
You are using an out of date browser. It may not display this or other websites correctly.
You should upgrade or use an alternative browser.
You should upgrade or use an alternative browser.
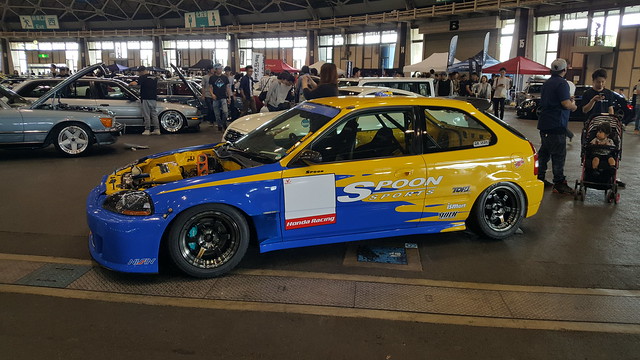
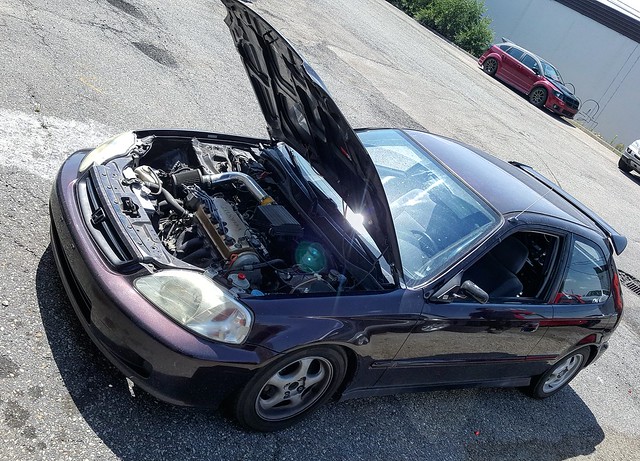
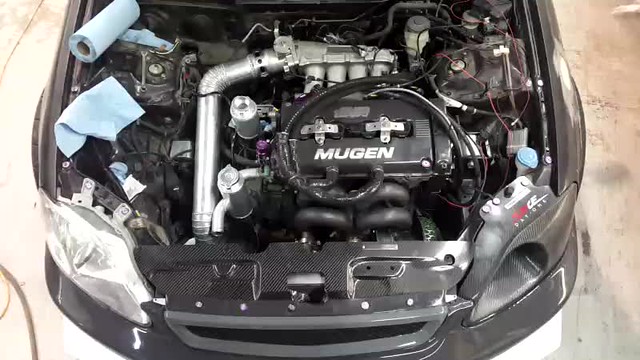
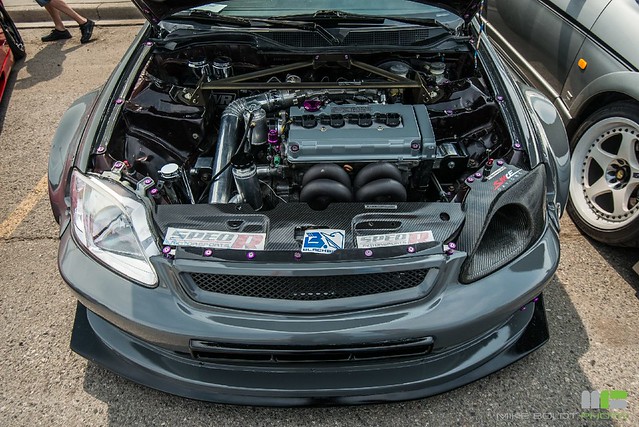
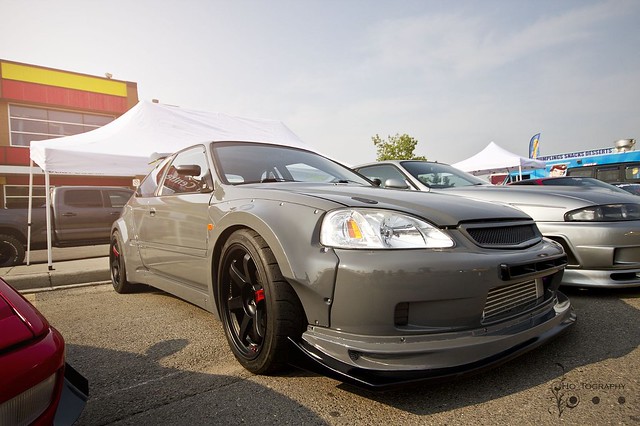
Kid-Vtek's Canadian EK build: CR-Vtec Turbo
- Thread starter Kid-Vtek
- Start date

Kid-Vtek
Active Member
- Joined
- Mar 30, 2012
- Messages
- 175
Thanks for the support guys!! i really appreciate it!
i actually havent install them yet, i am waiting for a back to back track day event where on the first day ill attend without them and install them for the second day so i can really see how much of a difference they make.
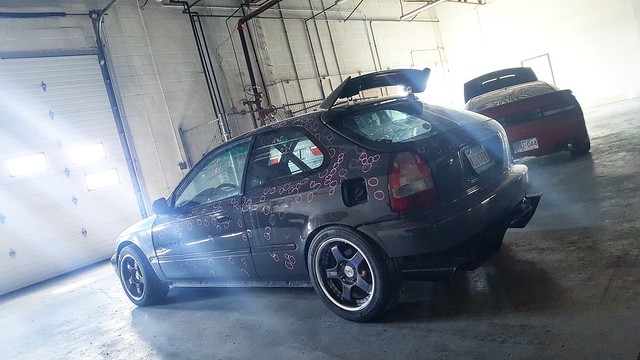
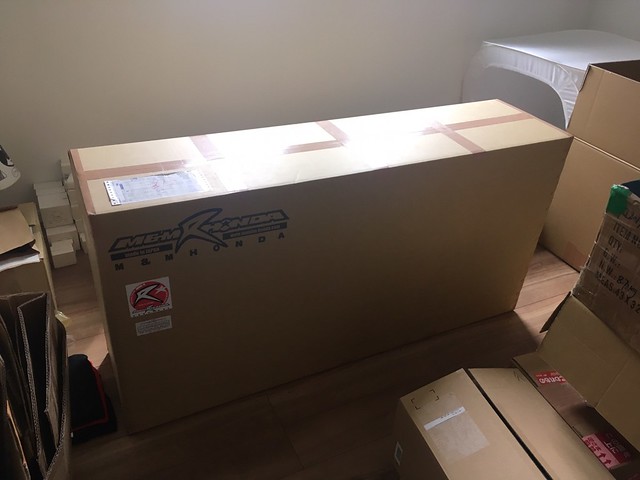
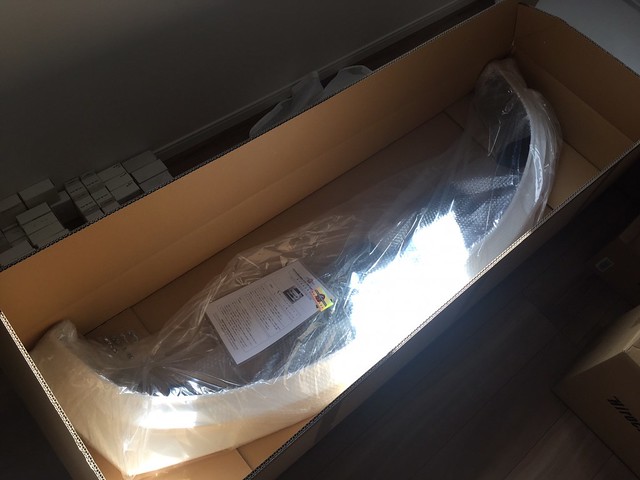
It is a replica spoon diffuser for a S2000, Shine Auto makes it. I didnt want to cut up an authentic spoon diffuser for my car i just couldnt do it haha
Impressive stuff!
I'm wondering whether you'll notice a difference from those rigid collars... Let us know!

i actually havent install them yet, i am waiting for a back to back track day event where on the first day ill attend without them and install them for the second day so i can really see how much of a difference they make.
Wow that diffuser is
Great build!
It is a replica spoon diffuser for a S2000, Shine Auto makes it. I didnt want to cut up an authentic spoon diffuser for my car i just couldnt do it haha
Kid-Vtek
Active Member
- Joined
- Mar 30, 2012
- Messages
- 175


Kid-Vtek
Active Member
- Joined
- Mar 30, 2012
- Messages
- 175
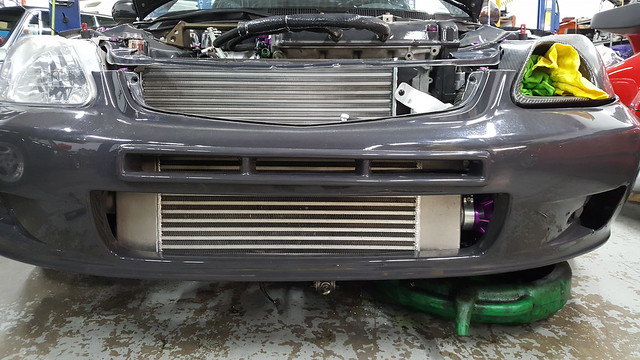
Update:
After some data logging with the new changes one thing was very clear that i was having a fuel pressure issue.
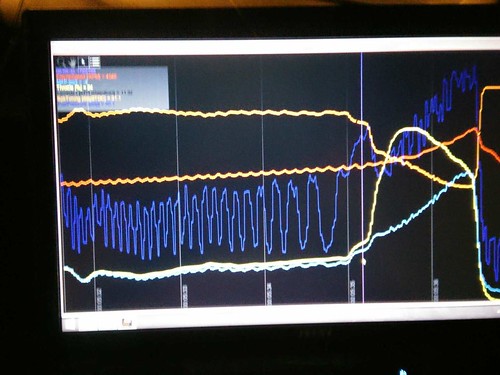 download_20160308_223303 by Guglianoh, on Flickr
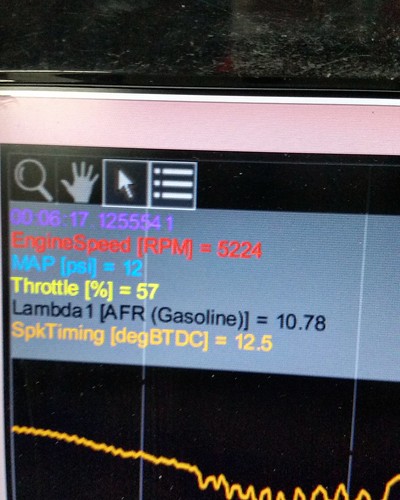
each vertical white line represents one second time lapse. You can clearly see a large fluctuation in fuel pressure multiple times per second and increasing as throttle increased. What was even more interesting was what else was found in the same data log file
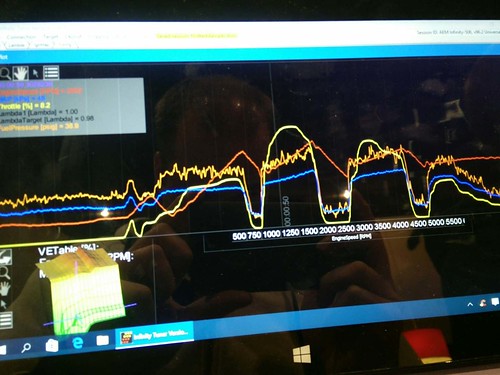
 download_20160308_223748 by Guglianoh, on Flickr
This is showing the injector pulse width being changed by the Infinity to compensate for the fuel pressure fluctuations which were over 10 psi and consistent frequency.
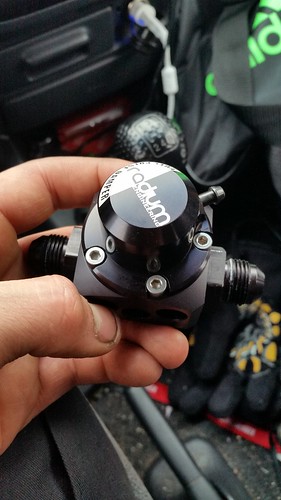
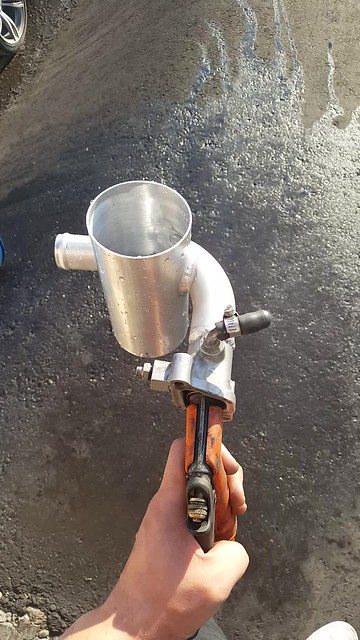
I managed to get my hands on a Radium pulse damper locally and installed it today
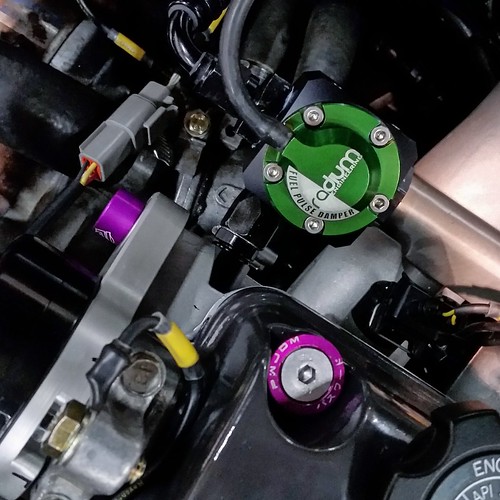 IMG_20160308_202648 by Guglianoh, on Flickr
And here are the results
 download_20160308_223438 by Guglianoh, on Flickr
Again each vertical white line indicated 1 second, you can clearly see the fluctuations are practically gone. Very pleased with the Radium damper, and of course the AEM infinity. Counting down the days until my Dyno sessions! cheers
After some data logging with the new changes one thing was very clear that i was having a fuel pressure issue.
download_20160308_223303 by Guglianoh, on Flickreach vertical white line represents one second time lapse. You can clearly see a large fluctuation in fuel pressure multiple times per second and increasing as throttle increased. What was even more interesting was what else was found in the same data log file
download_20160308_223748 by Guglianoh, on FlickrThis is showing the injector pulse width being changed by the Infinity to compensate for the fuel pressure fluctuations which were over 10 psi and consistent frequency.
I managed to get my hands on a Radium pulse damper locally and installed it today
IMG_20160308_202648 by Guglianoh, on FlickrAnd here are the results
download_20160308_223438 by Guglianoh, on FlickrAgain each vertical white line indicated 1 second, you can clearly see the fluctuations are practically gone. Very pleased with the Radium damper, and of course the AEM infinity. Counting down the days until my Dyno sessions! cheers
Kid-Vtek
Active Member
- Joined
- Mar 30, 2012
- Messages
- 175
 20160312_094928 by Guglianoh, on Flickr
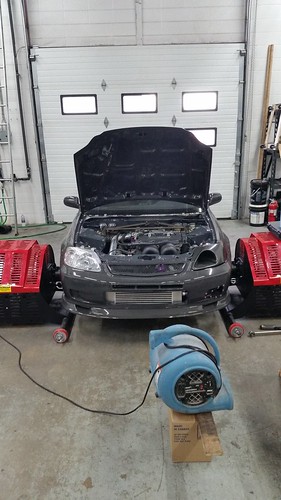
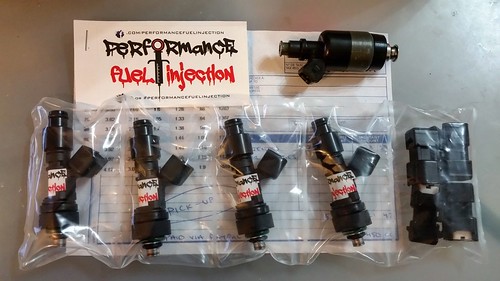
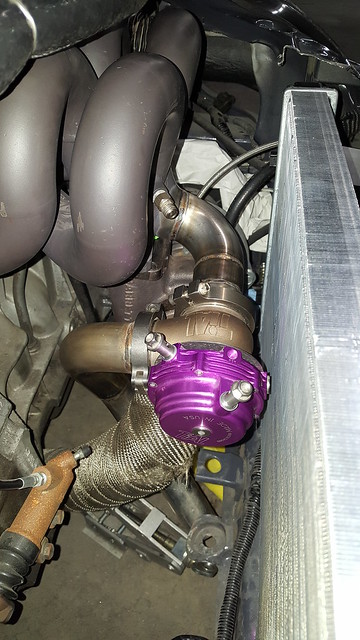
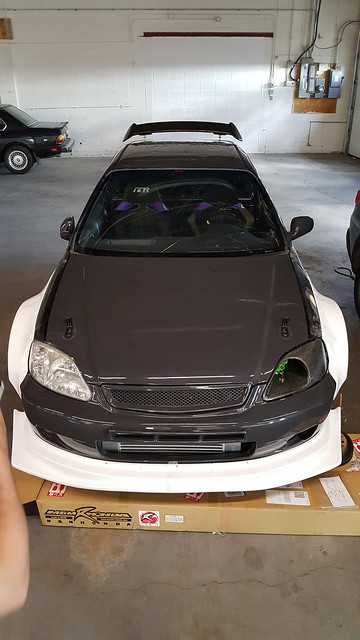
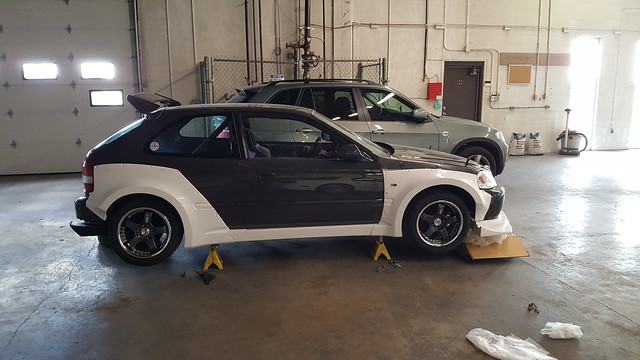
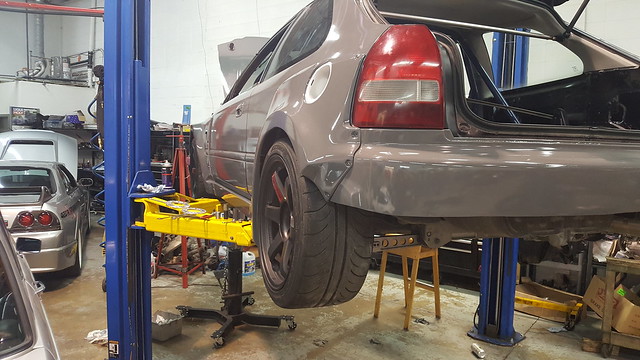
Following with the theme of this build my Dyno day would not go without some drama... The day started out with some low load, off boost/low cam tuning which ended smoothly, car was running great! We then proceeded with the Vtec tuning, again went smoothly and then onto the on boost tuning. After each short pull we could see EGT climbing up to 1750 F which was quite alarming. AFRs were reading good so more fuel was added to try and lower the temperatures without playing around with the timing. As boost was climbing torque was not following suit and EGTs continued to climb. on the Last pull there was a sudden misfire around 6500 rpm. We pulled the plugs and saw one cylinder was quite lean, swapping injectors carry the lean symptom to the opposite cylinder which lead me to think the injectors were faulty. We ended the day there so i could address my fueling issue before anymore problems came up. The following morning i drove the car in and out of the shop to clean up and she didnt want to start at all. Finally she started and she was sounded like the plugs were severely fouled, i took her for a short trip to try and clear the spark plugs only to flood the engine one block later. My coworker came to my aid with a new set of plugs which we swapped in at the side of the road. She still wouldnt start with brand new plugs... Reaking of fuel i unplugged the injectors to try and clear what was left in the cylinders, sure thing she fired right up.... and kept running.... for 3 blocks! With the injectors completely unplugged i limped back to the shop, i thought for sure the injectors were stuck open. My fuel pressure gauge would drop right to zero PSI when i primed the pump, i drained 1/2L of fuel out of my oil pan... not good. So this happened the following day! New set of Bosch 1000cc EV14 high impedence injectors to replace my ancient Dephi EV1 injectors.
 IMG_20160315_215054 by Guglianoh, on Flickr
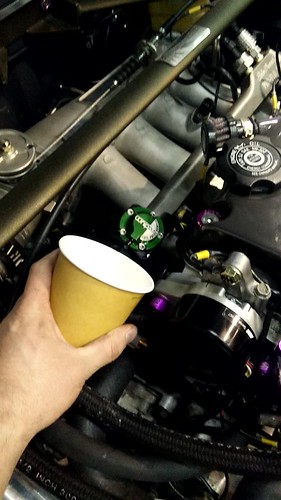
The following night i changed the oil, swapped in the injectors and after having the injector tables tweaked it was time to fire up!.... No start... pulled the plugs and again soaked in fuel! unplug the injectors, again it ran.... Fuel pressure still dropped to nearly zero PSI. WTF!?!?! Long story short this is what i found
 VID_20160316_194629 by Guglianoh, on Flickr
My brand new Radium fuel pulse dampener less than a week old, failed! in the video you can clearly see fuel spraying out from the vacuum port on top of the unit. Fuel was shooting past the rubber diaphragm, through the vacuum line and into the intake manifold. Talk about TBI lol This is what i found when i opened up the unit
 20160316_200459 by Guglianoh, on Flickr
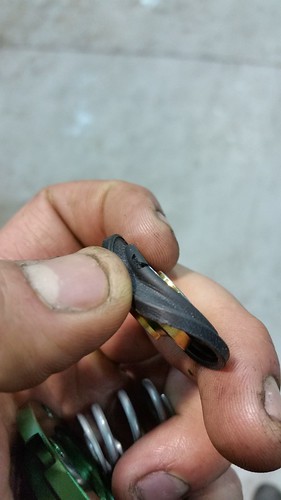 20160316_200452 by Guglianoh, on Flickr
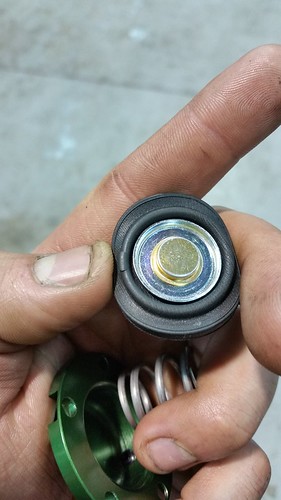
clearly a torn diaphragm, but why? it literally had only seen how ever many kms from my dyno tuning. I contacted the shop were i had purchased the part and they were able to get me a replacement/upgraded part that very day. Apparently this was a known issue which has been addressed with an updated diaphragm, i know have a new diaphragm and upgraded larger housing.
 20160317_180203 by Guglianoh, on Flickr
the housing was so large that i had to take the top off to install it, with the housing off i could inspect the new diaphragm and notice something that my previous one was missing... a small ball bearing. Jammed on the opposite end of my fuel rail blocking off my fuel return line was the ball bearing from my other diaphragm.
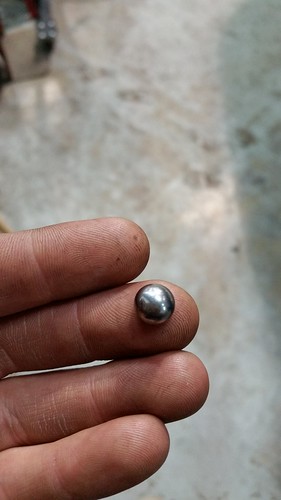 20160317_183032 by Guglianoh, on Flickr
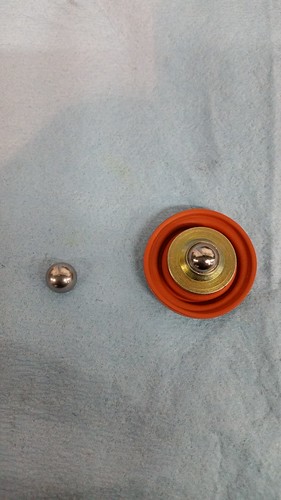 20160317_183041 by Guglianoh, on Flickr
What doesnt kill you makes you stronger? There are a lot of terrible things that could have happened if i didnt address this issue when i did, I am thankful that nothing did. Im trying not to think about those things as i proceed with tuning, Big thanks to Blackbird Technical Service for understanding something was wrong and not over looking it just to finish my tune. Thanks to Vex Performance for sorting out my issue with the pulse dampener same day i really appreciate that. Lets try this again shall we? Dyno day round 3 here we go
")
- Joined
- Oct 16, 2012
- Messages
- 8,917
Cool thread.
What was the cause of the pressure fluctuations in the end? Is the pulse damper not just a band aid to whatever the actual problem is?
Never seen this issue before so is like to understand it.
What was the cause of the pressure fluctuations in the end? Is the pulse damper not just a band aid to whatever the actual problem is?
Never seen this issue before so is like to understand it.
Kid-Vtek
Active Member
- Joined
- Mar 30, 2012
- Messages
- 175
Cool thread.
What was the cause of the pressure fluctuations in the end? Is the pulse damper not just a band aid to whatever the actual problem is?
Never seen this issue before so is like to understand it.
A combination of removing the factory Honda pulse dampener and old style ball bearing injectors. When they close its simply a ball bearing seating which can really hammer down. Almost all vehicles will have a pulse dampener but im no sure many people actually monitor fuel pressure that closes, only for base pressure really. Ill keep an eye on it but it looks healthy now.
Kid-Vtek
Active Member
- Joined
- Mar 30, 2012
- Messages
- 175
Bump from the dead:
Its been a while since my last update, it seems i just cant catch a break with thus build... August of 2016 a nasty hail storm came through my city and destroyed my car. The vehicle was a total loss, damage to literally every single panel of my vehicle.... even on my wheel center caps!
 20170406_105834 by Guglianoh, on Flickr
 IMG_20170624_150942_736 by Guglianoh, on Flickr
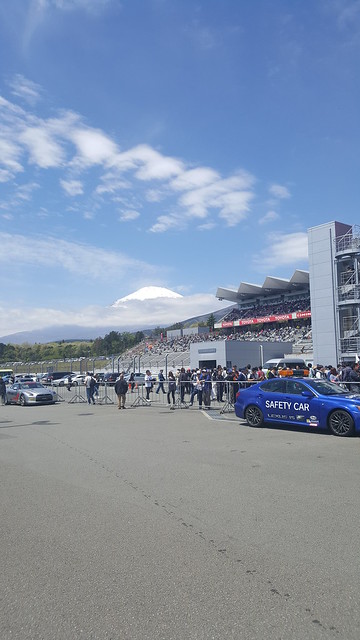
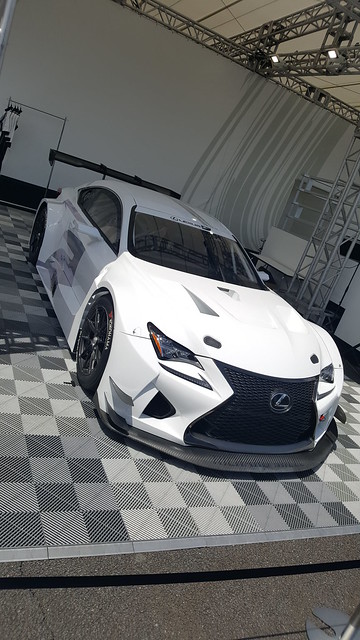
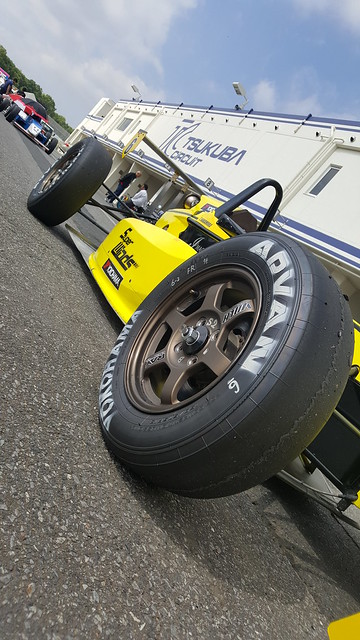
After this i was devastated, the sat... for a while. In late April i crossed something off my bucket list and went to Japan with friends. Our trip was outstanding, beyond words. Fuji speedway, Tsukuba circuit, Wekfest were just a few things we got up to, i cant wait to go back! Haha
 20170504_105455 by Guglianoh, on Flickr
 20170504_122036 by Guglianoh, on Flickr
 20170505_082903 by Guglianoh, on Flickr
 20170505_085603 by Guglianoh, on Flickr
 20170503_120013 by Guglianoh, on Flickr
 20170503_124309 by Guglianoh, on Flickr
 20170427_084836 by Guglianoh, on Flickr
Its been a while since my last update, it seems i just cant catch a break with thus build... August of 2016 a nasty hail storm came through my city and destroyed my car. The vehicle was a total loss, damage to literally every single panel of my vehicle.... even on my wheel center caps!
20170406_105834 by Guglianoh, on FlickrIMG_20170624_150942_736 by Guglianoh, on FlickrAfter this i was devastated, the sat... for a while. In late April i crossed something off my bucket list and went to Japan with friends. Our trip was outstanding, beyond words. Fuji speedway, Tsukuba circuit, Wekfest were just a few things we got up to, i cant wait to go back! Haha
20170504_105455 by Guglianoh, on Flickr20170504_122036 by Guglianoh, on Flickr20170505_082903 by Guglianoh, on Flickr20170505_085603 by Guglianoh, on Flickr20170503_120013 by Guglianoh, on Flickr20170503_124309 by Guglianoh, on Flickr20170427_084836 by Guglianoh, on Flickr
Last edited:
Kid-Vtek
Active Member
- Joined
- Mar 30, 2012
- Messages
- 175
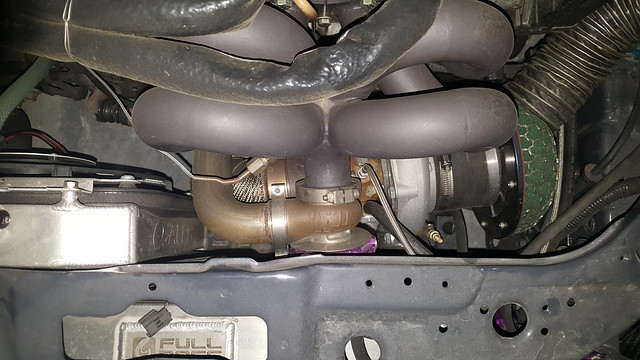
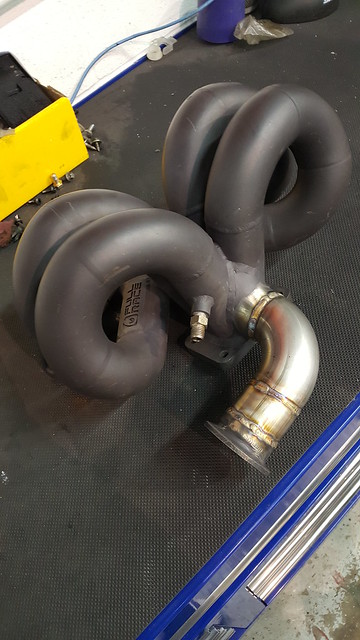
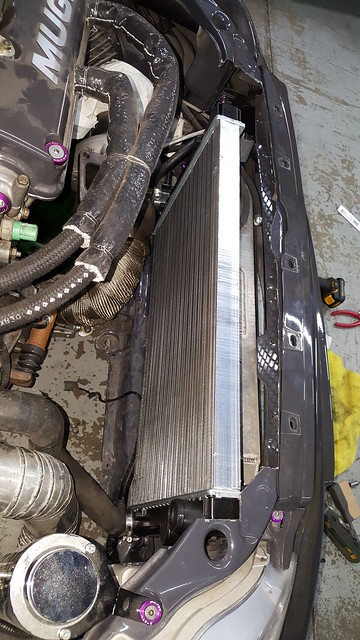
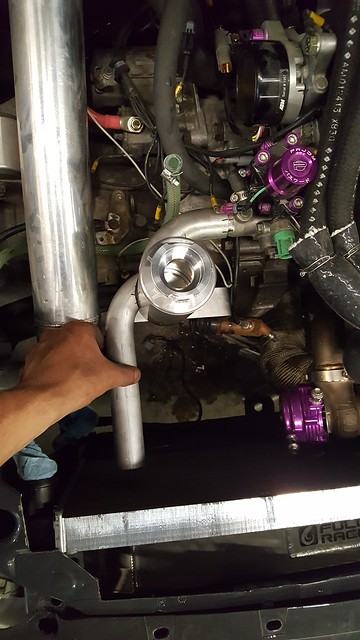
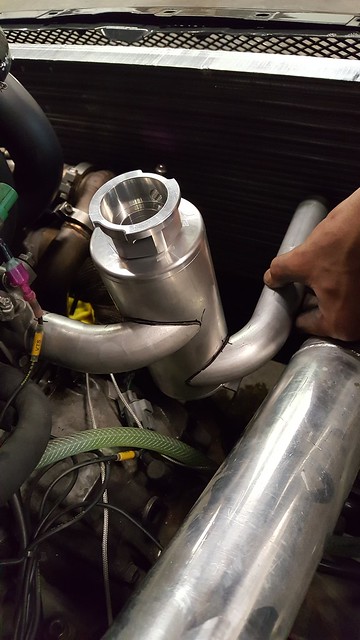
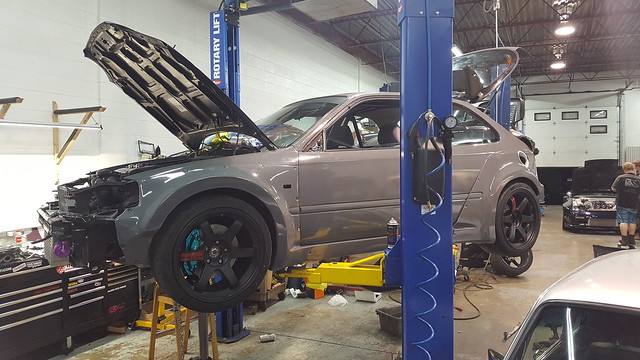
When i got back i started working on my car again. One of the biggest problems that plagued my car on the dyno was quickly rising coolant temps. Unfortunately the Full Race exhaust manifold i have places the waste gate right where more radiator could fit, so i had to move it.
 20170510_070806 by Guglianoh, on Flickr
 20170517_080125 by Guglianoh, on Flickr
An old VW scirocco radiator would do the trick
 20170514_184537 by Guglianoh, on Flickr
 20170514_184312 by Guglianoh, on Flickr
 20170517_185752 by Guglianoh, on Flickr
While upgrading my radiator i went one step further installing a swirl pot
 20170525_212209 by Guglianoh, on Flickr
 20170525_212316 by Guglianoh, on Flickr
 20170527_195340 by Guglianoh, on Flickr
 20170528_192239 by Guglianoh, on Flickr
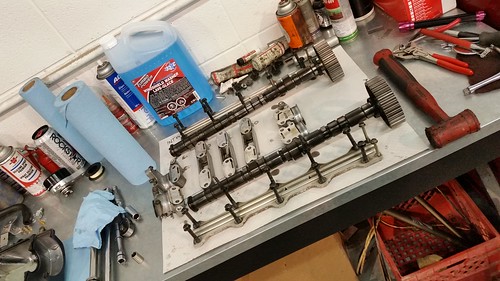
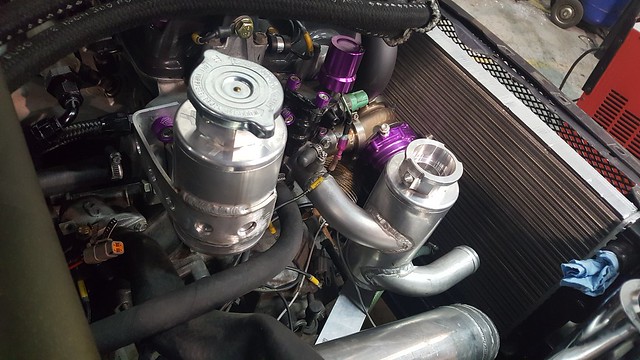
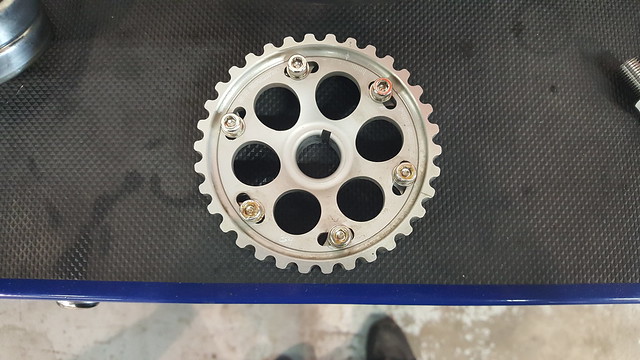
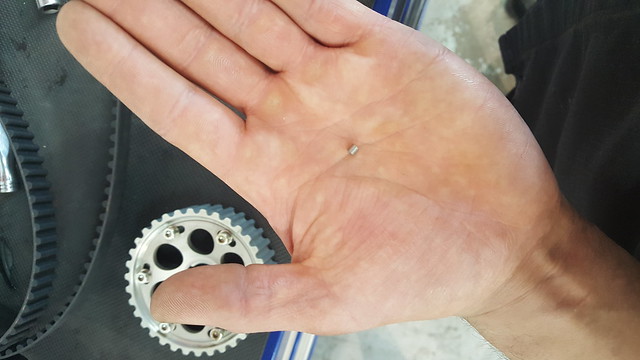
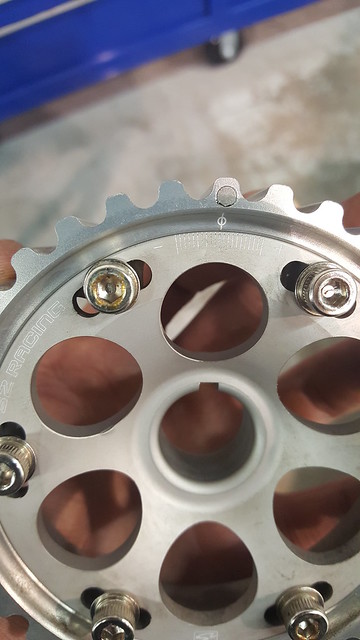
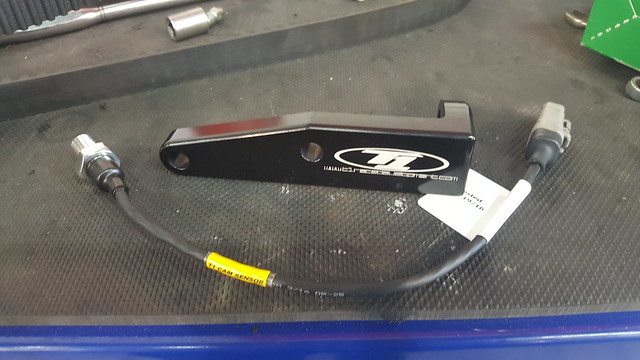
Another issue i had on the dyno was ignition drift. The AEM EPM unit wasnt doing its job. After spot on customer service and tech support from AEM i decided to make my own igntion setup. Already had the OBD2 oil pump which has provisions for a crank sensor so all i needed was a cam trigger, nothing a magnet cant fix
 20170403_180717 by Guglianoh, on Flickr
 20170403_180803 by Guglianoh, on Flickr
 20170403_185741 by Guglianoh, on Flickr
 20170403_180638 by Guglianoh, on Flickr
20170510_070806 by Guglianoh, on Flickr20170517_080125 by Guglianoh, on FlickrAn old VW scirocco radiator would do the trick
20170514_184537 by Guglianoh, on Flickr20170514_184312 by Guglianoh, on Flickr20170517_185752 by Guglianoh, on FlickrWhile upgrading my radiator i went one step further installing a swirl pot
20170525_212209 by Guglianoh, on Flickr20170525_212316 by Guglianoh, on Flickr20170527_195340 by Guglianoh, on Flickr20170528_192239 by Guglianoh, on FlickrAnother issue i had on the dyno was ignition drift. The AEM EPM unit wasnt doing its job. After spot on customer service and tech support from AEM i decided to make my own igntion setup. Already had the OBD2 oil pump which has provisions for a crank sensor so all i needed was a cam trigger, nothing a magnet cant fix
20170403_180717 by Guglianoh, on Flickr20170403_180803 by Guglianoh, on Flickr20170403_185741 by Guglianoh, on Flickr20170403_180638 by Guglianoh, on Flickr
Last edited:
Kid-Vtek
Active Member
- Joined
- Mar 30, 2012
- Messages
- 175
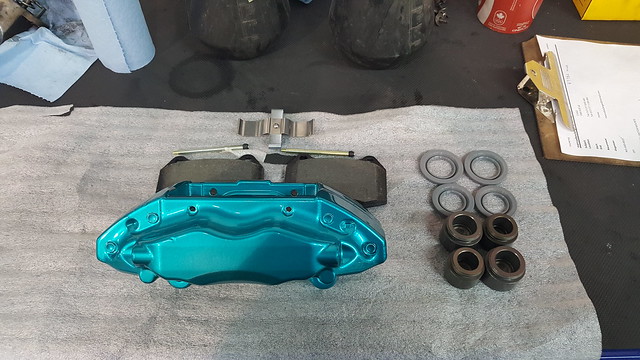
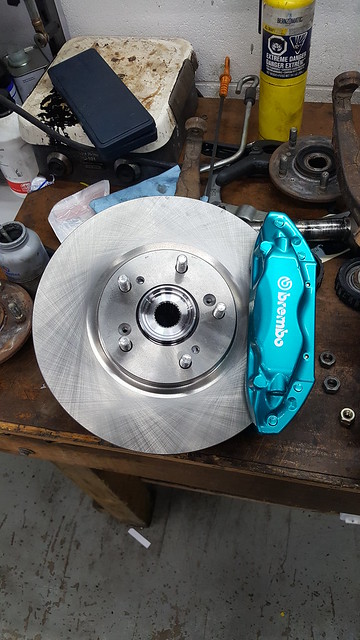
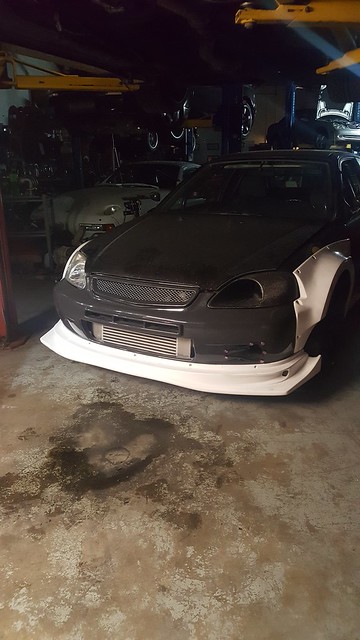
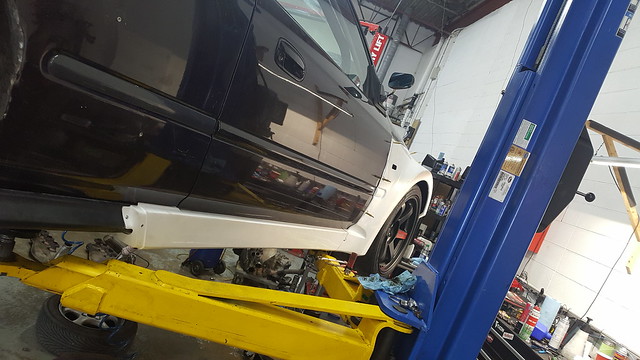
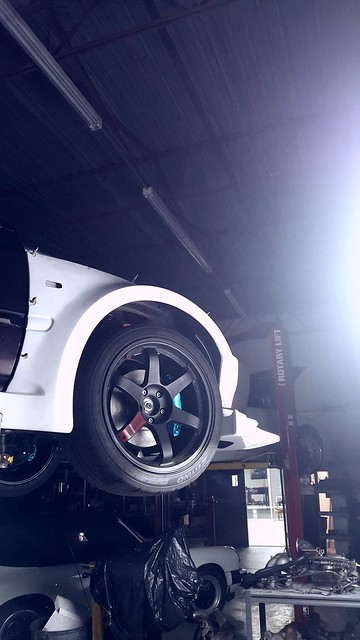
Next on the list was to finally use my DC5 brembos that have been collecting dust for years now. 5 lug ftw. While rebuilding my calipers i replaced the pistons with ceramic ones from a porsche cayman
 20170329_183708 by Guglianoh, on Flickr
 20170329_183714 by Guglianoh, on Flickr
 20170329_183716 by Guglianoh, on Flickr
 20170722_183338 by Guglianoh, on Flickr
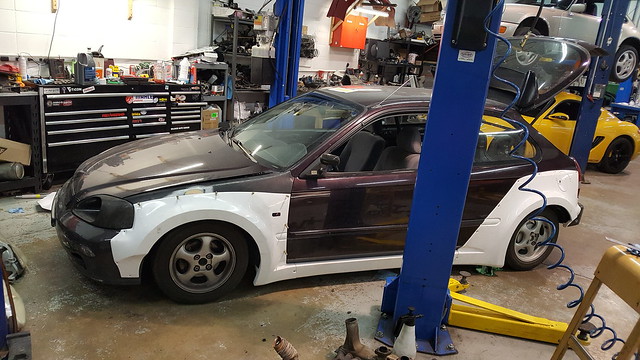
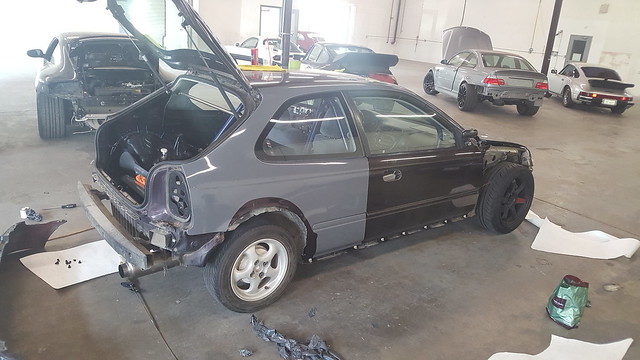
Now i really needed to deal with the body. The hail damage was terrible, 2 PDR specialist refused the job due to the extent of the damage. There was only one answer...
 IMG_2162 by Guglianoh, on Flickr
 IMG_2154 by Guglianoh, on Flickr
 20170605_192411 by Guglianoh, on Flickr
 20170605_191827 by Guglianoh, on Flickr
Yes that is a M and M hyper wide body kit . I tried so hard to keep this chassis but after the body shops estimate for repairs/body kit fitment and paint it just wasnt logical to keep. Back to square one... with only 2 weeks away from a local show and shine i was lucky enough to find this really clean shell.
 IMG_20170727_140421_064 by Guglianoh, on Flickr
20170329_183708 by Guglianoh, on Flickr20170329_183714 by Guglianoh, on Flickr20170329_183716 by Guglianoh, on Flickr20170722_183338 by Guglianoh, on FlickrNow i really needed to deal with the body. The hail damage was terrible, 2 PDR specialist refused the job due to the extent of the damage. There was only one answer...
IMG_2162 by Guglianoh, on FlickrIMG_2154 by Guglianoh, on Flickr20170605_192411 by Guglianoh, on Flickr20170605_191827 by Guglianoh, on FlickrYes that is a M and M hyper wide body kit . I tried so hard to keep this chassis but after the body shops estimate for repairs/body kit fitment and paint it just wasnt logical to keep. Back to square one... with only 2 weeks away from a local show and shine i was lucky enough to find this really clean shell.
IMG_20170727_140421_064 by Guglianoh, on Flickr
Last edited:
Kid-Vtek
Active Member
- Joined
- Mar 30, 2012
- Messages
- 175
As i mentioned i only had 2 weeks to complete this build.... the following days are still a blur, the earliest i got home every night was 1am. Time to get to work
 20170727_231218 by Guglianoh, on Flickr
 20170728_123712 by Guglianoh, on Flickr
 20170802_011456 by Guglianoh, on Flickr
 VID-20170802-WA0006 by Guglianoh, on Flickr
This kit is enormous! My friend 16x8 SSR look miniature in the wheel wells. 18x10 TE37 might do the trick
 20170729_170125 by Guglianoh, on Flickr
 20170814_214455 by Guglianoh, on Flickr
Time was running short so the only way to make my car one color was vinyl wrap. Im not a fan of wrapped cars, but after seeing how much work is involved i can appreciate the craft
 20170808_154952 by Guglianoh, on Flickr
 20170811_225459 by Guglianoh, on Flickr
 20170811_225443 by Guglianoh, on Flickr
At 7:45 am morning of the show, i emerged with something resembling a car.
 20170813_070326 by Guglianoh, on Flickr
 20170813_090321 by Guglianoh, on Flickr
 20170813_090258 by Guglianoh, on Flickr
 Resized_MBP_6300001 by Guglianoh, on Flickr
 Resized_MBP_6302001 by Guglianoh, on Flickr
Huge thanks to everyone that helped me pull off this incredible feat, i absolutely could not have done this alone... or without an unhealthy amount of caffiene haha more pics to come, enjoy!
20170727_231218 by Guglianoh, on Flickr20170728_123712 by Guglianoh, on Flickr20170802_011456 by Guglianoh, on FlickrVID-20170802-WA0006 by Guglianoh, on FlickrThis kit is enormous! My friend 16x8 SSR look miniature in the wheel wells. 18x10 TE37 might do the trick
20170729_170125 by Guglianoh, on Flickr20170814_214455 by Guglianoh, on FlickrTime was running short so the only way to make my car one color was vinyl wrap. Im not a fan of wrapped cars, but after seeing how much work is involved i can appreciate the craft
20170808_154952 by Guglianoh, on Flickr20170811_225459 by Guglianoh, on Flickr20170811_225443 by Guglianoh, on FlickrAt 7:45 am morning of the show, i emerged with something resembling a car.
20170813_070326 by Guglianoh, on Flickr20170813_090321 by Guglianoh, on Flickr20170813_090258 by Guglianoh, on FlickrResized_MBP_6300001 by Guglianoh, on FlickrResized_MBP_6302001 by Guglianoh, on FlickrHuge thanks to everyone that helped me pull off this incredible feat, i absolutely could not have done this alone... or without an unhealthy amount of caffiene haha more pics to come, enjoy!
Last edited:
Kid-Vtek
Active Member
- Joined
- Mar 30, 2012
- Messages
- 175
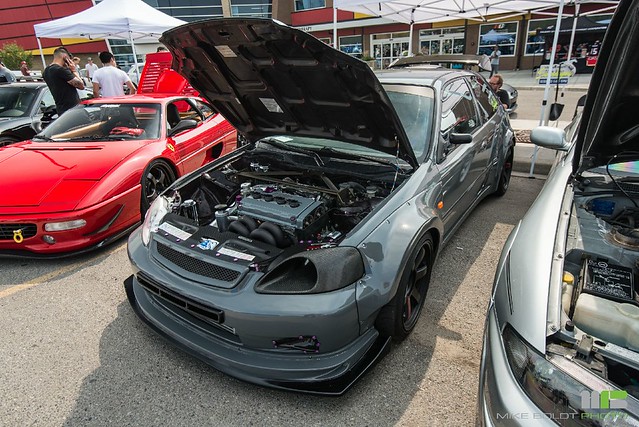
Thanks! I am extremely happy with how it turned out. To be honest my plan is to just drive it! Thats one thing ive never had the chance to do, she has always been in a "rebuild status" that i have zero seat time. Im hoping to get it back on the dyno in the coming weeks, turn up the boost a bit and have some fun.
Mark Mckay
Member
- Joined
- Jul 21, 2017
- Messages
- 87
- Car(s)
- Bmw coupe 320d
Some serious work went into this. Looks insane mate 
Kid-Vtek
Active Member
- Joined
- Mar 30, 2012
- Messages
- 175
Thanks guys, ill post more pictures soon i have a photo shoot this weekend. cheers
 IMG_20170816_083449_379 by Guglianoh, on Flickr
IMG_20170816_083449_379 by Guglianoh, on Flickr- Joined
- May 3, 2013
- Messages
- 1,485
This is amazing a great read too. You have it all documented very well. And all the brilliant upgrades to the engine along the way, like the swirl pot that was cool.
Really looks cool an i bet its a beast .
.
Hope to see more pics an vids.
Also well done to sticking to it rather than giving in. And unlucky on the hailstones
Really looks cool an i bet its a beast
.Hope to see more pics an vids.
Also well done to sticking to it rather than giving in. And unlucky on the hailstones
Kid-Vtek
Active Member
- Joined
- Mar 30, 2012
- Messages
- 175
Thanks everyone for the kind words. Its winter now in Canada which means hibernation for the car. I was lucky enough to get in a couple photoshoots before storage. enjoy
 IMG_20170909_173807_681 by Guglianoh, on Flickr
 IMG_20170917_205140_228 by Guglianoh, on Flickr
 file-2 by Guglianoh, on Flickr
 IMG_20170923_110837_188 by Guglianoh, on Flickr
 IMG_20171004_125435_276 by Guglianoh, on Flickr
 file-3 by Guglianoh, on Flickr
 file-5 by Guglianoh, on Flickr
 file-6 by Guglianoh, on Flickr
IMG_20170909_173807_681 by Guglianoh, on FlickrIMG_20170917_205140_228 by Guglianoh, on Flickrfile-2 by Guglianoh, on FlickrIMG_20170923_110837_188 by Guglianoh, on FlickrIMG_20171004_125435_276 by Guglianoh, on Flickrfile-3 by Guglianoh, on Flickrfile-5 by Guglianoh, on Flickrfile-6 by Guglianoh, on Flickr
Last edited: