S2000 Digi Dash Conversion into EK9


Ashy C

Active Member
Joined
Jan 26, 2010
Messages
1,070
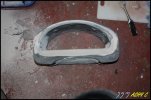
Heres a little snippet into my dash conversion S2000 dials/speedo/clusterinto my EK9.

After some research i decided i probably could pull this off, a few concerns were:

Would the speedo and revs read properly?
Would the trip computer work?
Fuel and Temp levels, would these be reliable?
Also would my shift light still work on them thats prog through my Hondata


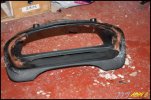
I tried to source a good set of clocks, there was 2 versions

AP1 or AP2 the earlier AP1 version has a larger rev counter and can be reprogrammed to any mileage
The layout was also different on these and in my opinion the AP1 cluster looks better.

The clocks were fetching circa £150 -£200 with an extra £25-100 for the connectors on the rear or the full interior loom. I need approx 6 inch of loom from the rear of the dials to make all the necessary connections.

SUCCESS ...... I managed to get hold of a set for £100 delivered with the all import loom on them :)):dance::)):dance:

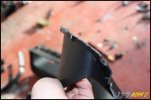
Next came the conversion module, the little black box to make it all work, this box would make the revs, speedo, fuel and temp gauges read properly, fortunately i got hold of a lad that makes them and he sent me one out , along with a bit of a wiring diagram to connect them up. Although this was missing a few wires and the colours and positions were incorrect, a little online research and also the use of my multimeter i worked out how it should go.

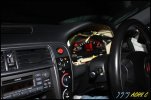
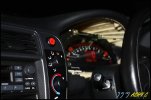
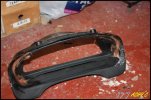
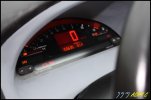
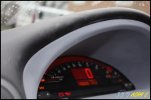
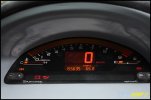
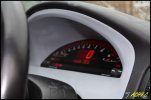
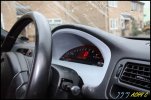
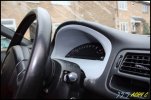
A saturday afternoon passed and the dials where working, although the speedo was reading incorrectly, an hours puzzling passed and i realised in may have something to do with the speedo conversion chip on the gearbox. I switched the dials to kph and magically they began reading in MPH correctly, (i needed to remove the chip)

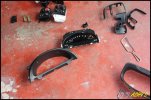
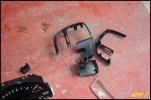
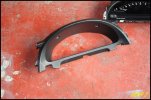
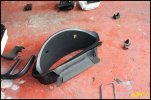
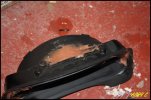
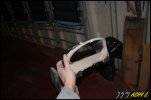
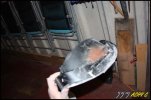
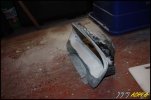
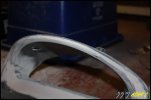
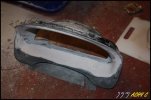
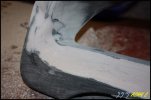
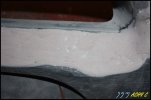
Pic of them in rough and testing

attachment.php
 

Attachments

  • $S2000Cluster006.jpg
    $S2000Cluster006.jpg
    56.8 KB · Views: 11,106
Last edited by a moderator:
  • Like
Reactions: rvm
attachment.php


attachment.php


So now they worked i need to work out how to make them fit and look OEM, i couldnt find much infor on this online, only poorly fitting clocks with a homemade bezel. My plan was to make a custom housing for them.

I thought the best way would be to use an S2000 bezel and make it fit on the EK housing. Another ebay search and more money led to me buying the S2000 dash, complete with switches etc, these fetch about £75, a bit of bartering later and i had them delivered for £20 plus another £12 for a spare EK surround

attachment.php


attachment.php


attachment.php


attachment.php


Time to butcher both bezels and make the surround, i started by removing the unwanted plastic from the S2000 surround and securing it into the EK surround.

attachment.php


attachment.php


attachment.php


attachment.php


attachment.php


Lots of trimmed plastic

attachment.php


attachment.php


attachment.php


attachment.php


attachment.php


Once i had a rough fitting i fibreglassed them in place then used filler to sculpt it further. (I'll let the pics do the talking)

attachment.php


attachment.php


attachment.php
 

Attachments

  • $S2000Cluster004.jpg
    $S2000Cluster004.jpg
    50.6 KB · Views: 8,080
  • $S2000Cluster003.jpg
    $S2000Cluster003.jpg
    30.8 KB · Views: 7,984
  • $S2000Cluster010.jpg
    $S2000Cluster010.jpg
    70.2 KB · Views: 9,873
  • $S2000Cluster011.jpg
    $S2000Cluster011.jpg
    52.2 KB · Views: 11,765
  • $S2000Cluster012.jpg
    $S2000Cluster012.jpg
    38.8 KB · Views: 8,798
  • $S2000Cluster013.jpg
    $S2000Cluster013.jpg
    46.7 KB · Views: 10,413
  • $S2000Cluster016.jpg
    $S2000Cluster016.jpg
    88.5 KB · Views: 7,392
  • $S2000Cluster017.jpg
    $S2000Cluster017.jpg
    80.6 KB · Views: 7,392
  • $S2000Cluster019.jpg
    $S2000Cluster019.jpg
    83.7 KB · Views: 7,416
  • $S2000Cluster020.jpg
    $S2000Cluster020.jpg
    81.1 KB · Views: 8,767
  • $S2000Cluster023.jpg
    $S2000Cluster023.jpg
    92.4 KB · Views: 7,337
  • $S2000Cluster025.jpg
    $S2000Cluster025.jpg
    97.5 KB · Views: 7,240
  • $S2000Cluster027.jpg
    $S2000Cluster027.jpg
    85.8 KB · Views: 7,224
  • $S2000Cluster029.jpg
    $S2000Cluster029.jpg
    92.8 KB · Views: 7,213
  • $S2000Cluster030.jpg
    $S2000Cluster030.jpg
    51.9 KB · Views: 7,194
  • $S2000Cluster031.jpg
    $S2000Cluster031.jpg
    34.4 KB · Views: 7,148
  • $S2000Cluster034.jpg
    $S2000Cluster034.jpg
    94.2 KB · Views: 7,220
  • $S2000Cluster035.jpg
    $S2000Cluster035.jpg
    61.2 KB · Views: 7,159
  • $S2000Cluster036.jpg
    $S2000Cluster036.jpg
    68.1 KB · Views: 7,134
Last edited by a moderator:
Working in the garage the temps were still a chilly 3 degrees celcius so i used an old recylcing box and fan heater to creat a nice little oven to bake the fibreglass and filler as it was taking too long for them to set

attachment.php


attachment.php


Old puntosportsclub fleece providing insulation

attachment.php


Put plenty of filler on it

attachment.php


attachment.php


attachment.php


Next came the sanding and sculpting

attachment.php


attachment.php


attachment.php


attachment.php


attachment.php


It seemed to look pretty good, a few pin holes etc, i smoothed them out and my impatient nature got the best of me and i decided to primer it.

attachment.php


attachment.php


Pictures of it in primer and test fitting

attachment.php


attachment.php


attachment.php


attachment.php


attachment.php


attachment.php


attachment.php


I was unsure how to paint or finish it, matt black, gloss black, champ white, carbon fibre kit/wrap it, then someone suggested flocking it........ hmmmm an idea turned into an impulsive ebay purchase.... 1x DIY flocking kit


For some reason i have lost the pics of me flocking the item...... all i can say is you get a black adhesive which you paint on folowed by a squeezey bottle of flocking fibres which you blow on use the bottle. ( What a ballache)

1st attempt - Too much adhesive, so it ran
2nd attempt - Not enough of adhesive or flock
3 rd attempt - Spray adhesive/upholstery glue and layered with flock, then glue, flock, glue flock

This seemed to work nicely

Will load some pics of the finished flocked item fitted.

Costs

S2000 Clocks £100
Convertor box £120
S2000 Surround £20
EK Surround £15
Flock £20
Filler fibreglass £10

TOTAL £285


I'm happy with the finished article, something special about a digital gauge

Comments welcome :D
 

Attachments

  • $S2000Cluster036.jpg
    $S2000Cluster036.jpg
    68.1 KB · Views: 6,962
  • $S2000Cluster038.jpg
    $S2000Cluster038.jpg
    41.2 KB · Views: 7,047
  • $S2000Cluster039.jpg
    $S2000Cluster039.jpg
    58.2 KB · Views: 6,795
  • $S2000Cluster040.jpg
    $S2000Cluster040.jpg
    42.6 KB · Views: 6,977
  • $S2000Cluster042.jpg
    $S2000Cluster042.jpg
    38 KB · Views: 6,927
  • $S2000Cluster043.jpg
    $S2000Cluster043.jpg
    53.2 KB · Views: 6,946
  • $S2000Cluster047.jpg
    $S2000Cluster047.jpg
    75.7 KB · Views: 7,017
  • $S2000Cluster048.jpg
    $S2000Cluster048.jpg
    90.2 KB · Views: 6,949
  • $S2000Cluster050.jpg
    $S2000Cluster050.jpg
    61.7 KB · Views: 6,910
  • $S2000Cluster052.jpg
    $S2000Cluster052.jpg
    31 KB · Views: 6,911
  • $S2000Cluster053.jpg
    $S2000Cluster053.jpg
    57.1 KB · Views: 6,876
  • $S2000Cluster060.jpg
    $S2000Cluster060.jpg
    56.1 KB · Views: 6,866
  • $S2000Cluster057.jpg
    $S2000Cluster057.jpg
    61.1 KB · Views: 6,828
  • $S2000Cluster068.jpg
    $S2000Cluster068.jpg
    44.3 KB · Views: 7,898
  • $S2000Cluster067.jpg
    $S2000Cluster067.jpg
    32.3 KB · Views: 7,194
  • $S2000Cluster066.jpg
    $S2000Cluster066.jpg
    31.5 KB · Views: 7,405
  • $S2000Cluster065.jpg
    $S2000Cluster065.jpg
    36.9 KB · Views: 7,276
  • $S2000Cluster064.jpg
    $S2000Cluster064.jpg
    38.3 KB · Views: 8,001
  • $S2000Cluster063.jpg
    $S2000Cluster063.jpg
    58.6 KB · Views: 7,553
  • $S2000Cluster061.jpg
    $S2000Cluster061.jpg
    60.3 KB · Views: 7,024
Last edited by a moderator:
Awesome, such a great conversion. Shame they usually cost the earth to achieve. Sounds like you got them for a decent price though. And fitted very well indeed!
 
Last edited:
Yeh i fell really lucky,

The price could have been more like

Dials £200
Loom £50
Surround £75

plus the other bits £165


So could cost £490 plus :O
 
That looks top notch,very well done:nice:,makes me wana do mine if i had the money
 
Awesome write up !! Will be looking at doing this myself in the near future. Looking forward to see what they look like flocked.
 
Well done mate, really want this done to my car, but theres a lot of work involved if you dont want it to cost an arm and a leg... good on you to getting this done all yourself!
 
Flock is the Seude type effect applied to interior parts.

Its applied by putting glue onto the part eg Dashboard then connecting it to a high voltage and spraying it with fine fibres that have been elctrostatically charged, this causes then to stick to the glue like bristles
 
Where do get the black box converter from is it from the bloke on civiclife?
 
Back
Top