
You are using an out of date browser. It may not display this or other websites correctly.
You should upgrade or use an alternative browser.
You should upgrade or use an alternative browser.
EG6 pure track toy joy!
- Thread starter NIcad7
- Start date
NIcad7
EG6
- Joined
- Nov 19, 2011
- Messages
- 359
I had the weekend off and with nothing to do decided to attack the Eg!
I started with the battery relocation which I forgot to take any pics of, but I mounted the Odyssey Battery behind the front passenger seat laying flat. Then extended the positive cable from the engine bay back to it via the battery cut off that will be mounted in the dash. Then made a short earth bolting it to the inside seat subframe bolt.
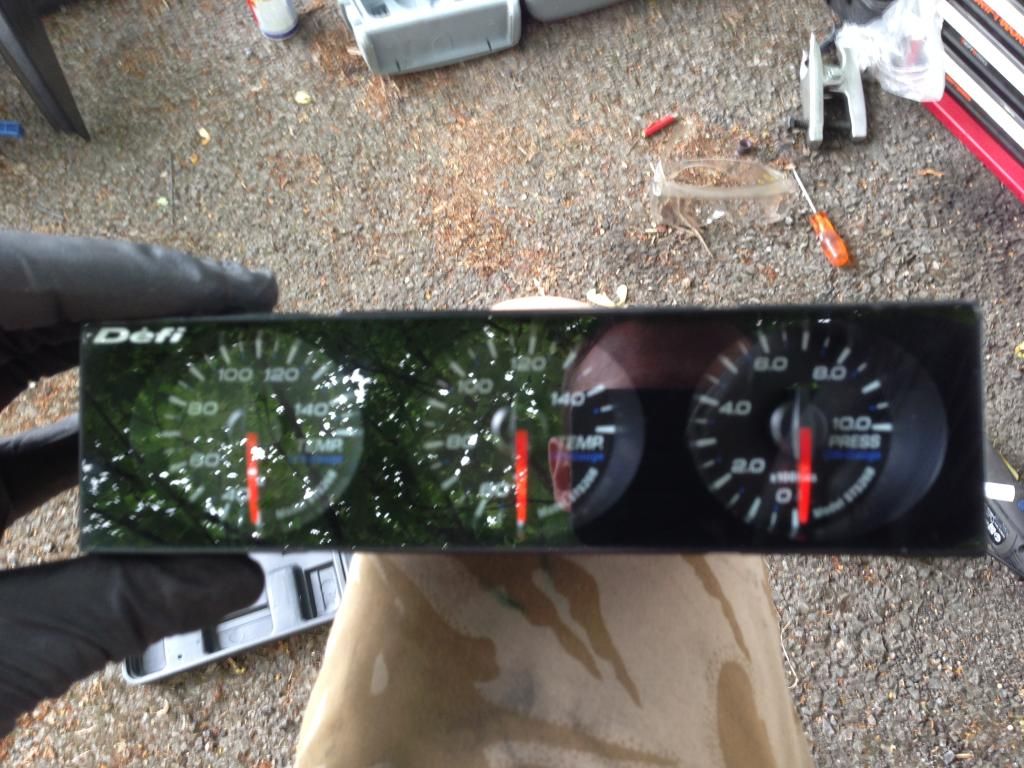
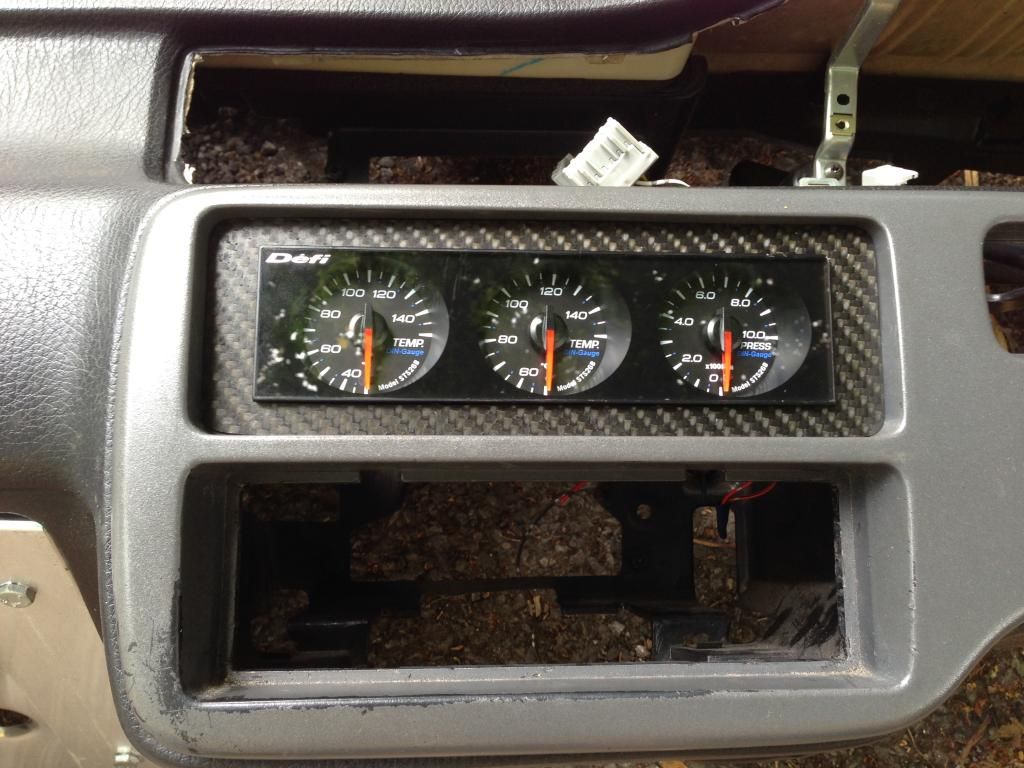
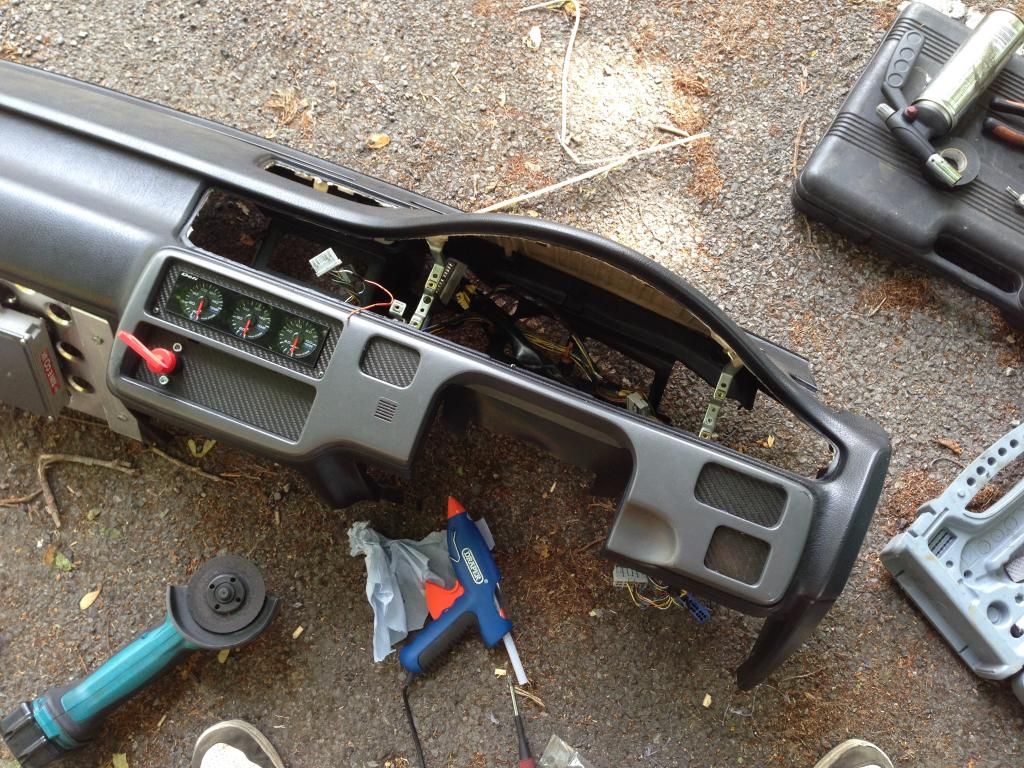
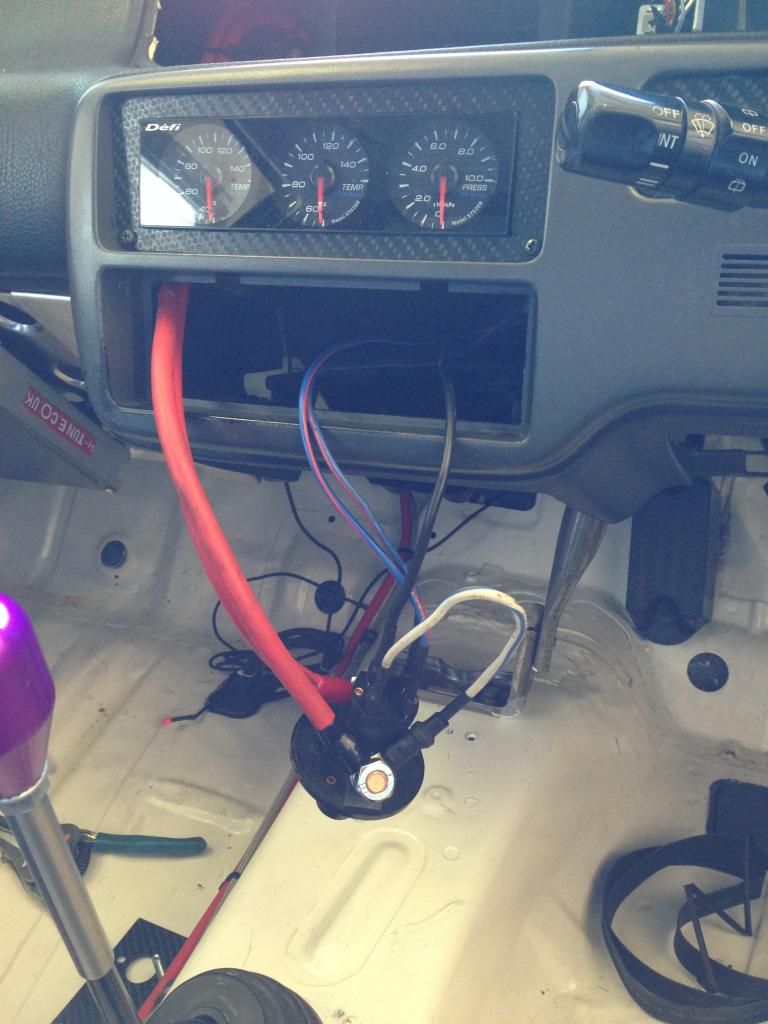
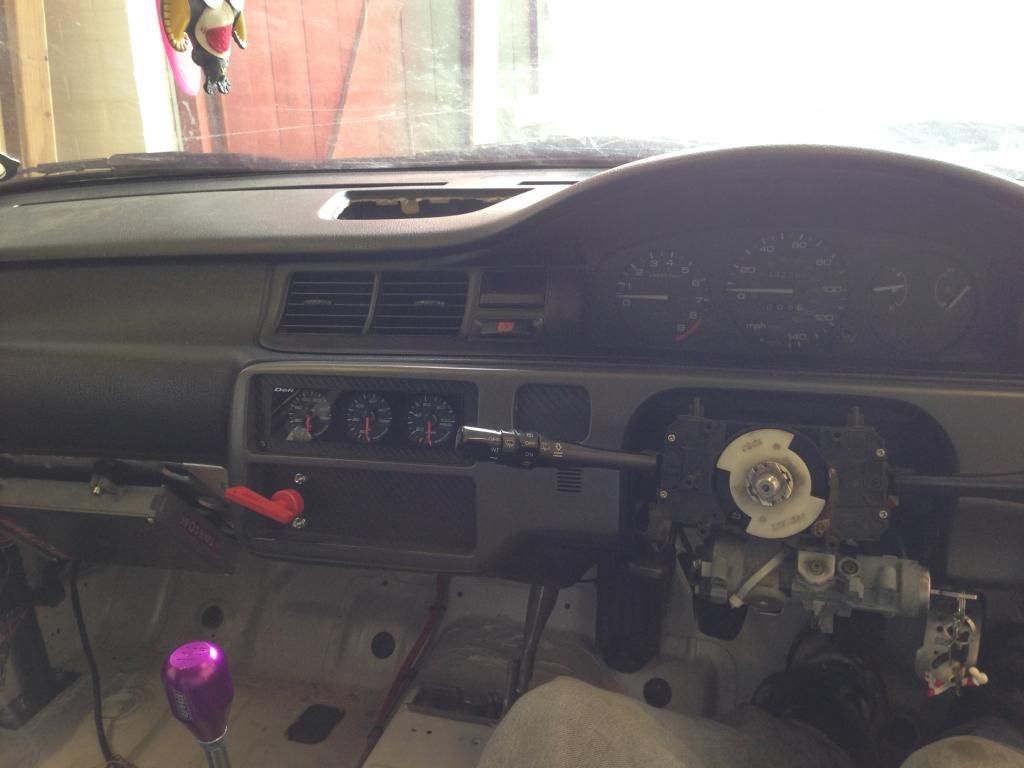
Then I cracked on with mounting my Defi Din Gauge set and FIA Cutoff into the dash;

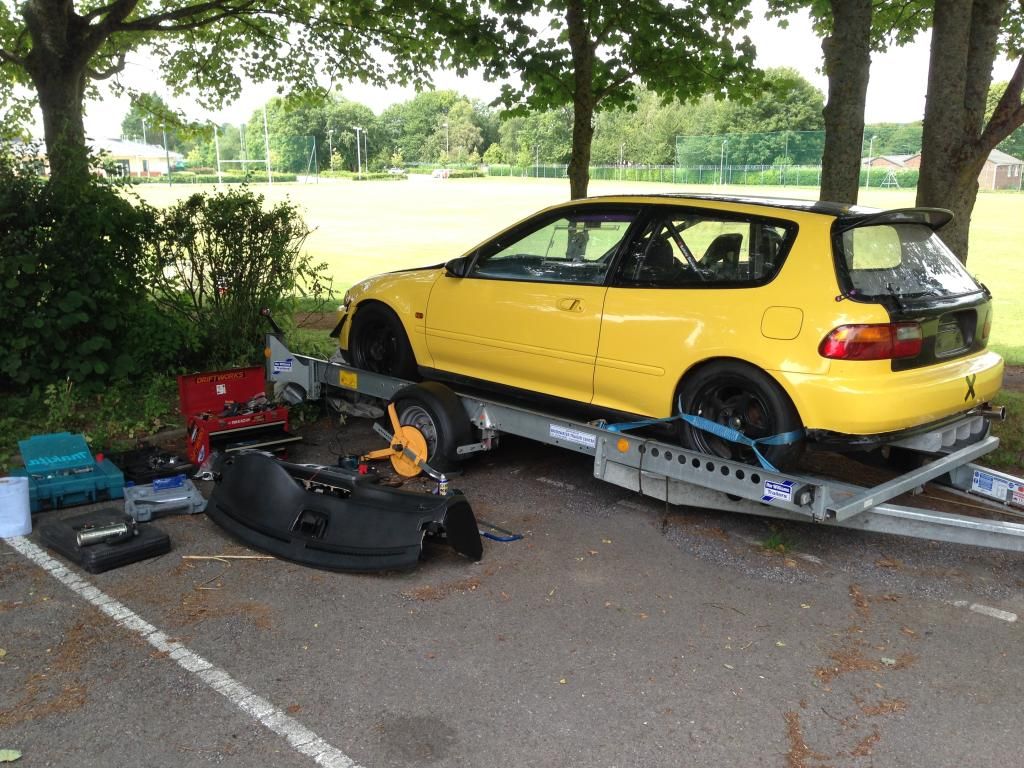
Working outside in a dirty crappy car park sucks ass!
I suppose next to the cut off I'll have a toggle switch for the heater fan once I set that up but not sure what else could go on there? Possibly a pull cable once I buy/fit a fire extinguisher.
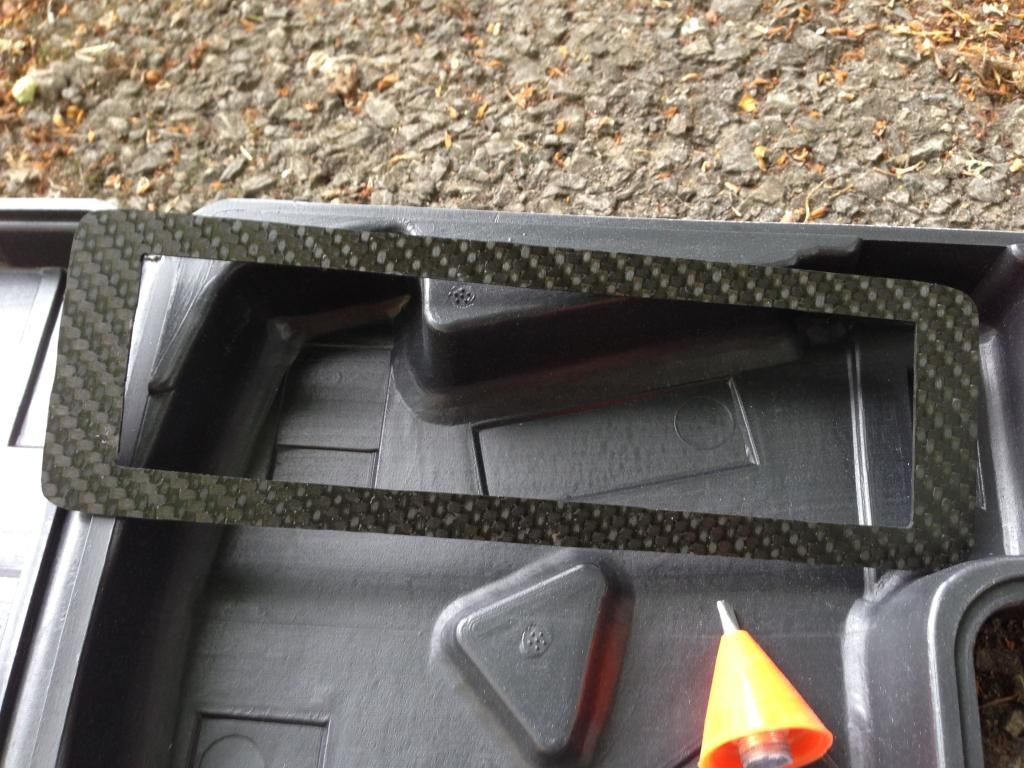
Anyway with that done I thought whilst I'm at it I may aswell blank off all the unused holes now in the dash, I just hot glued them in;

Then came the real fun stuff, attacking the loom. Removing all the ABS wiring (about 4Kg's worth so far!) and any other disused wiring that I now have like rear washer, heater controls etc.
Starting with moving all the left side of the loom into the cabin;
And start stripping, I'm currently at this stage pondering whether the car will ever start again!

I started with the battery relocation which I forgot to take any pics of, but I mounted the Odyssey Battery behind the front passenger seat laying flat. Then extended the positive cable from the engine bay back to it via the battery cut off that will be mounted in the dash. Then made a short earth bolting it to the inside seat subframe bolt.
Then I cracked on with mounting my Defi Din Gauge set and FIA Cutoff into the dash;


Working outside in a dirty crappy car park sucks ass!

I suppose next to the cut off I'll have a toggle switch for the heater fan once I set that up but not sure what else could go on there? Possibly a pull cable once I buy/fit a fire extinguisher.
Anyway with that done I thought whilst I'm at it I may aswell blank off all the unused holes now in the dash, I just hot glued them in;


Then came the real fun stuff, attacking the loom. Removing all the ABS wiring (about 4Kg's worth so far!) and any other disused wiring that I now have like rear washer, heater controls etc.
Starting with moving all the left side of the loom into the cabin;

And start stripping, I'm currently at this stage pondering whether the car will ever start again!

NIcad7
EG6
- Joined
- Nov 19, 2011
- Messages
- 359
Thanks man!
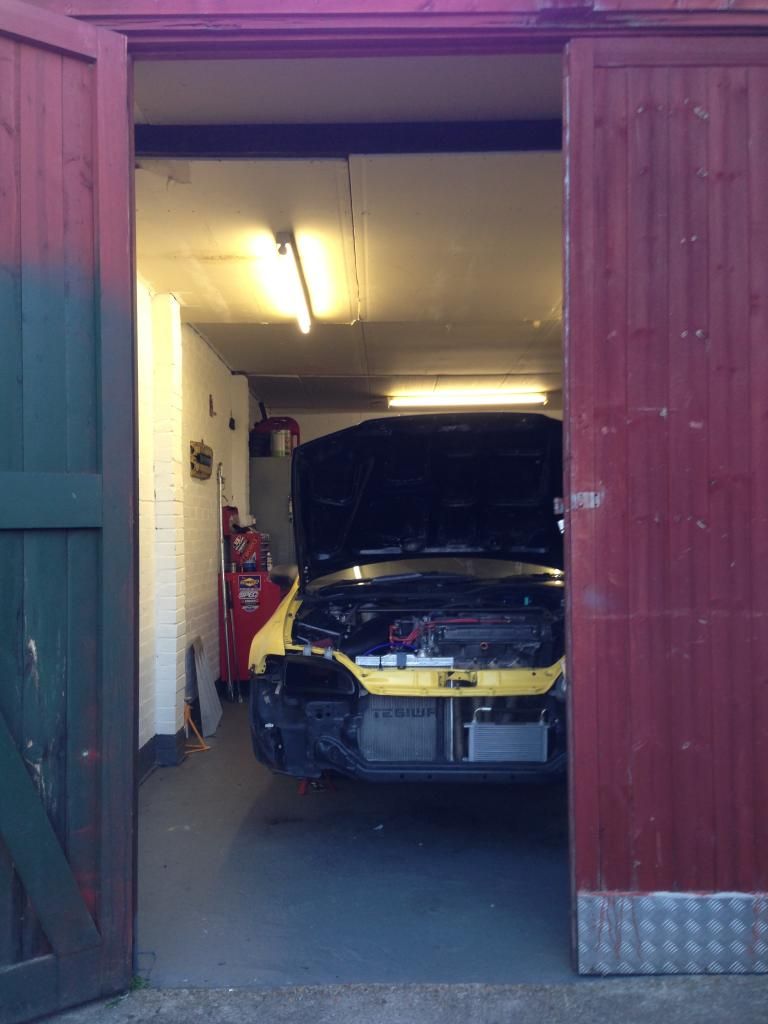
So if you've seen my other thread 'Garage Project' you'll know Ive been pretty busy recently moving house and lightly refurbing my new garage and generally doing rubbish (but cool) housy stuff!
Well my little Eg has been feeling very left out! So I gave it some love today. Well on and off for the past few days not that I got any pics! But I've finished up stripping all the loom, everything went well luckily and it fired up as always on the button purring sweet
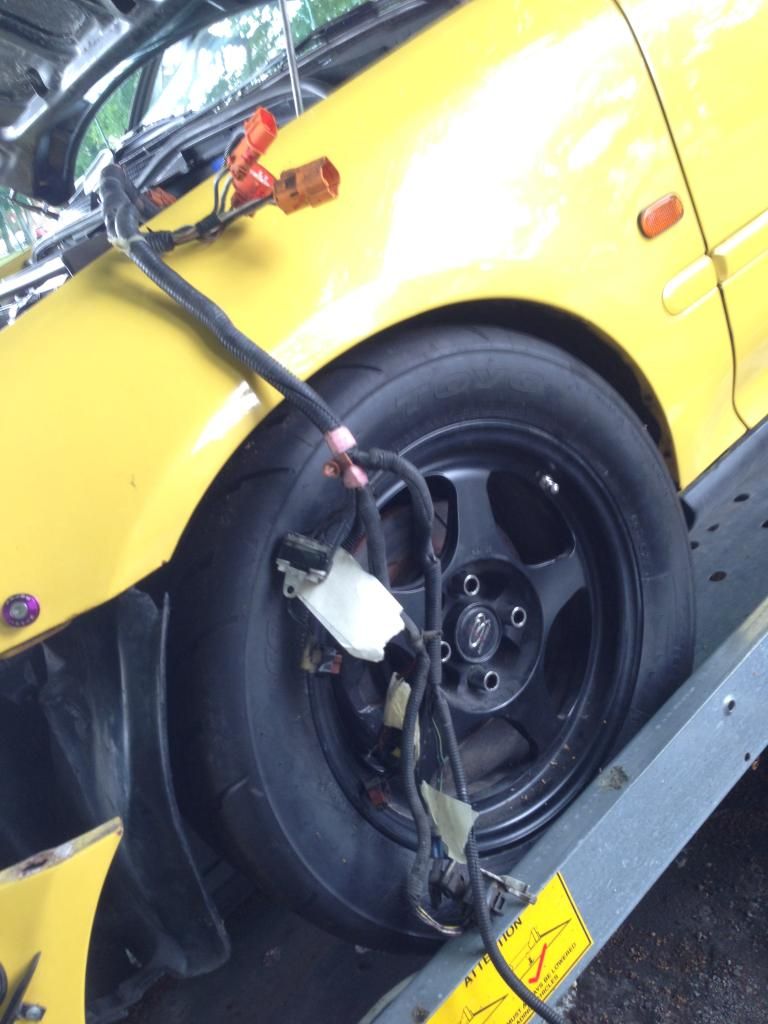
Also rerouted what was left of the engine loom into the wings, infact the only wiring in the wings now is for the headlights and indicators everything else is gone. I weighed the bad of wiring that Ive lost and it came in at a tad over 4Kgs!
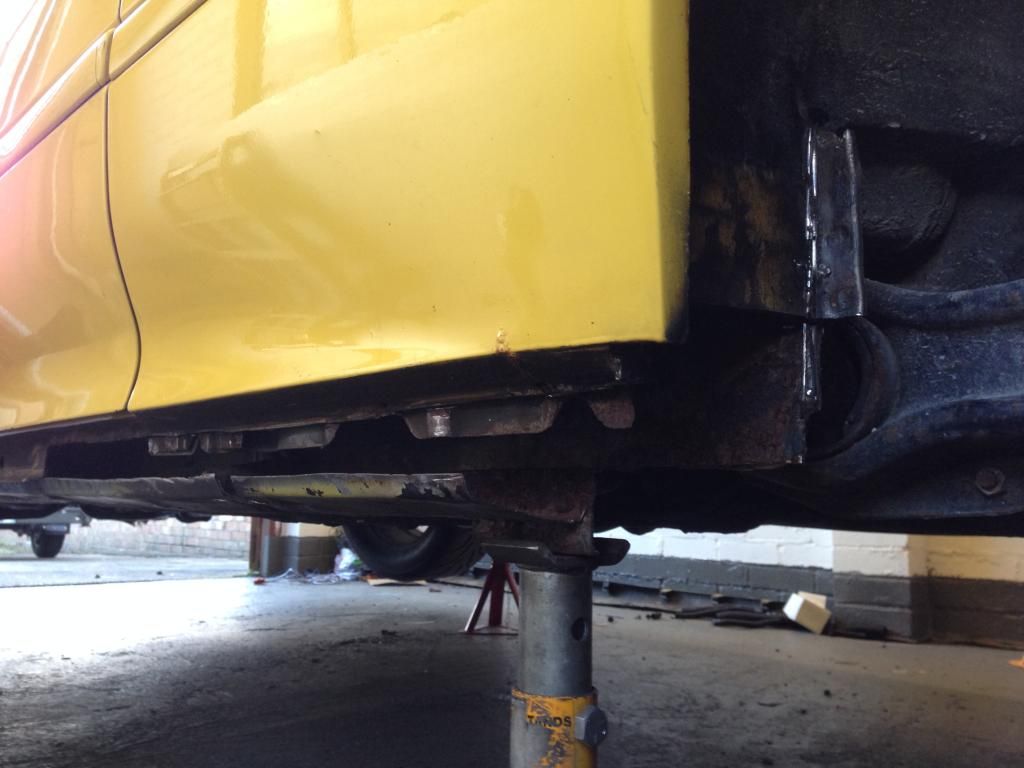
To get the wings off I had to pull of the side skirts that Ive never done on this car before. I found more cancer which I need to deal with pretty sharpish!!
Bashed this out with my trusty rust pick;
Ive got a few more small wiring jobs I want to sort out and then I'm going to attack this mess. I also need to order new skins for the rear arches. I may hack that out tomorrow and see how bad it is there too
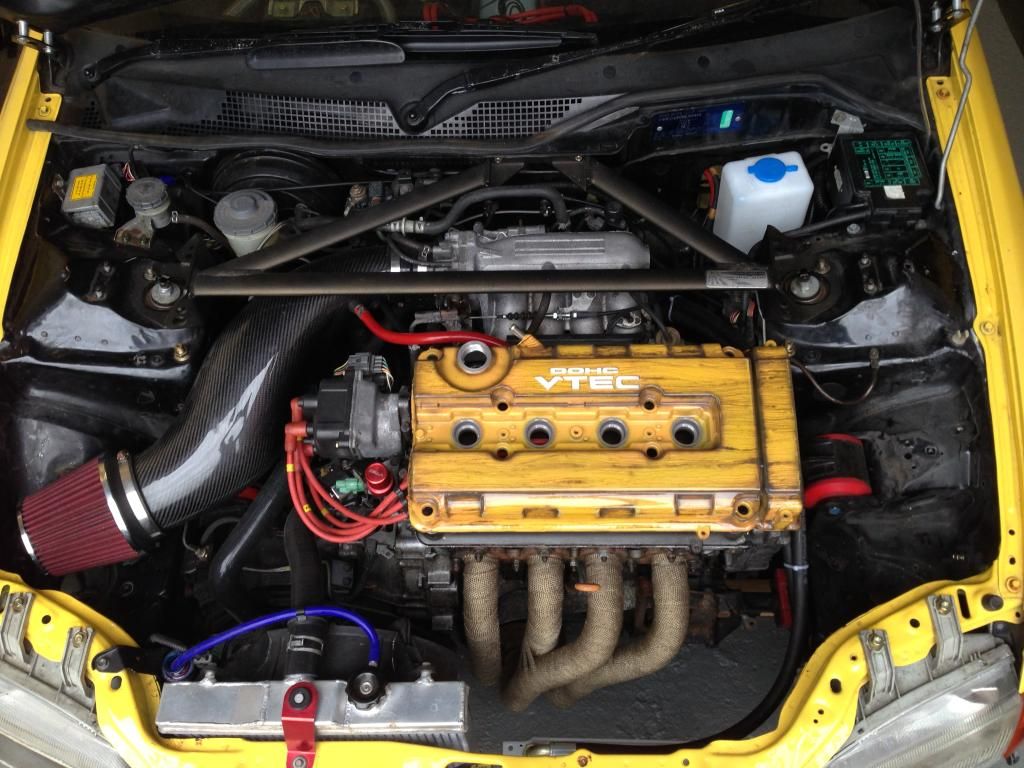
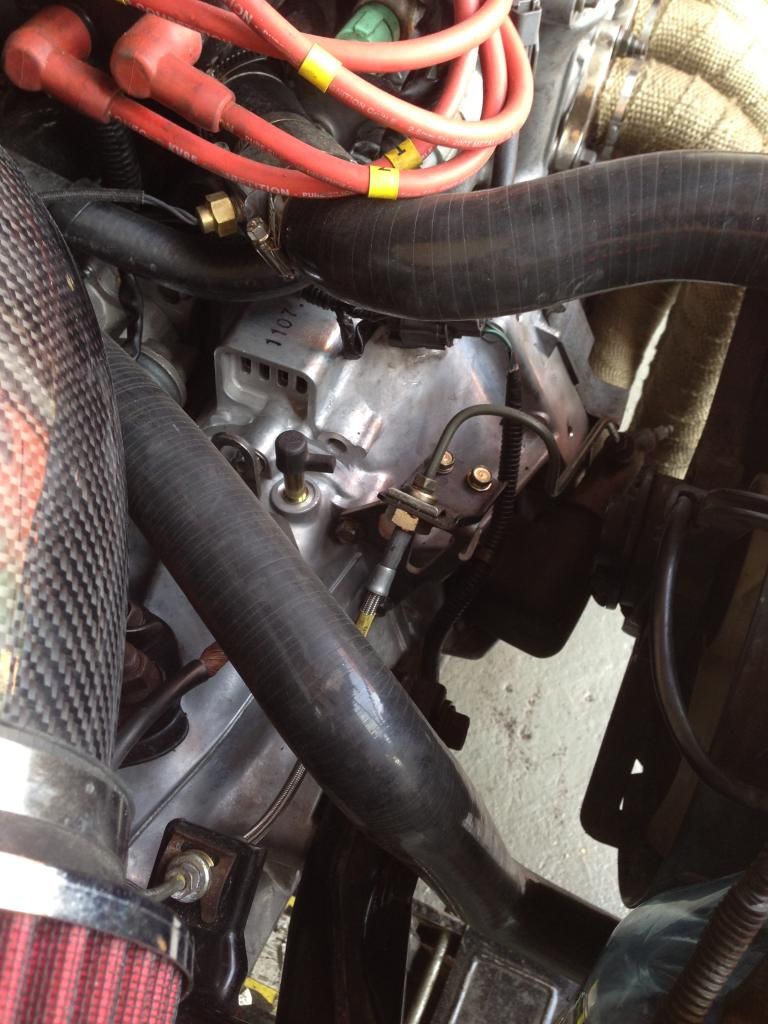
For now here's how the engine bay looks. Needs a good clean, I also layed on my new cam cover that I've had waiting to go on forever! It's not going on yet though, not until the car is pretty much finished as the final cherry on top
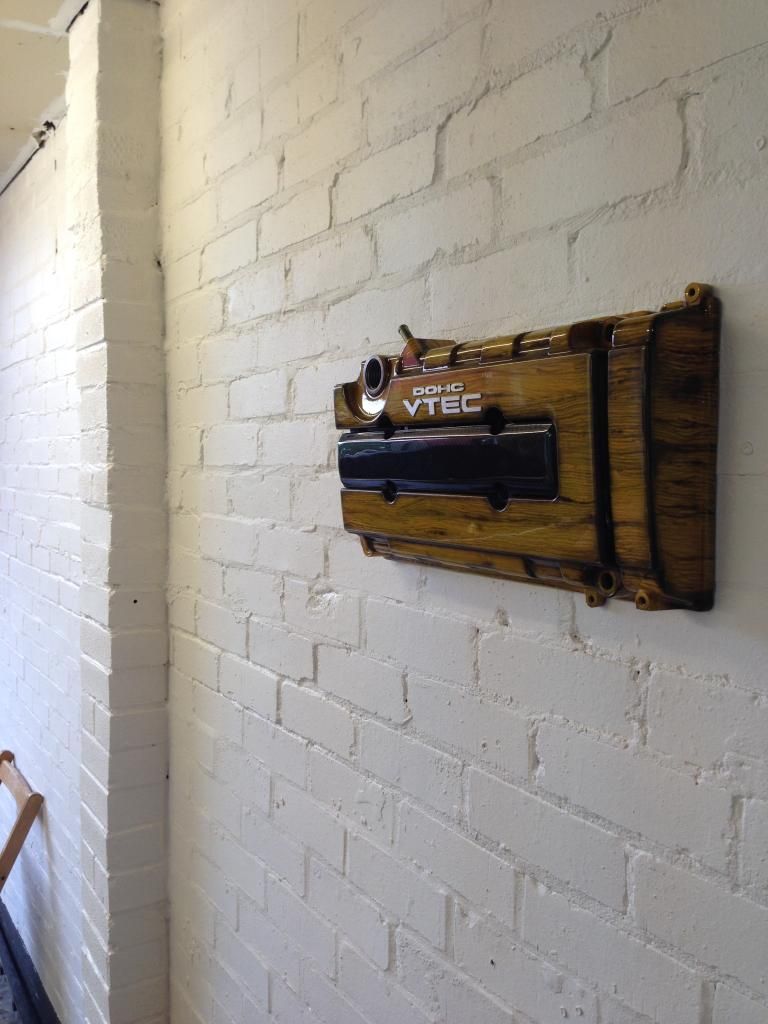
So for now it's been mounted on my garage wall....watching... waiting...
So if you've seen my other thread 'Garage Project' you'll know Ive been pretty busy recently moving house and lightly refurbing my new garage and generally doing rubbish (but cool) housy stuff!
Well my little Eg has been feeling very left out! So I gave it some love today. Well on and off for the past few days not that I got any pics! But I've finished up stripping all the loom, everything went well luckily and it fired up as always on the button purring sweet
Also rerouted what was left of the engine loom into the wings, infact the only wiring in the wings now is for the headlights and indicators everything else is gone. I weighed the bad of wiring that Ive lost and it came in at a tad over 4Kgs!
To get the wings off I had to pull of the side skirts that Ive never done on this car before. I found more cancer which I need to deal with pretty sharpish!!
Bashed this out with my trusty rust pick;


Ive got a few more small wiring jobs I want to sort out and then I'm going to attack this mess. I also need to order new skins for the rear arches. I may hack that out tomorrow and see how bad it is there too
For now here's how the engine bay looks. Needs a good clean, I also layed on my new cam cover that I've had waiting to go on forever! It's not going on yet though, not until the car is pretty much finished as the final cherry on top

So for now it's been mounted on my garage wall....watching... waiting...

NIcad7
EG6
- Joined
- Nov 19, 2011
- Messages
- 359
Been busy today tackling the rust. Opened a right can of worms. The more I cut out the more I find! Ive ordered up a pair of new arch skins so hopefully they will arrive this week and I can kill off the cancer for a good while!
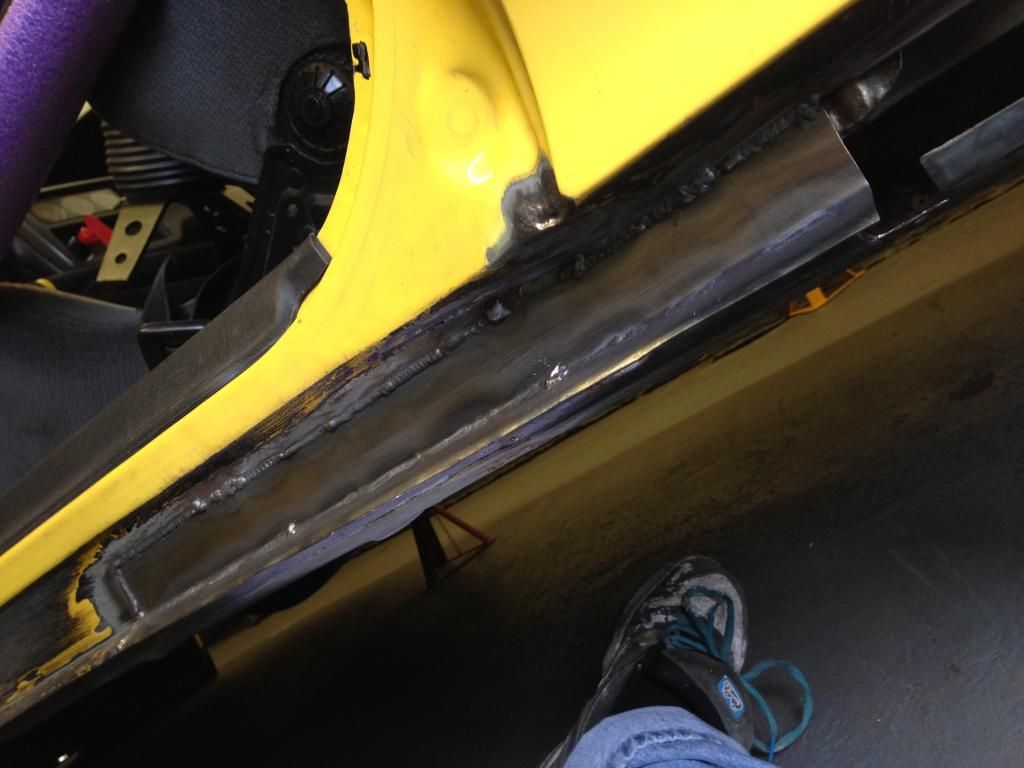
Got it all cut out. I wanted to cry doing this!
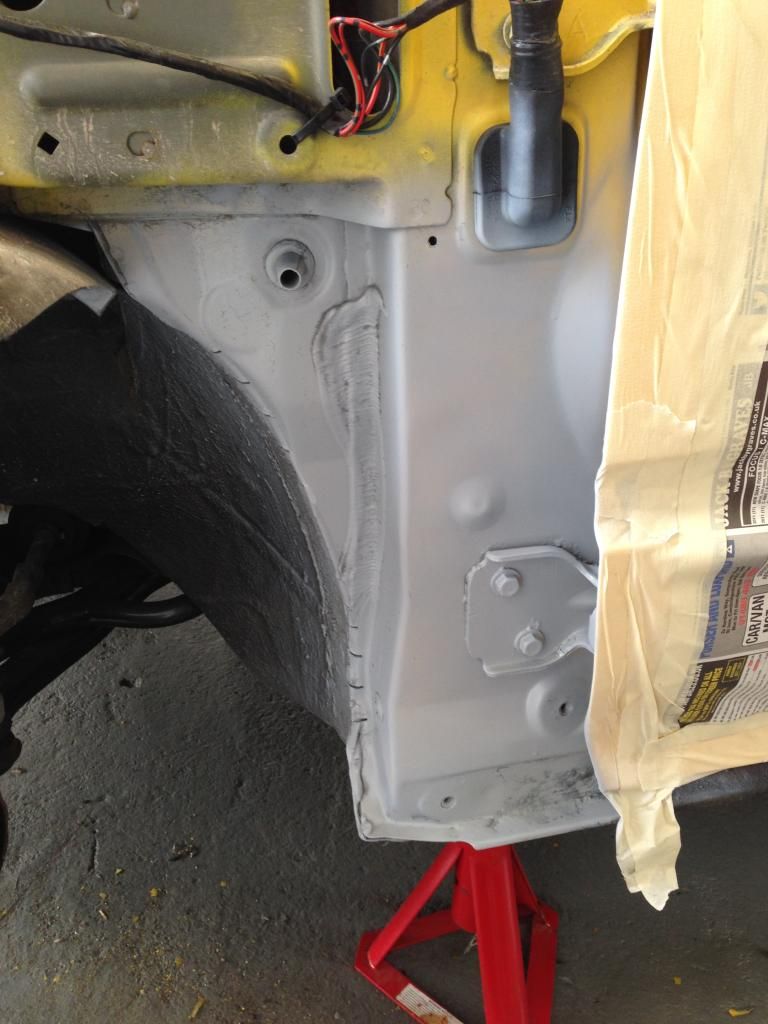
Then once it was all cleaned up I started putting in fresh metal;
That's as far as I can go for now until the arch skins turn up. So I finished up all the wiring. Battery cut off done and the defi's all rewired up, so that's pretty much the wiring all complete bar sorted a heater unit for the windscreen;
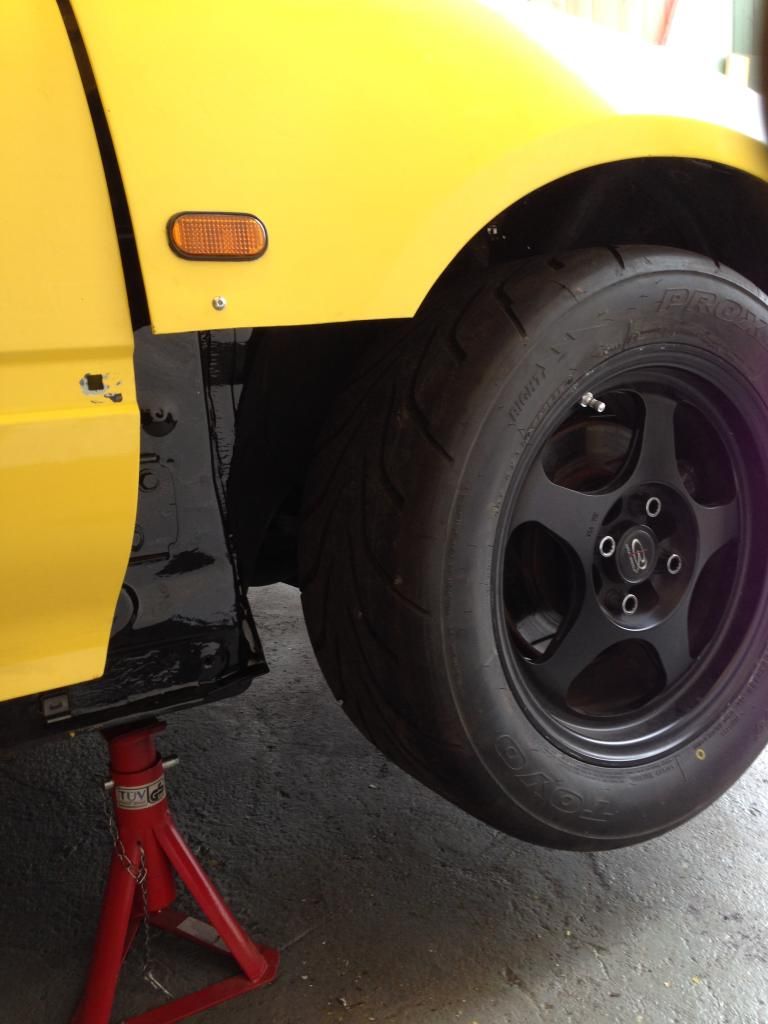
I also spaced out the lower part of the front wings to help clear the 225's up front!

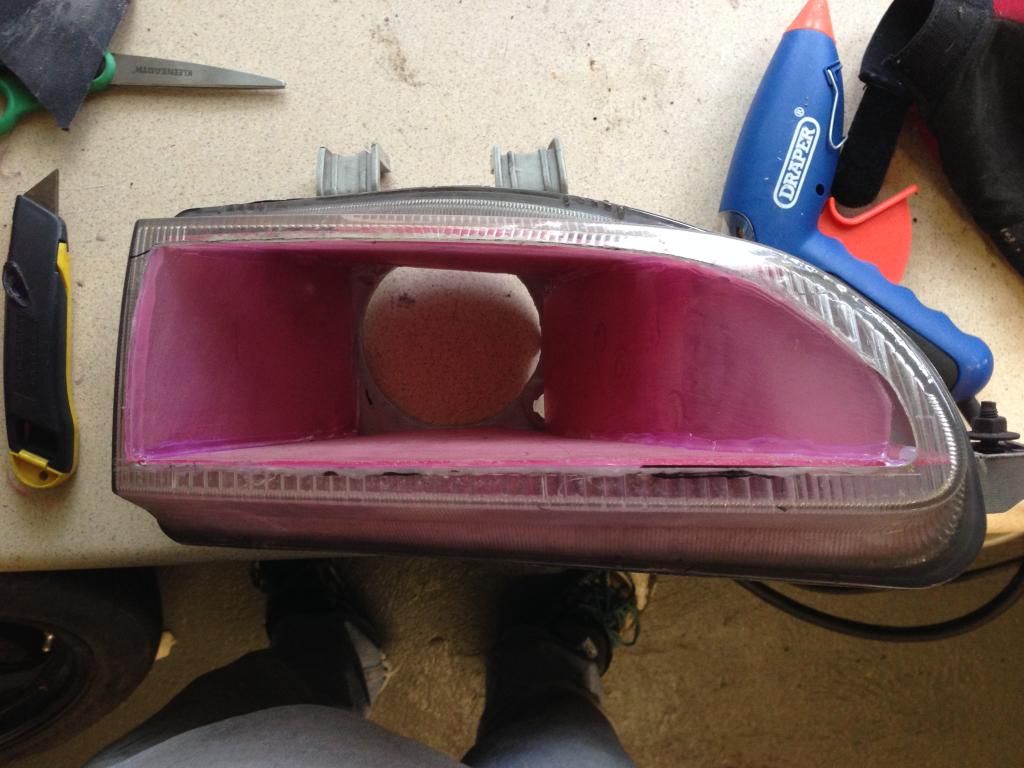
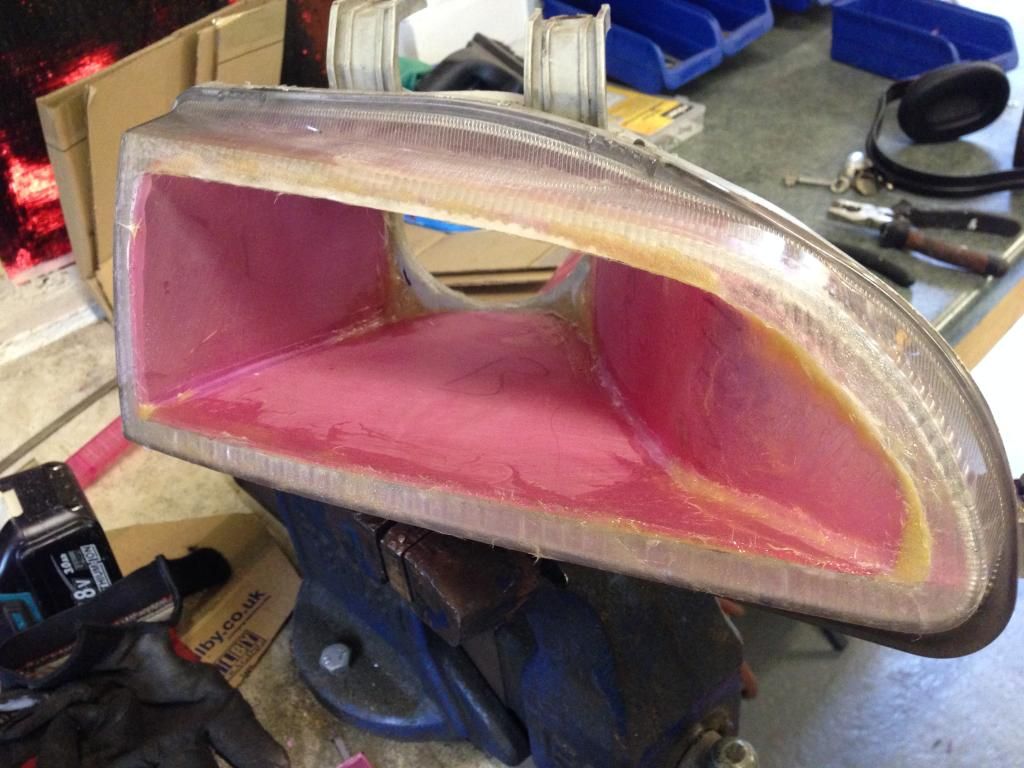
And finally I cracked on with the headlight duct. I'm quite happy with the shape so far. Hopefully just a skim of filler and it will be good for paint tomorrow
Got it all cut out. I wanted to cry doing this!

Then once it was all cleaned up I started putting in fresh metal;


That's as far as I can go for now until the arch skins turn up. So I finished up all the wiring. Battery cut off done and the defi's all rewired up, so that's pretty much the wiring all complete bar sorted a heater unit for the windscreen;


I also spaced out the lower part of the front wings to help clear the 225's up front!

And finally I cracked on with the headlight duct. I'm quite happy with the shape so far. Hopefully just a skim of filler and it will be good for paint tomorrow


muhammadravat9
DOHC VTEC
- Joined
- Apr 7, 2014
- Messages
- 521
Spaced arch looks serious! Love the headlight duct. Proper track look now!
NIcad7
EG6
- Joined
- Nov 19, 2011
- Messages
- 359
Been pretty busy with it today. First job was to get the gearbox swapped to my freshly built S80 with 96 spec gearing, KAAZ plated diff and a 4.78 FD. Along with a new clutch and fidanza flywheel!
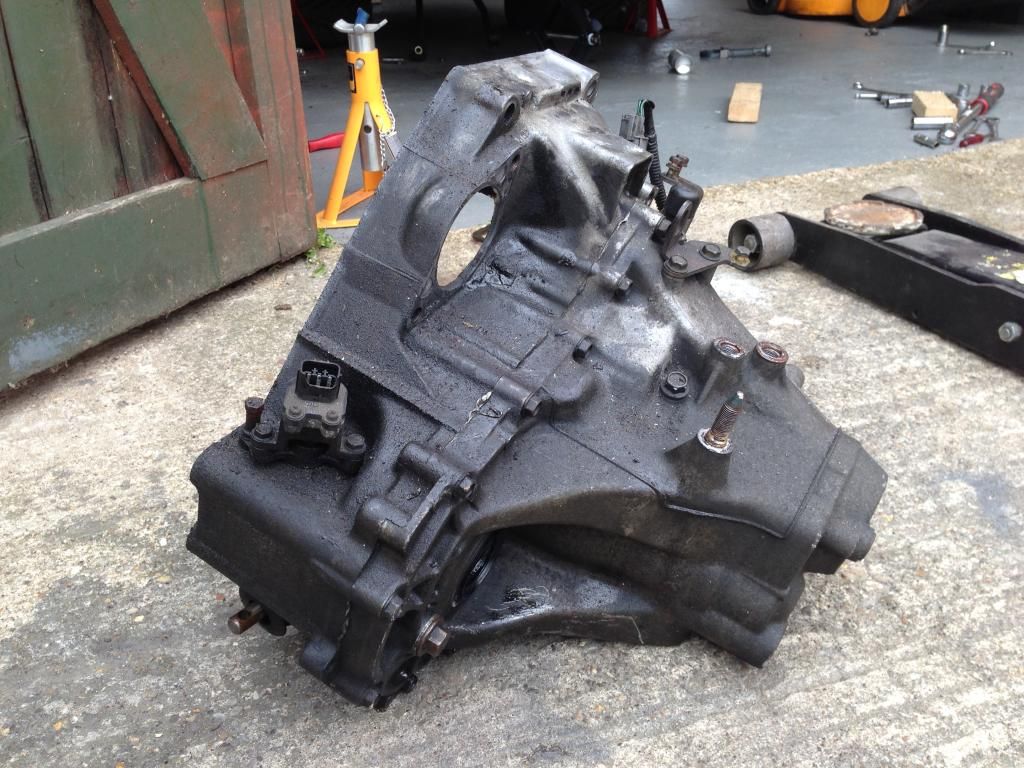
Got the old Y21 out, it's working great but is absolutely minging!
Flywheel on;
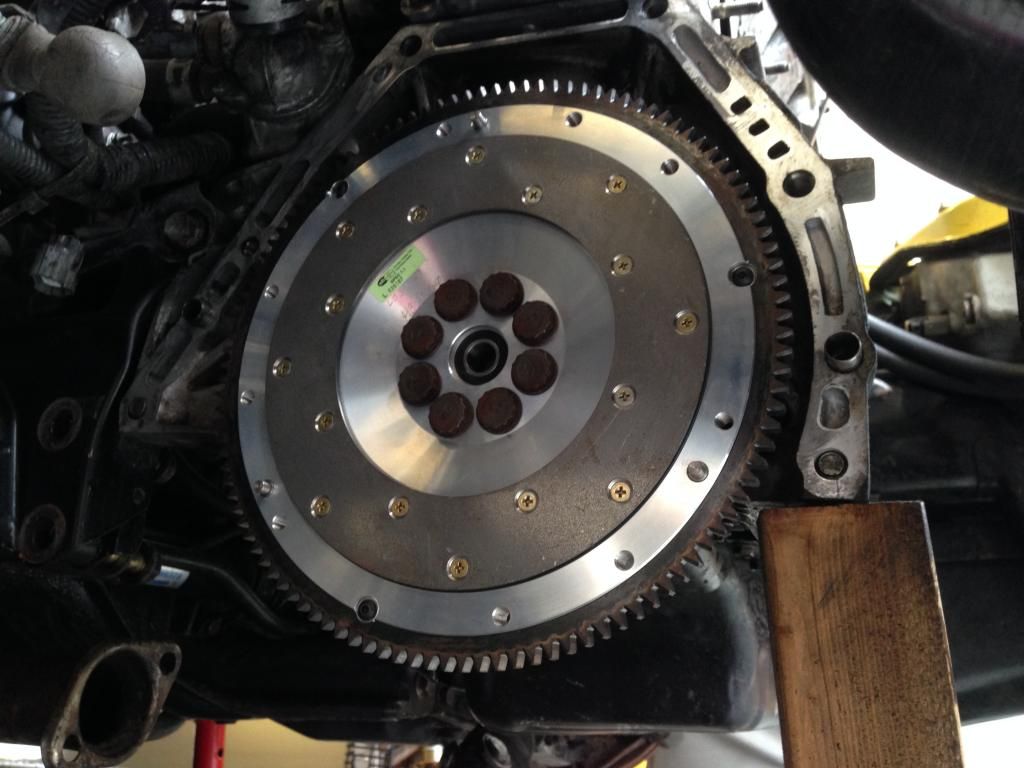
Didn't have a clutch alignment tool so struggled to get the box on ititially! Had to make up my own alignment tool using some special sockets and I went straight on
But also found Ive got a ripped inner CV boot so waiting for a new one to turn up and I can get that job finished.
So with that out the way I cracked on with the headlight duct. I'm really pleased with how it's turning out and because Ive hardly had to use any filler it's really light!
Got the filler on that I needed and sanded like crazy!


And then into plastic primer;
And then another rub down and onto the first coat. I'm going to led it harden overnight and give it a final rub down and coat in the morning. Can't wait to see it fully finished and on the car!
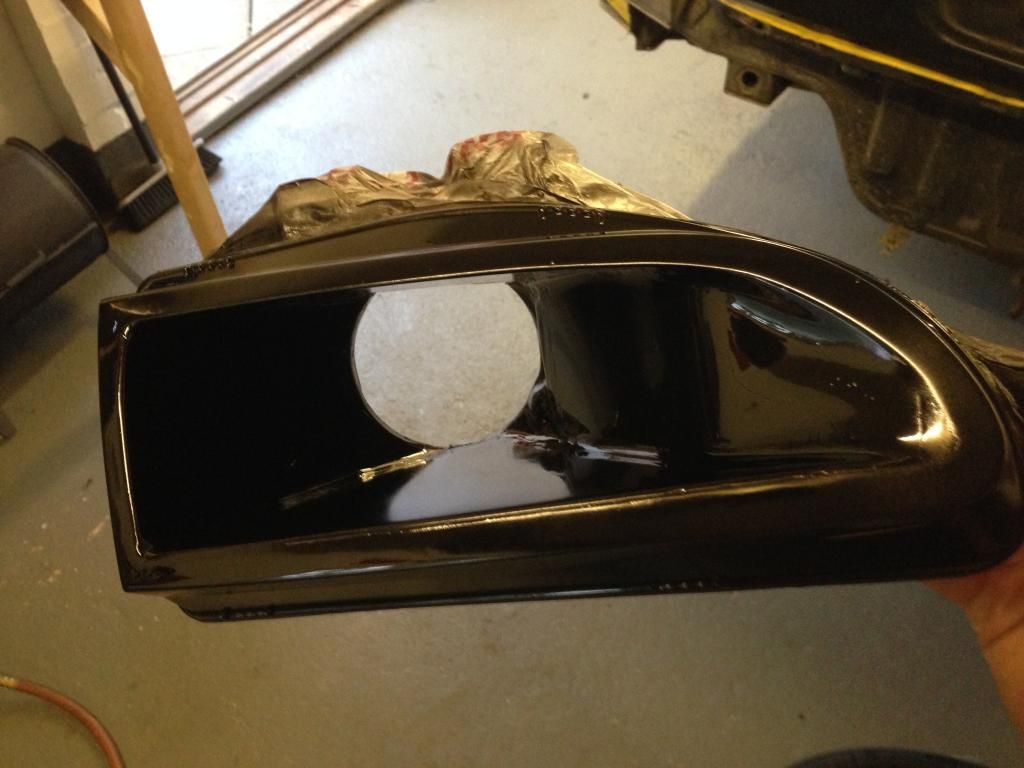
I gonna sort that line out that's appeared at the bottom also. It's annoying me!
Got the old Y21 out, it's working great but is absolutely minging!

Flywheel on;

Didn't have a clutch alignment tool so struggled to get the box on ititially! Had to make up my own alignment tool using some special sockets and I went straight on
But also found Ive got a ripped inner CV boot so waiting for a new one to turn up and I can get that job finished.
So with that out the way I cracked on with the headlight duct. I'm really pleased with how it's turning out and because Ive hardly had to use any filler it's really light!
Got the filler on that I needed and sanded like crazy!


And then into plastic primer;

And then another rub down and onto the first coat. I'm going to led it harden overnight and give it a final rub down and coat in the morning. Can't wait to see it fully finished and on the car!

I gonna sort that line out that's appeared at the bottom also. It's annoying me!
Last edited:

NIcad7
EG6
- Joined
- Nov 19, 2011
- Messages
- 359
Forgot to get pics of the sexy uber clean gearbox yesterday too!
So here it is;
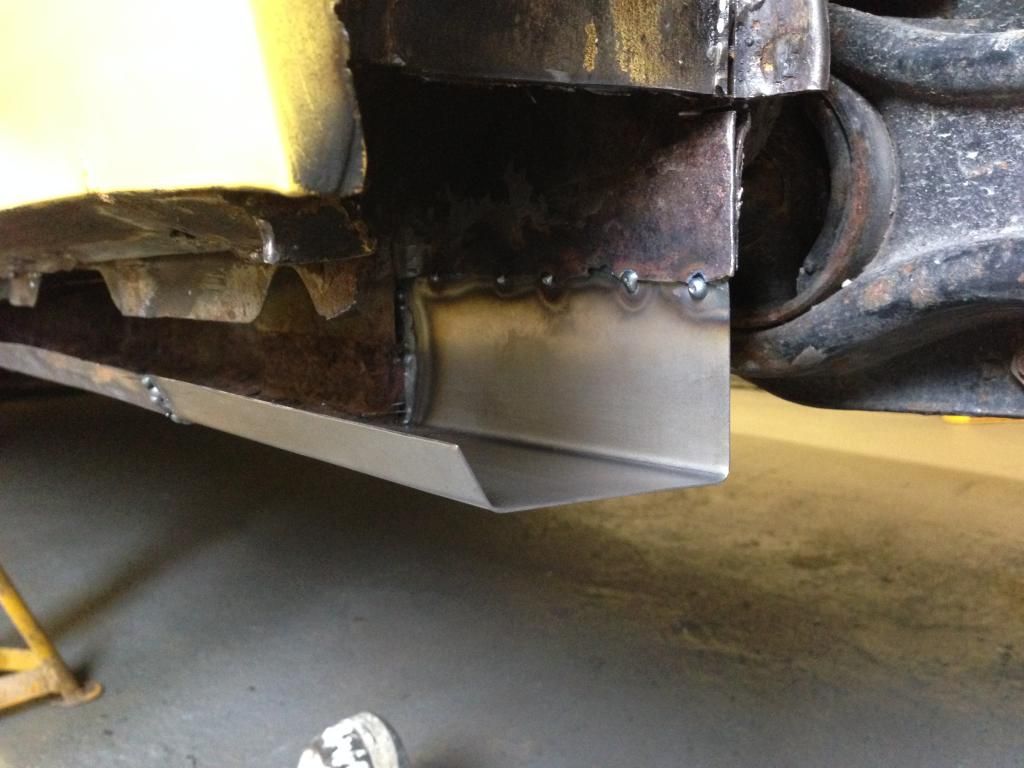
I also applied a layer of 'reflectagold' to the bottom of the sump to help with heat managment, not that I should have any issues really but thought why not!
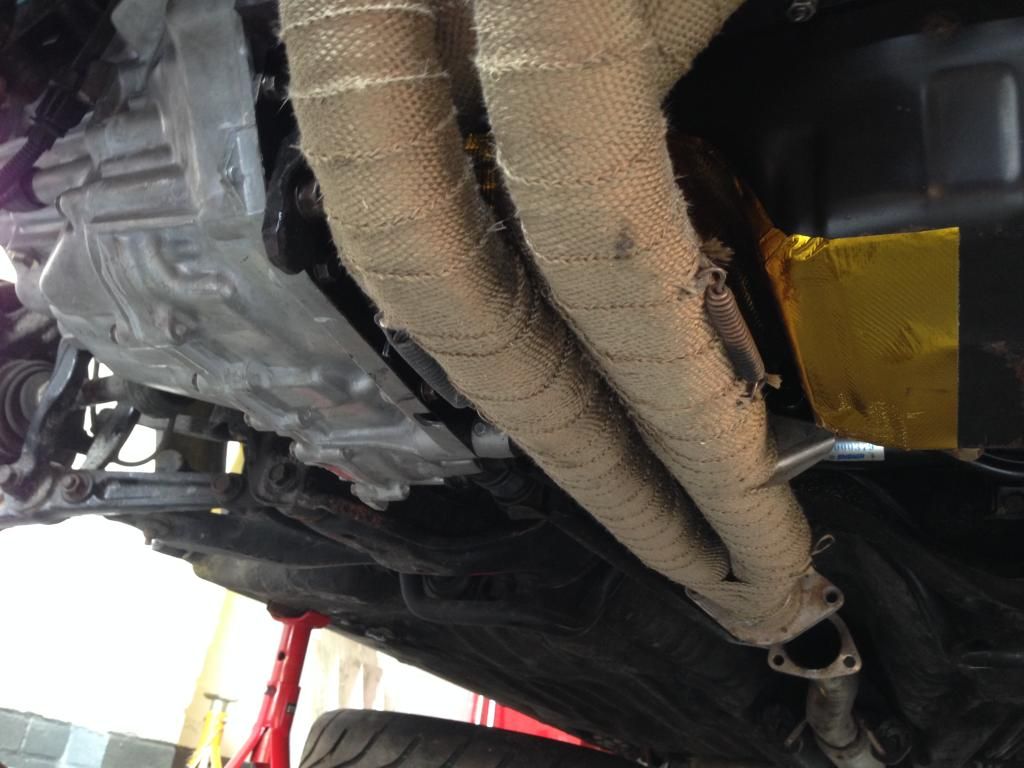
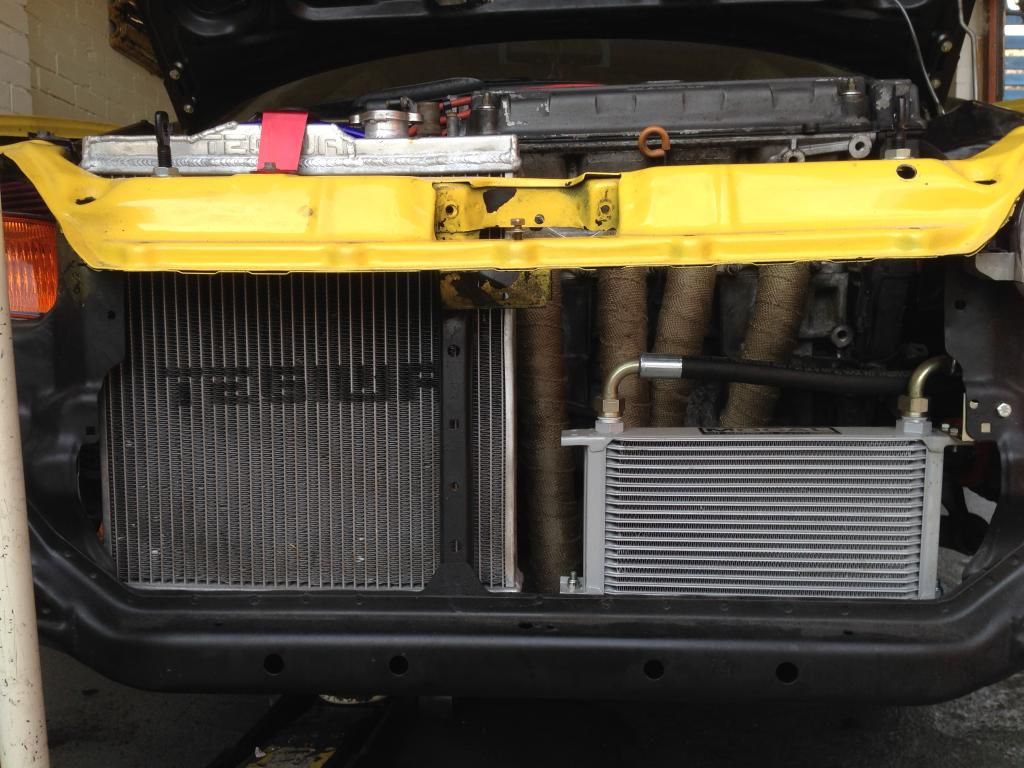
Aided by my oil cooler setup that I never did put a pic of it up!
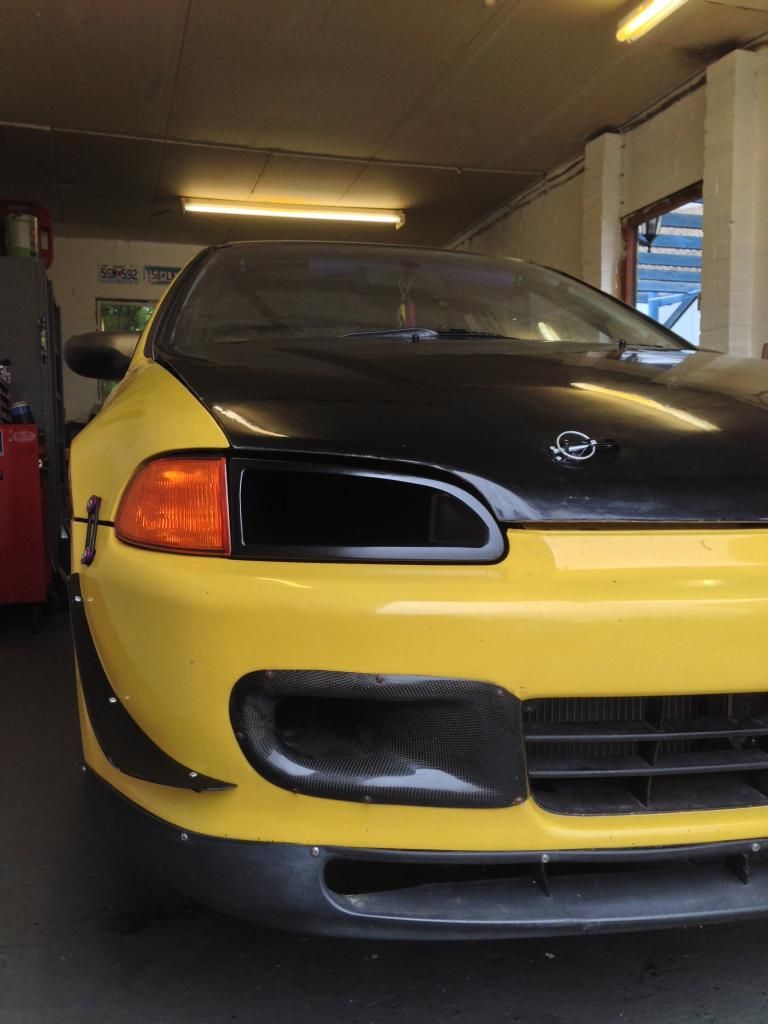
By then the headlight has properly dried and I couldn't wait to get it on the car and see how it looks. I'm really happy with how it's turned out!
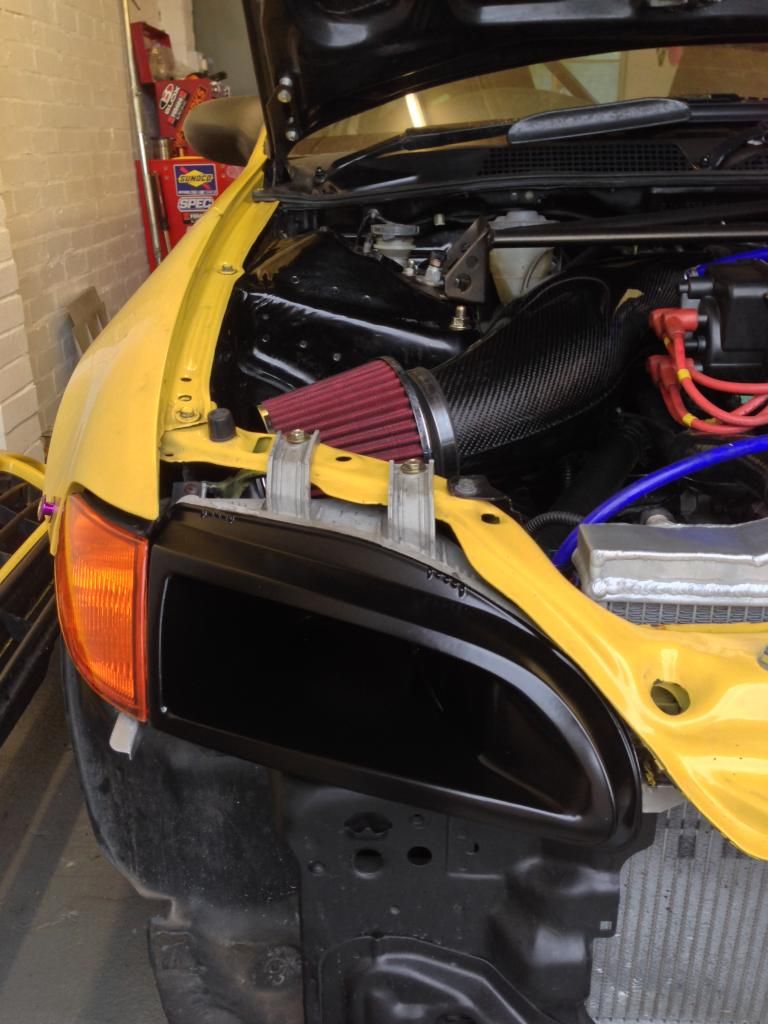

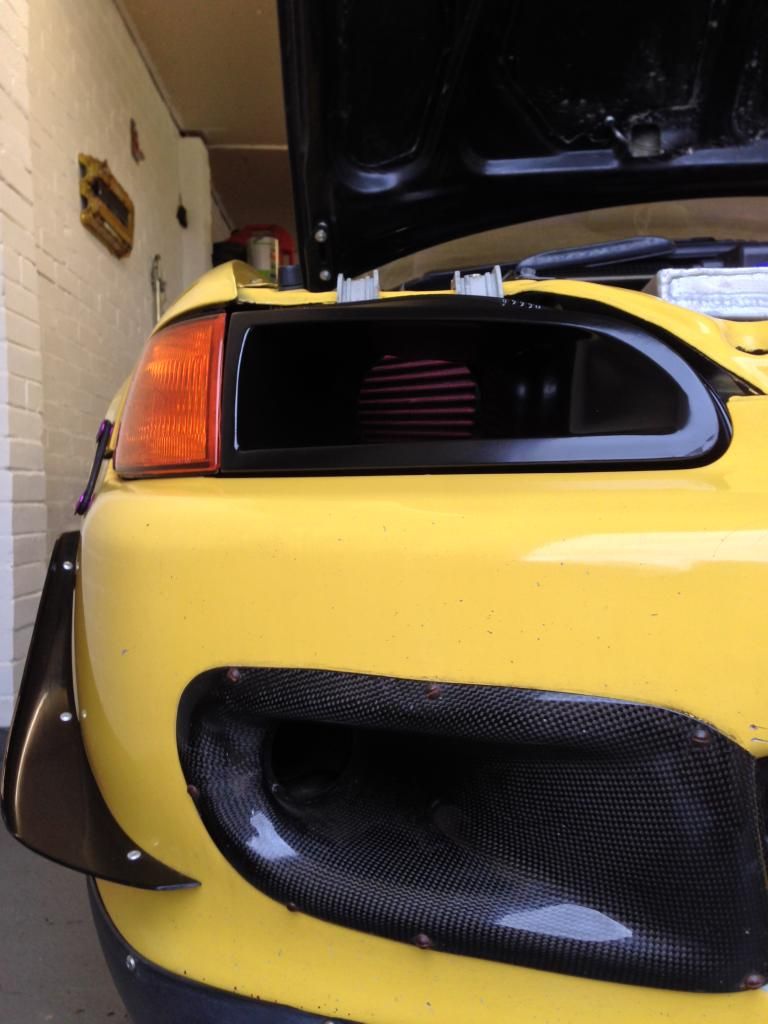
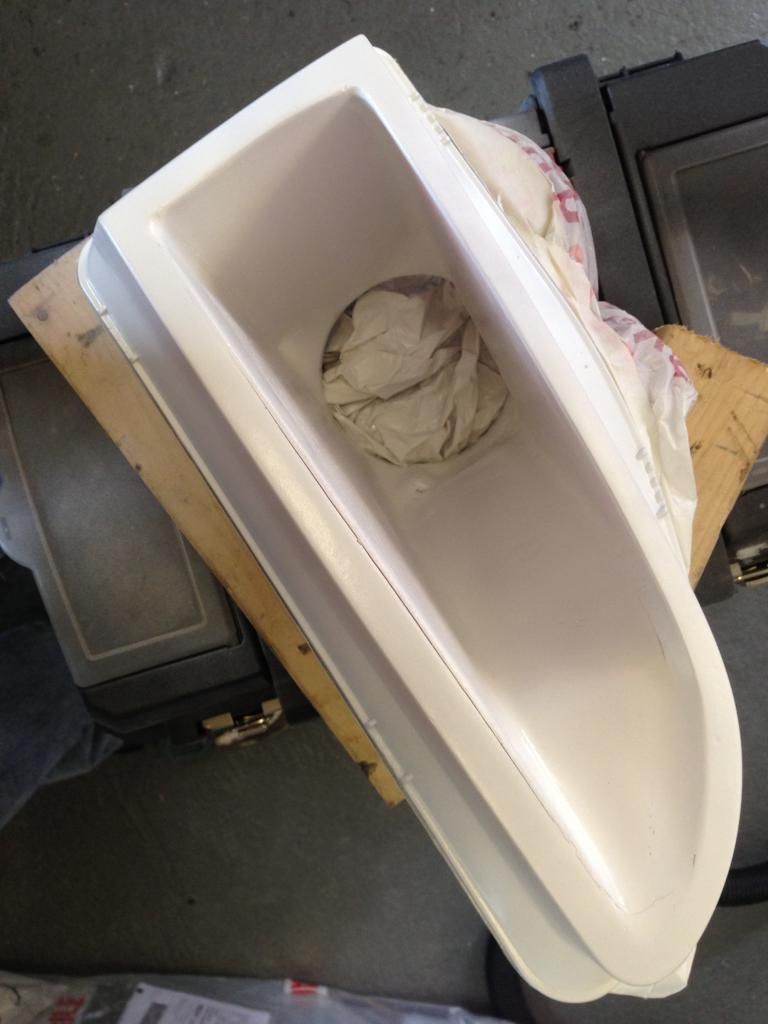
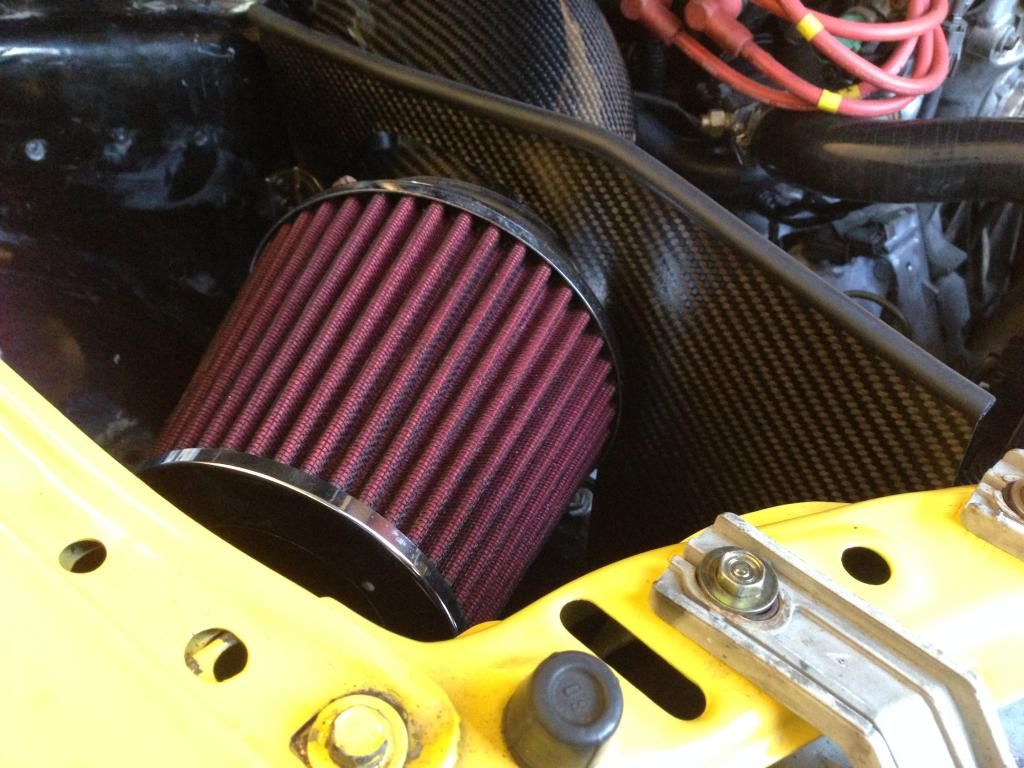
Should provide the filter with ample cold air, so I thought I had best try and seal the filter off a bit from the engine bay. I quickly knocked up a blanking section although I think I will come back to this later and make it better!
And finally getting locked up for the night
So here it is;

I also applied a layer of 'reflectagold' to the bottom of the sump to help with heat managment, not that I should have any issues really but thought why not!

Aided by my oil cooler setup that I never did put a pic of it up!

By then the headlight has properly dried and I couldn't wait to get it on the car and see how it looks. I'm really happy with how it's turned out!


Should provide the filter with ample cold air, so I thought I had best try and seal the filter off a bit from the engine bay. I quickly knocked up a blanking section although I think I will come back to this later and make it better!

And finally getting locked up for the night

Last edited:
NIcad7
EG6
- Joined
- Nov 19, 2011
- Messages
- 359
Been attacking the rust all weekend. Although I feel like Ive not achieved much of the time I was just sat there staring at it all in despair! The more I took out the more I found!
Finding some inspiration Ive decided the only way to go for it is to do it properly. So I dropped all the suspension and am now part way through stripping off the underseal and everything back to bare metal. That way I can see what's what and start cutting out the bad metal and welding in new stuff. Gonna be a while...
I bought a pair of rear quarter panels so Ive traced out one side and cut it out. Needs a little tweaking to fit but the lines are pretty good. Ive chopped down the new panel some, no point replacing a load of metal that doesn't need it!

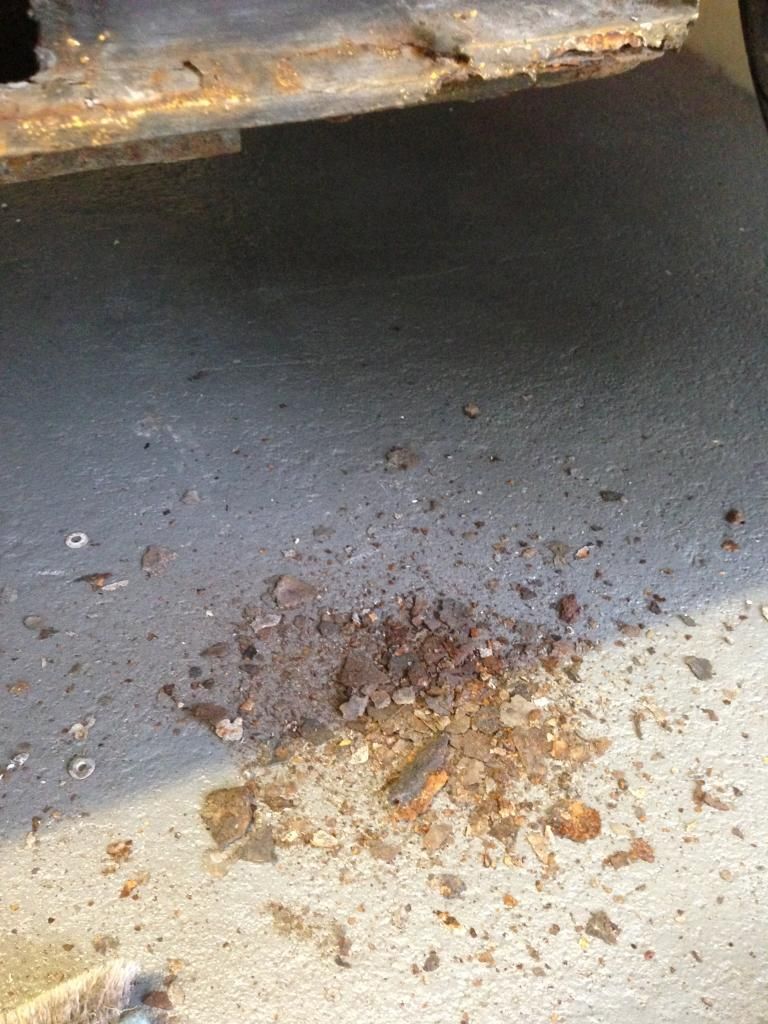
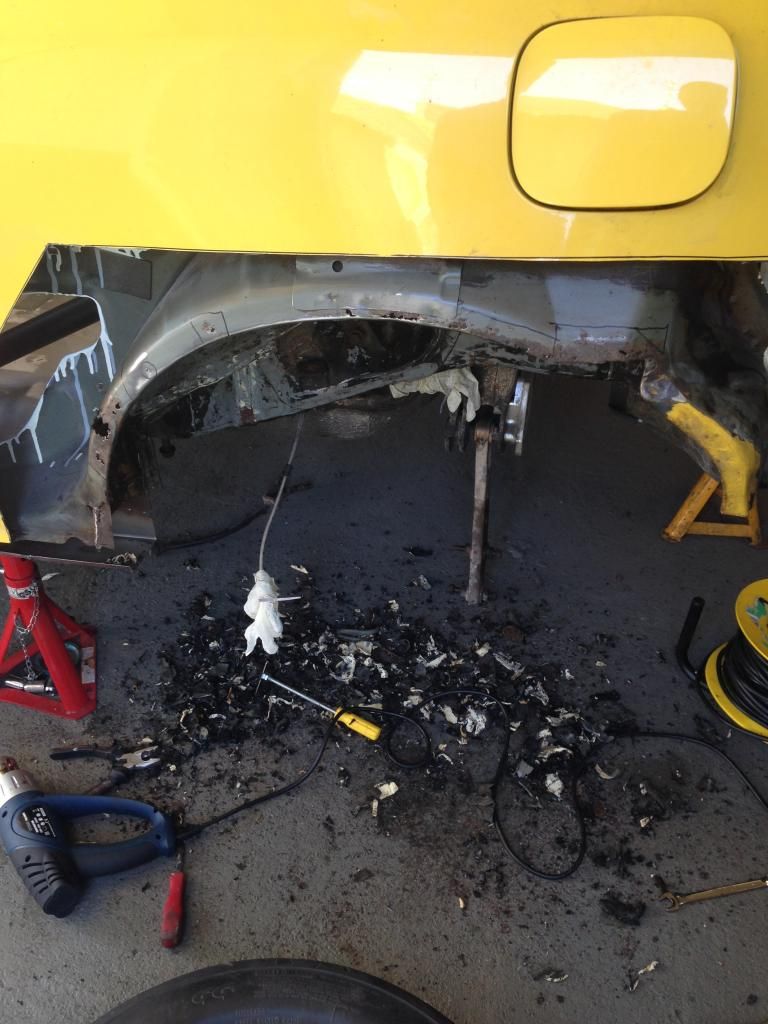
Then started the glorious job of taking out the underseal using a heat gun, wasn't too bad really;

This is half of it, guess it's all saving weight
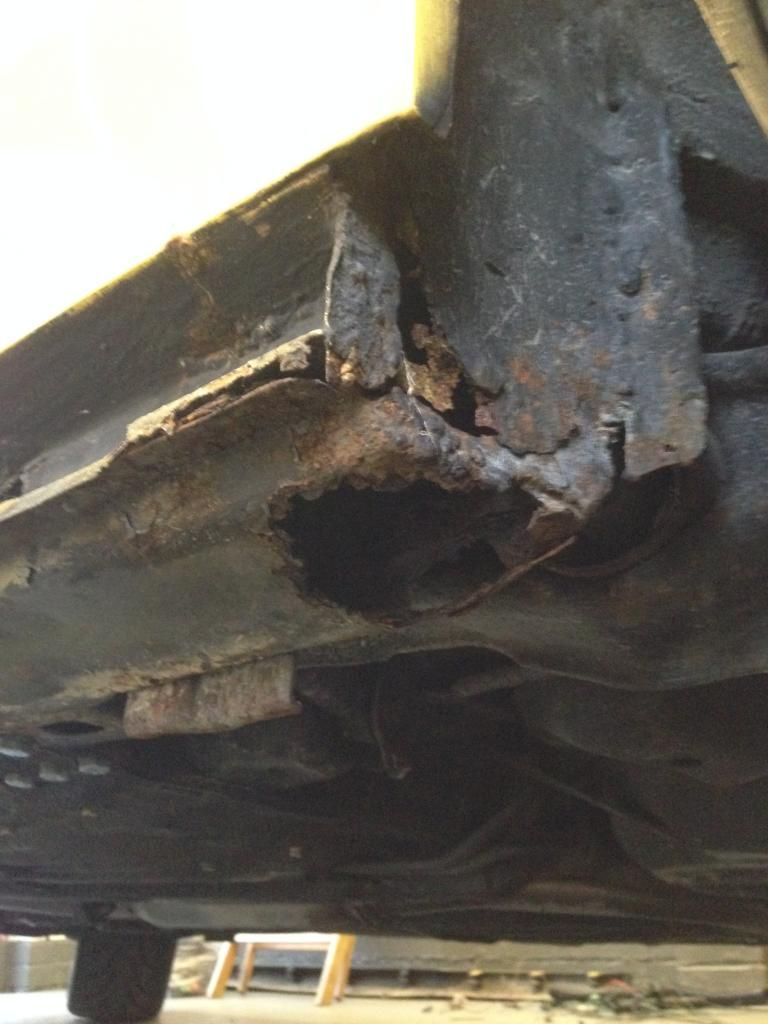
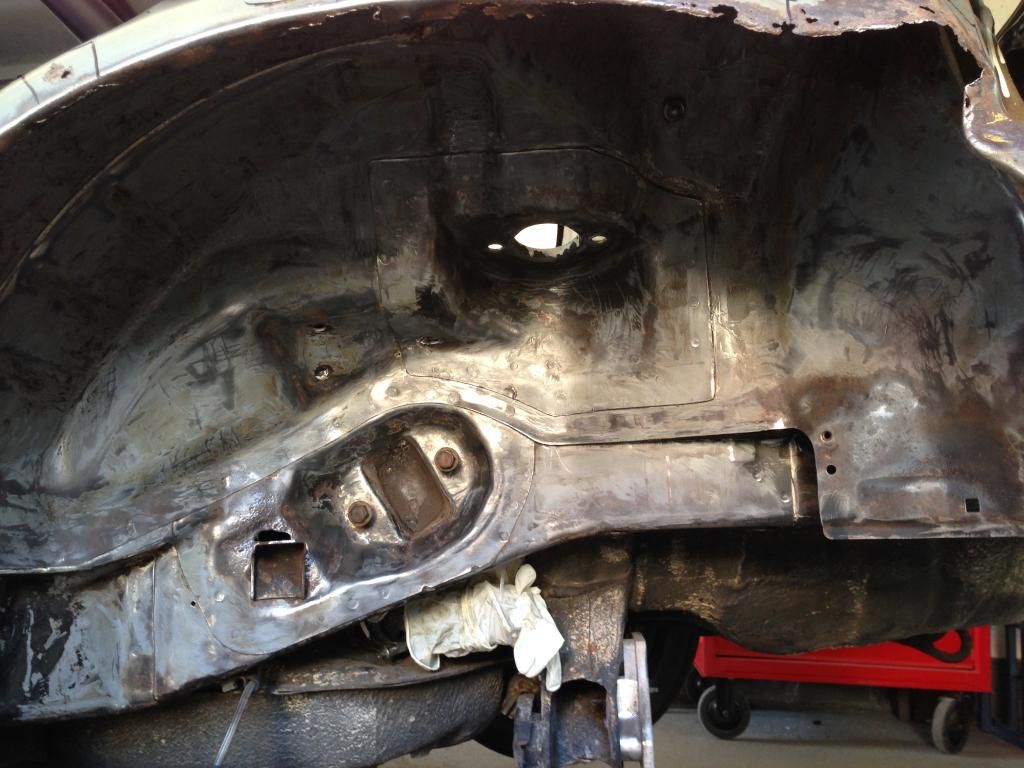
This is where I'm up to so far, about half way through going back to bare metal. There's a lot of surface rust and some holes that will be tricky to shape metal to replace but over not the worst
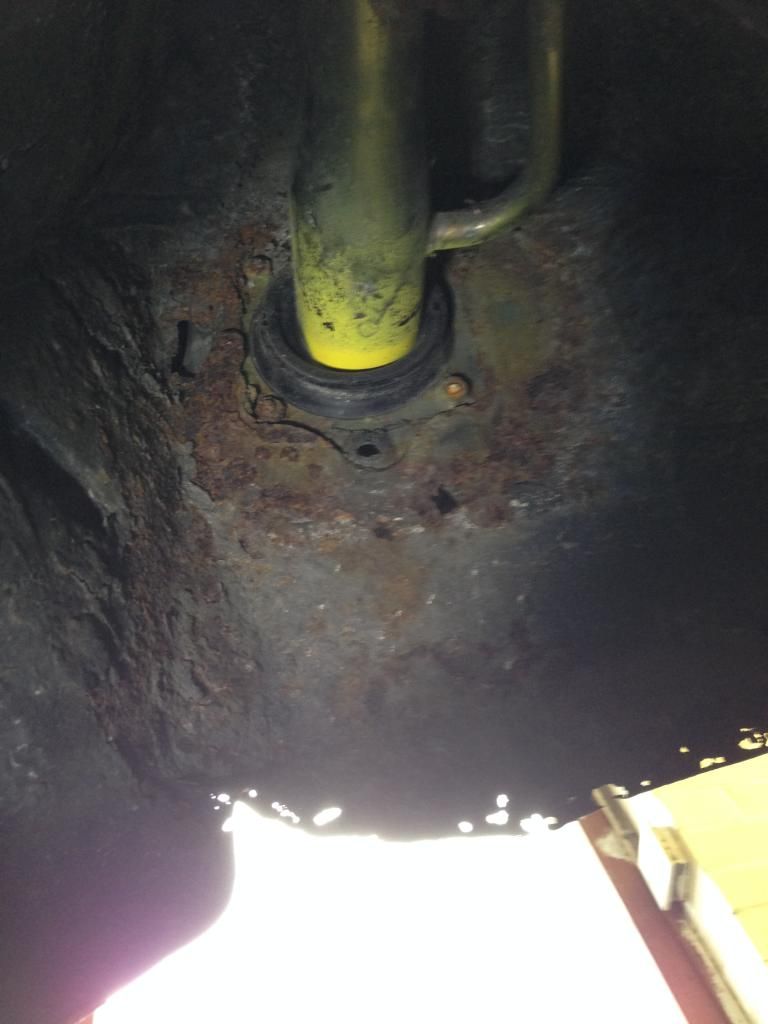
Here's an idea of what I'm dealing with. After grinding out that area around the fuel filler a lot of large holes have appeared!
So feeling down with it all I decided to cheer myself up with some good old 'feel good jobs'. Catching some inspiration from a picture I saw of a Kanjo EK in Japan on facebook I decided to attack even more of my car with the grinder
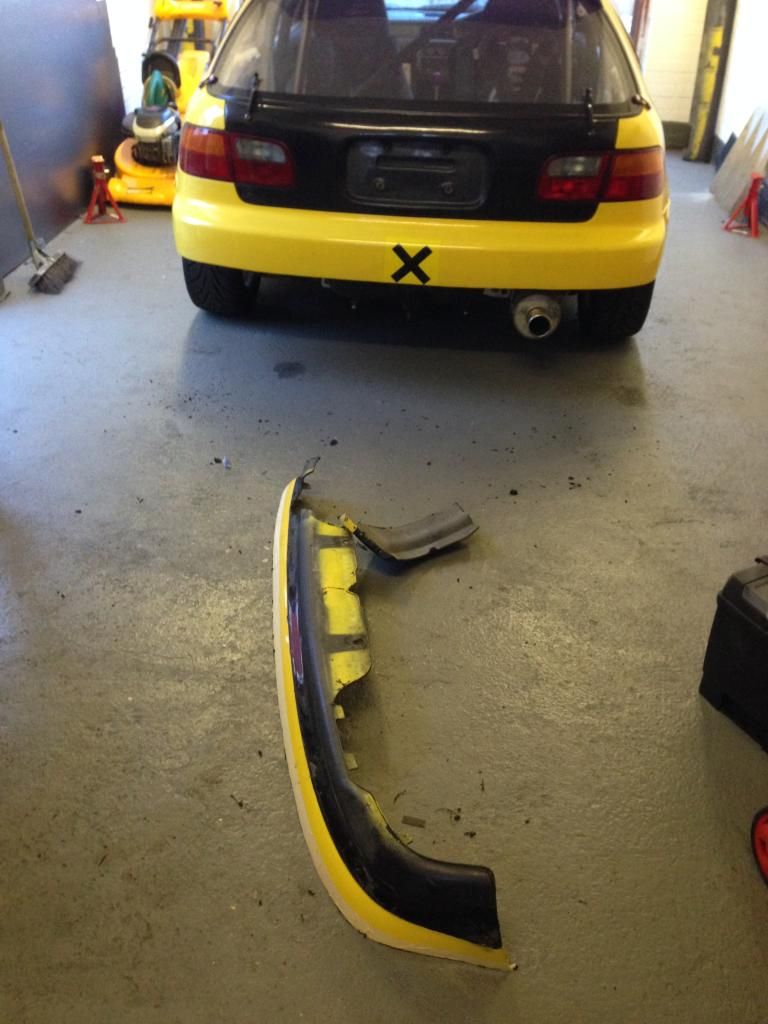
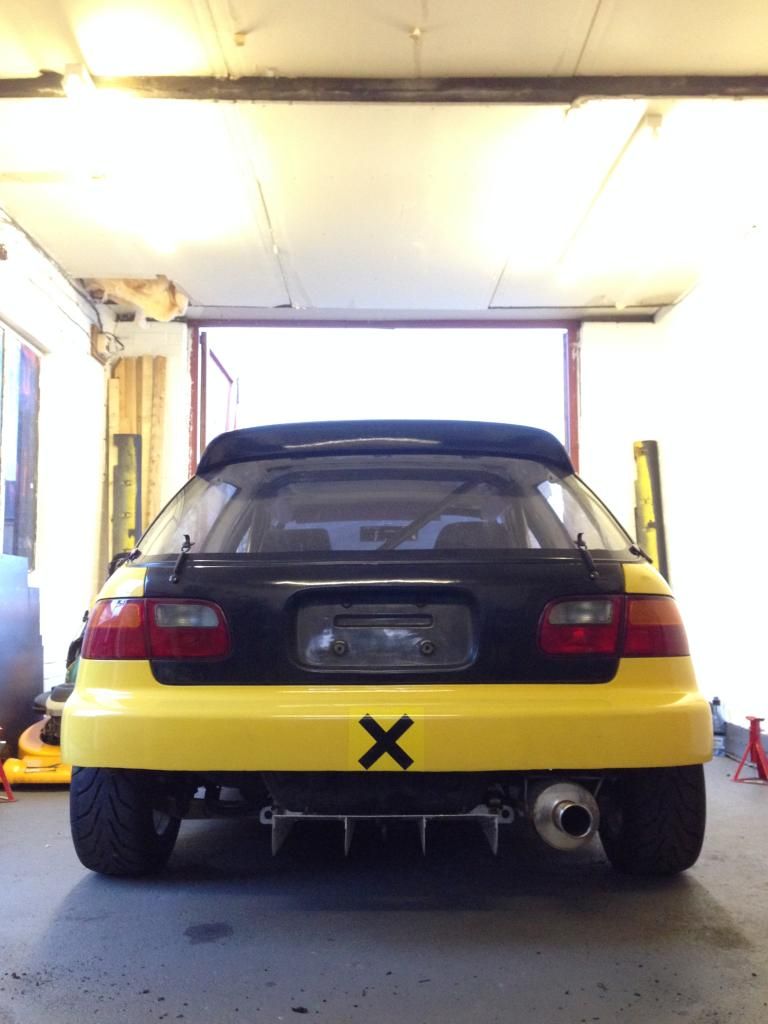
The parachute rear bumper has been cut, I think it looks pretty purposeful and will hopefully help the air exit out the rear a little. May need to put some extra holes in whats left of the bumper;
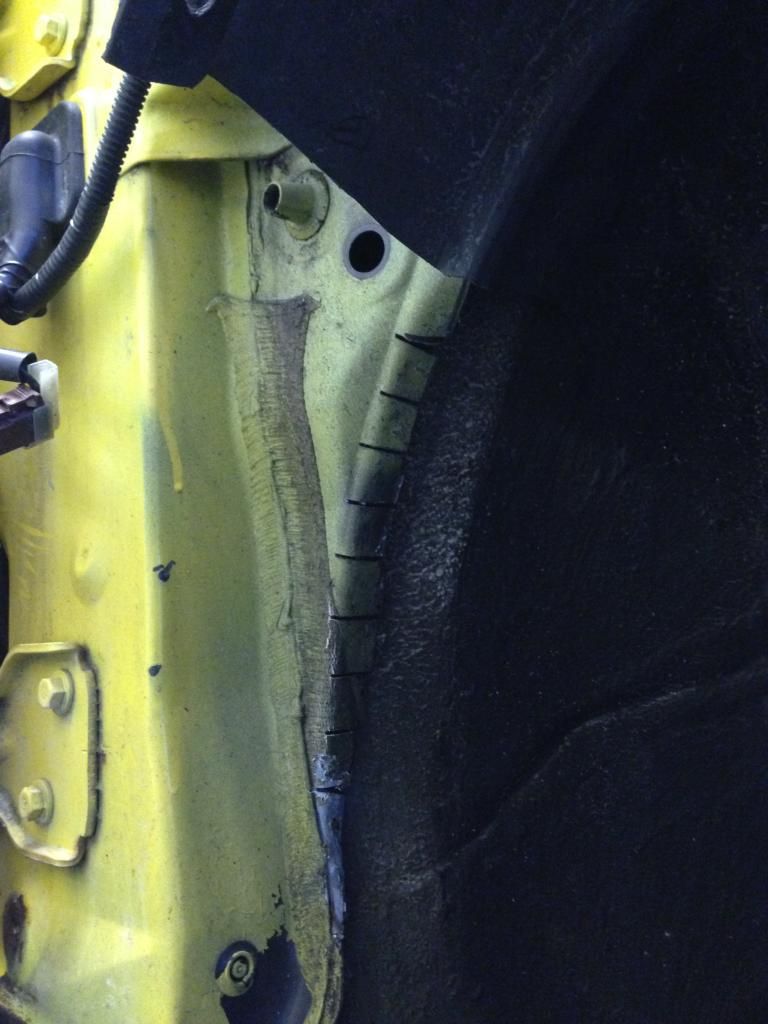
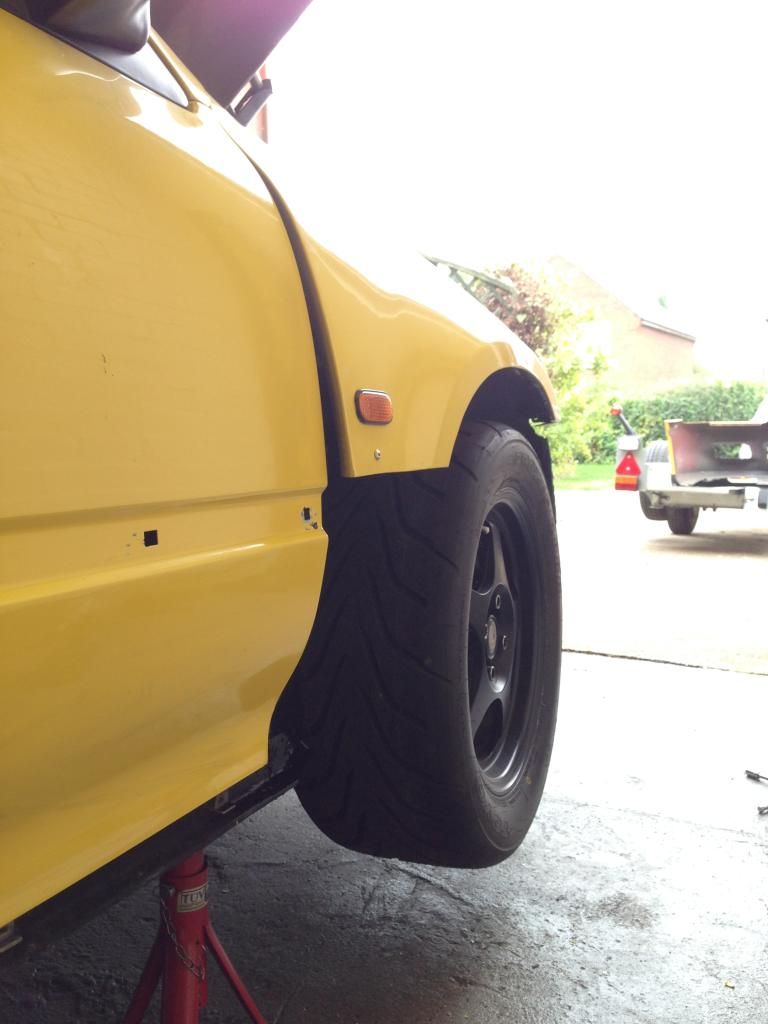
And then went for the half wing job, a little more involving, I trimmed back the seam lip inside the arch as the 225's were rubbing a touch;
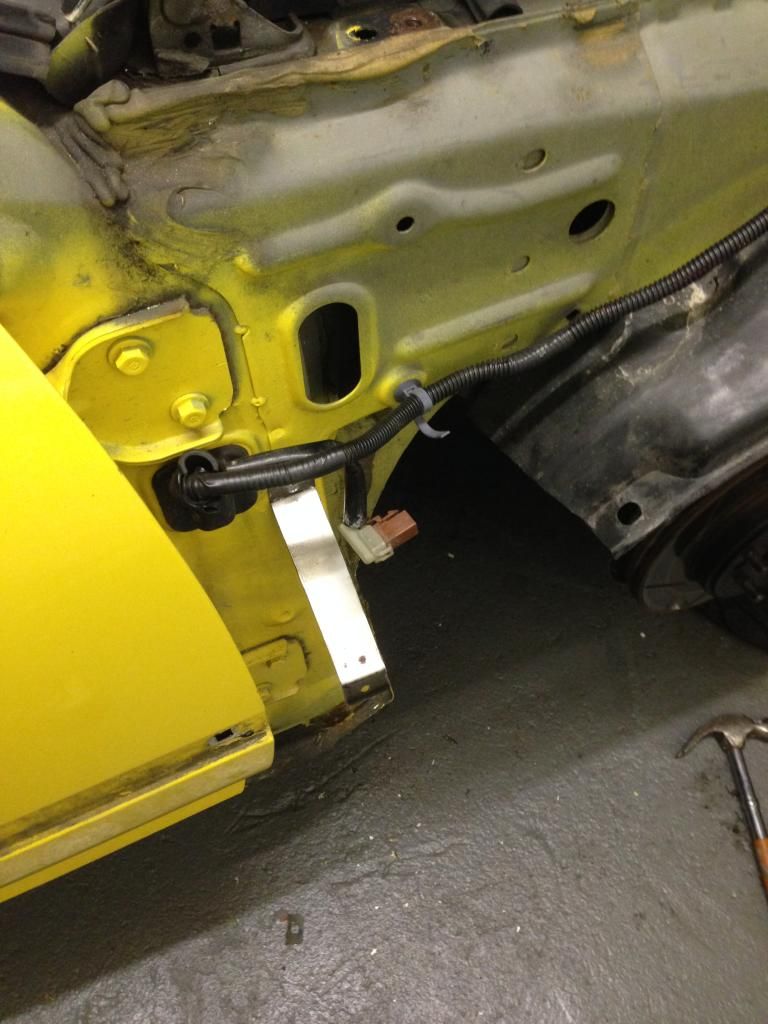
Had to make a custom bracket to hold what was left of the wing;
2 coats of primer and 3 coats of satin black;
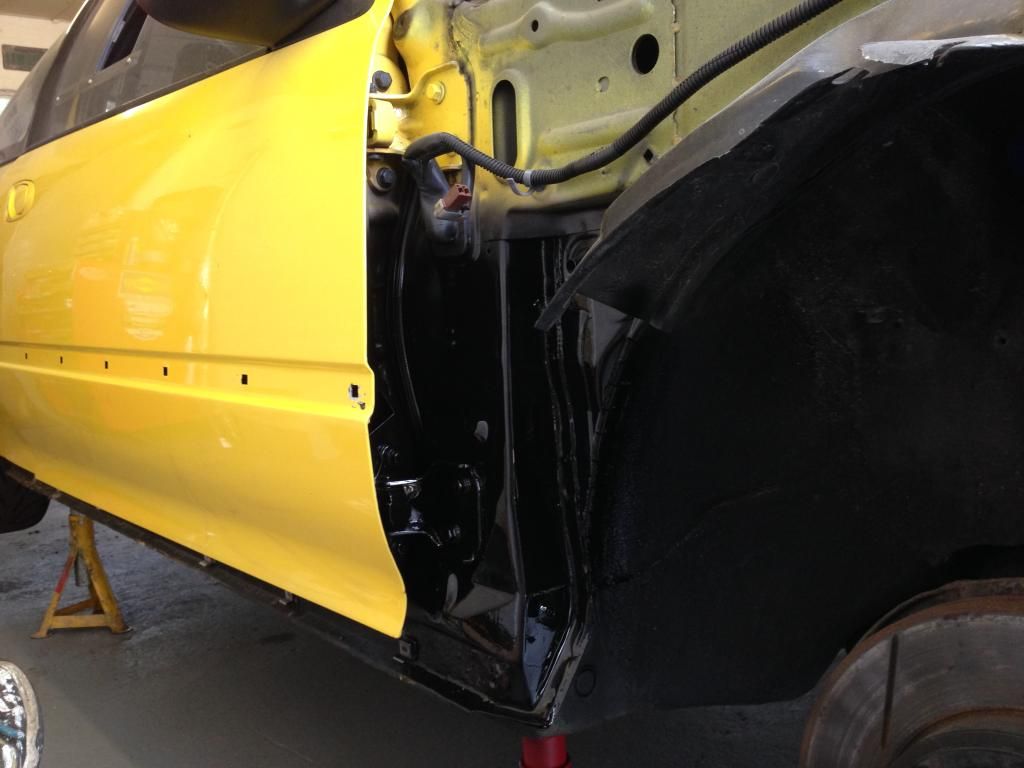
And jobs a fish!
Finding some inspiration Ive decided the only way to go for it is to do it properly. So I dropped all the suspension and am now part way through stripping off the underseal and everything back to bare metal. That way I can see what's what and start cutting out the bad metal and welding in new stuff. Gonna be a while...
I bought a pair of rear quarter panels so Ive traced out one side and cut it out. Needs a little tweaking to fit but the lines are pretty good. Ive chopped down the new panel some, no point replacing a load of metal that doesn't need it!

Then started the glorious job of taking out the underseal using a heat gun, wasn't too bad really;

This is half of it, guess it's all saving weight

This is where I'm up to so far, about half way through going back to bare metal. There's a lot of surface rust and some holes that will be tricky to shape metal to replace but over not the worst

Here's an idea of what I'm dealing with. After grinding out that area around the fuel filler a lot of large holes have appeared!

So feeling down with it all I decided to cheer myself up with some good old 'feel good jobs'. Catching some inspiration from a picture I saw of a Kanjo EK in Japan on facebook I decided to attack even more of my car with the grinder
The parachute rear bumper has been cut, I think it looks pretty purposeful and will hopefully help the air exit out the rear a little. May need to put some extra holes in whats left of the bumper;


And then went for the half wing job, a little more involving, I trimmed back the seam lip inside the arch as the 225's were rubbing a touch;

Had to make a custom bracket to hold what was left of the wing;

2 coats of primer and 3 coats of satin black;


And jobs a fish!


muhammadravat9
DOHC VTEC
- Joined
- Apr 7, 2014
- Messages
- 521
This is mean as hell! Cant wait till ur done and take full shots. This would look scary but so purposeful! Keep pics coming!
Bushell
Well-Known Member
- Joined
- Jun 15, 2013
- Messages
- 1,233
Hahaha what a build man, just had a quick look through and fair play to the amount of work, time and effort into this, pics of the car with the tanks was pretty cool. Must be brave to go so balls out on this, just hacking away **** all the time lol. Nice
NIcad7
EG6
- Joined
- Nov 19, 2011
- Messages
- 359
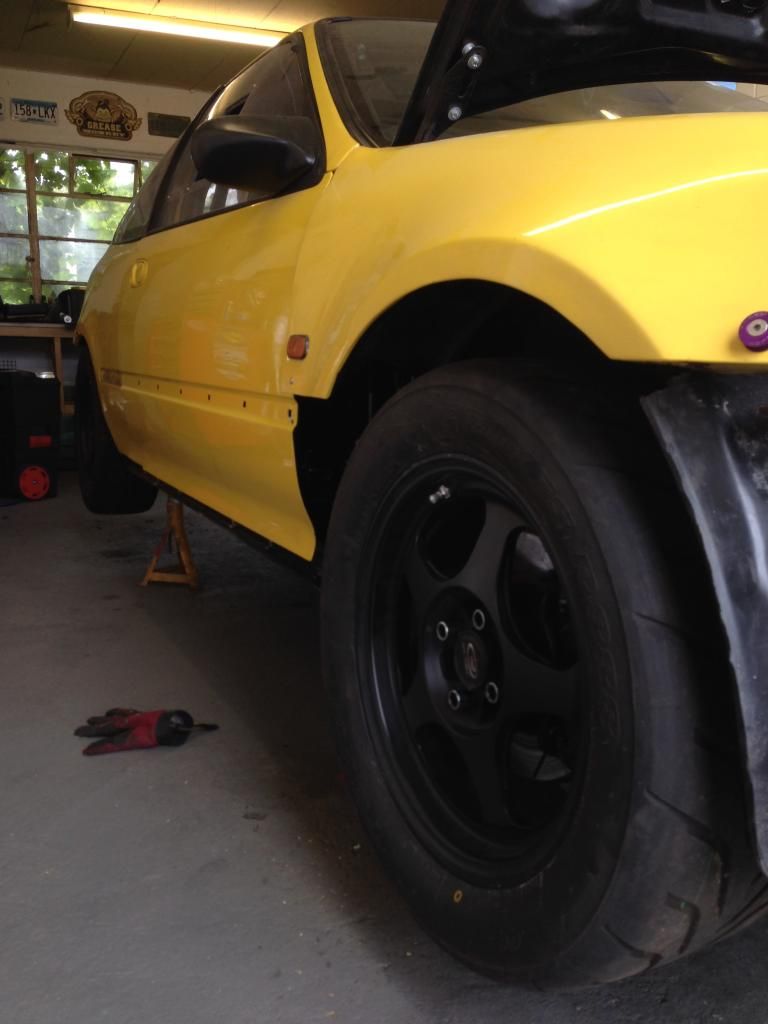
Can't wait to get the metal work finished up and sit it back on its wheels to take some proper shots with the wings etc.
Hopefully going to take Friday off and have a full weekend attacking it this weekend so maybe get an arch completed metal wise and I can move it out the garage for some hard parking shots
Hopefully going to take Friday off and have a full weekend attacking it this weekend so maybe get an arch completed metal wise and I can move it out the garage for some hard parking shots