1998 CIVIC


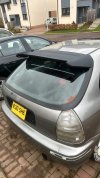
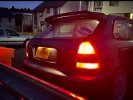
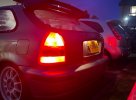
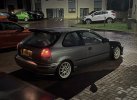
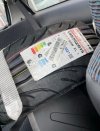
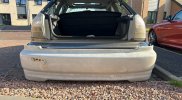
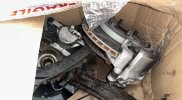
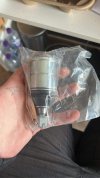
Next was fitting the bolts bolts jdm conversion at the rear ! Along with some very bright LED bulbs to really have it glowing no matter the light outside !

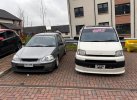
Had to do a little faffing about on the drivers side due to a missing wire from the bulb holder itself but we got it working!!! Was abit worried I would **** it right up and then worried that they wouldn’t go brighter with braking ! But it works very well and looks amazing, there’s the difference of how it was vs with the jdm and leds in now !
 

Attachments

  • IMG_4267.jpeg
    IMG_4267.jpeg
    1 MB · Views: 107
  • IMG_4268.jpeg
    IMG_4268.jpeg
    778.5 KB · Views: 105
  • IMG_4264.jpeg
    IMG_4264.jpeg
    695.9 KB · Views: 98
After this I bought some fatter rubber and opted for the NS2R

Bought tyre stencils from raving spirits (reusable) and sprayed them up

Probably change from NS2R eventually as it rains pretty often in Scotland but great tyre in the dry !

Had to adjust the height of my coilovers to allow the new rubber to not rub badly though
 

Attachments

  • IMG_4297.jpeg
    IMG_4297.jpeg
    1.5 MB · Views: 103
  • IMG_4295.jpeg
    IMG_4295.jpeg
    2.6 MB · Views: 110
  • IMG_4294.jpeg
    IMG_4294.jpeg
    1.2 MB · Views: 106
  • IMG_4293.jpeg
    IMG_4293.jpeg
    1.7 MB · Views: 102
Soon after I cut my rear plastics to fit in a tegiwa rear strut brace, and can confirm the baby’s pram still fits in the boot

Made a nice little difference for the handling when cornering with the rear
 

Attachments

  • IMG_4298.jpeg
    IMG_4298.jpeg
    1.2 MB · Views: 99
Purchased a new rear bumper without the mad trims on and a type r lip already fitted !

This won’t be going on till bodywork is being done and painted back to the same original colour of lighting metallic grey, will look great tho!
 

Attachments

  • IMG_4299.jpeg
    IMG_4299.jpeg
    932.6 KB · Views: 99
Oh I also forgot to add that in February 2023 i got a hold of a JDM B16A that I have plans on getting in the car at some stage after bodywork and ALOT of parts needing bought but it’s there and sitting in the house cupboard waiting for that glorious day ! I have the main piece to the swap !
 

Attachments

  • IMG_4300.jpeg
    IMG_4300.jpeg
    1.7 MB · Views: 99
  • IMG_4301.jpeg
    IMG_4301.jpeg
    1.2 MB · Views: 96
  • IMG_4302.jpeg
    IMG_4302.jpeg
    1.5 MB · Views: 96
Had to do a fix on the front sway bar as one of the drop links had broken, ended up being a grinder job with safety squints

Upgraded to hardened tegiwa drop links and this improved the stability up front quite abit
 

Attachments

  • IMG_4304.jpeg
    IMG_4304.jpeg
    1.3 MB · Views: 103
  • IMG_4303.jpeg
    IMG_4303.jpeg
    614.4 KB · Views: 97
  • IMG_4305.jpeg
    IMG_4305.jpeg
    2 MB · Views: 99
Soon after I got a cheeky little tax rebate in and ofc ! Spent some on parts

Bought myself some 262/282 hubs with everything included !
 

Attachments

  • IMG_4306.jpeg
    IMG_4306.jpeg
    1.9 MB · Views: 111
  • IMG_4307.jpeg
    IMG_4307.jpeg
    693.9 KB · Views: 96
After buying the 262 hubs I invested in some new wheel bearings for the hubs, as well as hardrace centre roll adjusters, hardrace track rod ends and new bilstein oem spec camber arms

All got fitted (with some issues lol) over a couple weekends then got the car alligned again making it drive amazingly

The difference in having new suspension/handling parts is unreal, especially being everything was old oem crap !
 

Attachments

  • IMG_4672.jpeg
    IMG_4672.jpeg
    426.7 KB · Views: 91
  • IMG_4673.jpeg
    IMG_4673.jpeg
    598.5 KB · Views: 83
Awesome mate. Looks good. I once swapped in a JDM B16A to my EG5, it was extremely gratifying when it was done.
 
Well now that it’s winter I’m keeping the civic off the salty roads and will be doing a small couple bits and maintenance where I can on it while it sits

In the mean time I did just buy a JDM Honda SMX as a daily driver, not the most beautiful car in the world but certainly quite cool

Practical for the 7 month old little dude I have at home and decent to drive back and forth to work as well as other activities!

Also will hit a naughty keybang
 

Attachments

  • IMG_5225.jpeg
    IMG_5225.jpeg
    1.2 MB · Views: 78
  • IMG_5226.jpeg
    IMG_5226.jpeg
    1.1 MB · Views: 82
  • IMG_5227.jpeg
    IMG_5227.jpeg
    1.3 MB · Views: 82
Not a tonne to update on the civic, not much been going on during winter, turned her over a few times and moved around to keep things running and not seized.

Took the rear seats/belts/boot carpet and parcel shelf out too at the start of January!

I have just got a Tenzo R valve cover for my b16a sitting from @Teggymun for my standard b16a valve cover, will find time to get that painted at some point. No rush as the bseries won’t be in for a while yet, priorities are elsewhere with the car.

Today i removed some stickers in aid of a sleeker look but also so I can fit a new rear window sticker, from Hiro Racing, much the same as @Teggymun ’s teg atm, I am also pushing for a more authentic “Osaka” style/ kanjo look.

Also bought some Japanese twirly bulbs for the top half of my rear taillights from a friend :) excited to see them in and working !

And a Japanese air fresher for the civic later again from @Teggymun

The main plan for now is start getting some service items in, book an mot for early April hopefully and make sure everything is mechanically sound still

After this I will be buying rear arches etc. and will get my brother to weld it up soon after hopefully (Handy)
 

Attachments

  • IMG_7433.jpeg
    IMG_7433.jpeg
    428.6 KB · Views: 39
Small update, had this rear bumper sitting for a good while now and I’ve sat on what to do with it for too long, got the civic booked for mot next week (fingers crossed) and I decided I want this bumper on soon after, so after some thought I decided **** it I’ll paint it myself and see how it goes, do like abit of DIY anyway and I can’t always pay someone to fix my **** up haha !

Anyway got to prepping, the first pic is before, very rough and full of scratches and marks, yuck! Middle is a little progress shot after hitting it with some 400grit dry to remove as much as possible and get it scuffed up

Third pic there is the final result of a couple hours work, did some passes of 400 grit dry, this smoothed majority of the imperfections, then moved onto a 800grit wet sand just to really make it smooth but still be scuffed up enough for some adhesion when I lay some primer down :)

Looks good imo

Gonna get some colour code matched paint made up this week and grab some clear as I have primer already and will attempt to make this look half decent, the whole car isn’t exactly “clean” anyway so what can go wrong ?!!

Updates will follow soon
 

Attachments

  • IMG_7668.jpeg
    IMG_7668.jpeg
    1.4 MB · Views: 29
  • IMG_7666.jpeg
    IMG_7666.jpeg
    1.3 MB · Views: 29
  • IMG_7667.jpeg
    IMG_7667.jpeg
    997.6 KB · Views: 27
Back
Top