B16A rebuild project


ek4 hatchback

Active Member
Joined
Oct 28, 2008
Messages
357
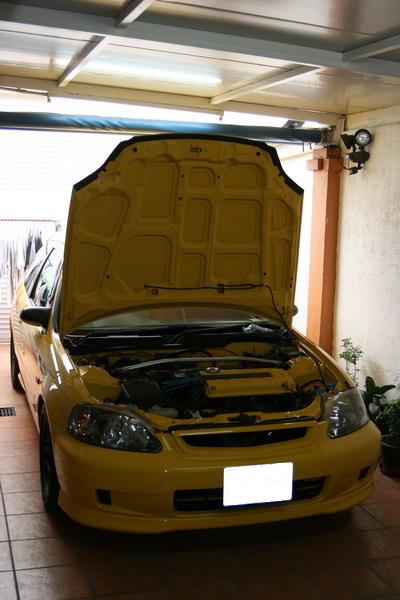
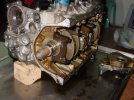
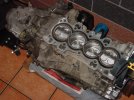
Start my long awaited engine rebuild. I am doing the job with hand tools only and working alone. But when i need an extra hand i would call my friend to come and help.

This is the first time i rebuild an engine so i will learn as i work through. I have a Honda service manual on hand and some mechanic friends that i can ask. So i hope i won't screw up anything!!

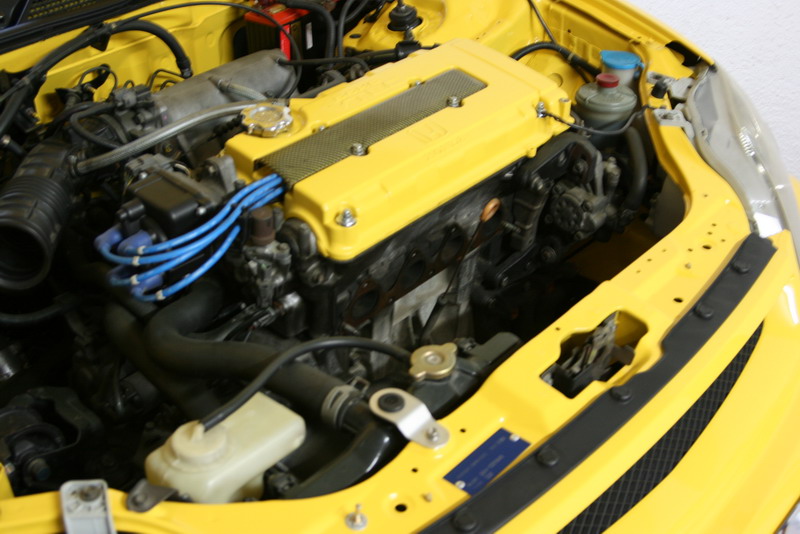
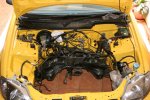
I work very careful in my fresh painted engine bay (painted last year).

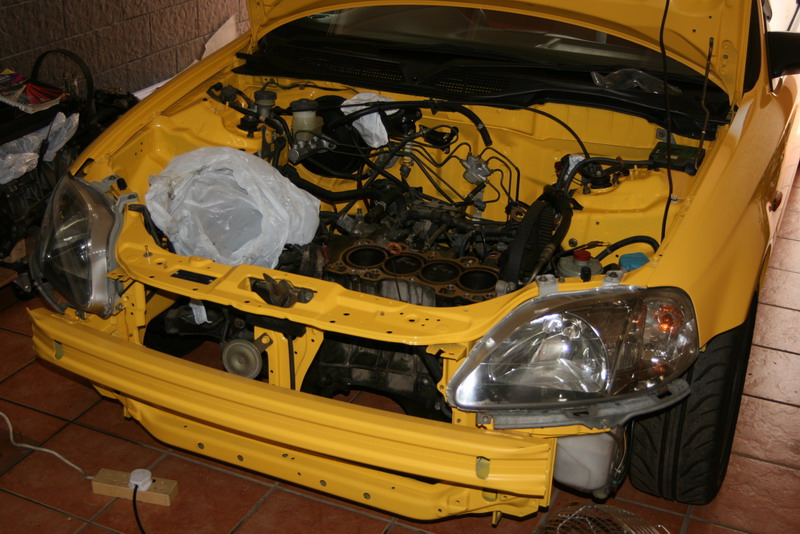
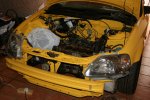
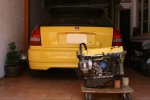
Starting by pull out my EK4 from storage,
9269d1272210322-out-4-months-storage-img_8822.jpg


Remove the header,
9264d1272208913-out-4-months-storage-img_8848.jpg


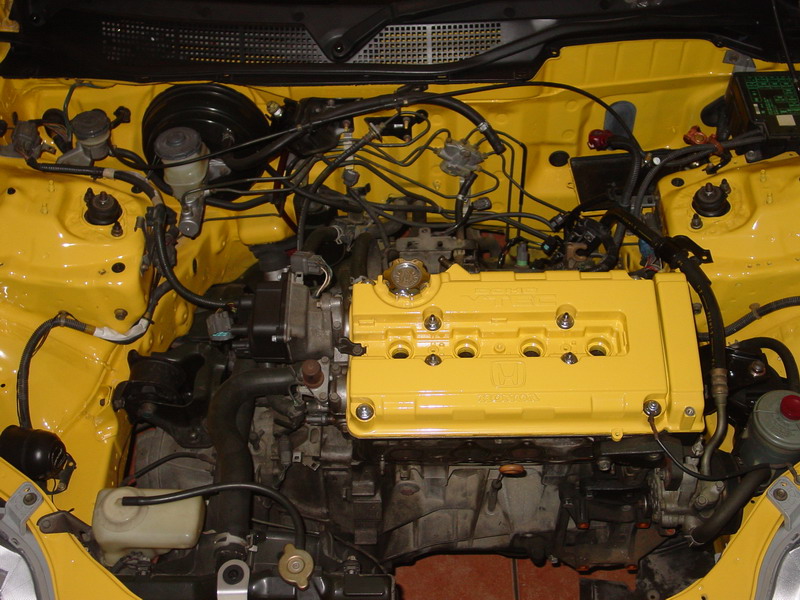
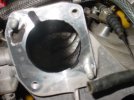
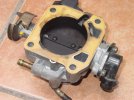
Remove the intake manifold, yes i did remove the monifold from above. It just take some patient and time to remove it. Also be very careful about the fuel line.
attachment.php


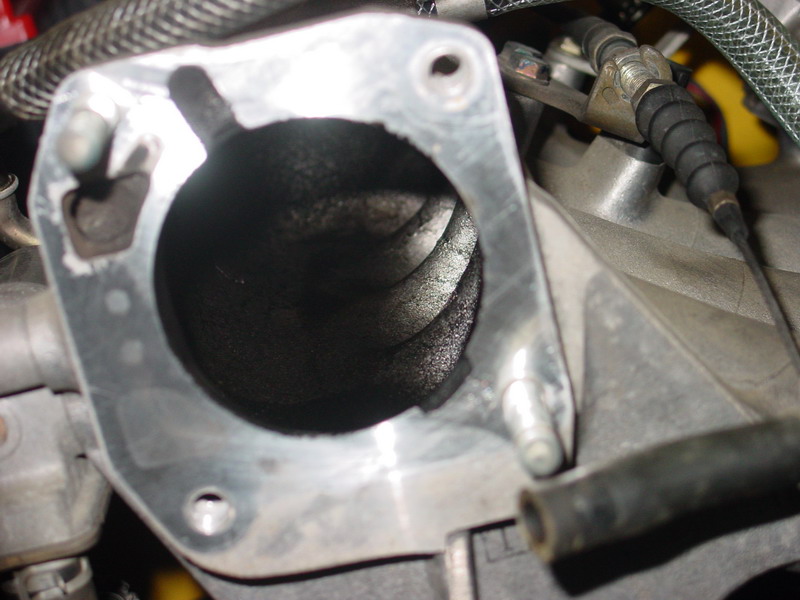
The oil built up very badly within the intake, it is due a bad PVC,
attachment.php

attachment.php

attachment.php


Loosen all the suspension bolts include the big axle nut so it get ready to remove the drive axles
attachment.php


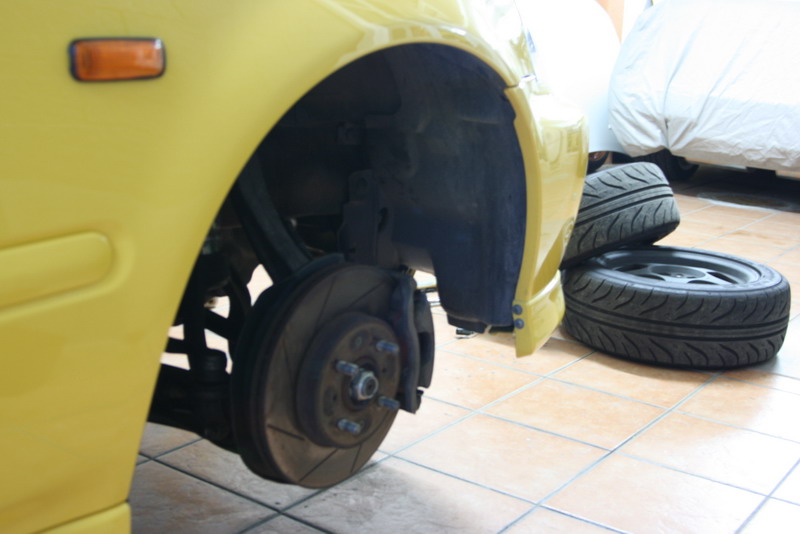
Also drain out all the fluid include tranny oil, engine oil and coolant.

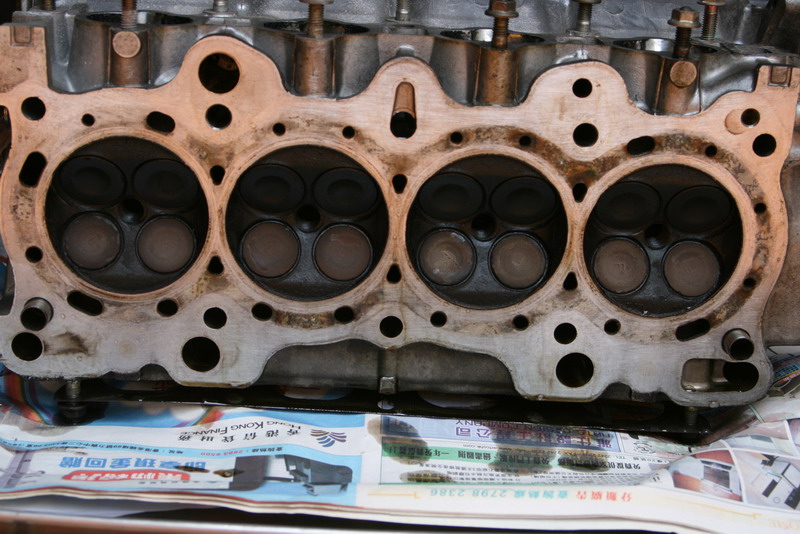
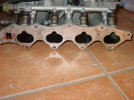
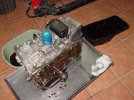
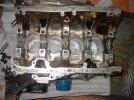
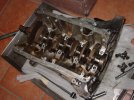
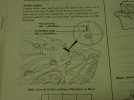
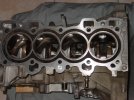
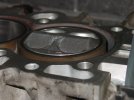
Remove the cylinder head bolts in sequence, the oil built up is very bad in the exhaust side ports
attachment.php

attachment.php

attachment.php


That is for now.....more to come!!
 

Attachments

  • $DSC02698.JPG
    $DSC02698.JPG
    167.7 KB · Views: 10,604
  • $DSC02672.JPG
    $DSC02672.JPG
    111 KB · Views: 10,113
  • $DSC02677.JPG
    $DSC02677.JPG
    132.5 KB · Views: 10,173
  • $DSC02680.JPG
    $DSC02680.JPG
    162.9 KB · Views: 10,241
  • $IMG_8851.JPG
    $IMG_8851.JPG
    86 KB · Views: 9,947
  • $IMG_8864.JPG
    $IMG_8864.JPG
    155.5 KB · Views: 10,746
  • $IMG_8884.JPG
    $IMG_8884.JPG
    176.1 KB · Views: 10,682
  • $IMG_8890.JPG
    $IMG_8890.JPG
    153 KB · Views: 9,817
cool, look forward 2 reading more as i will be rebuilding a b16 next year. Keep it nice and detailed for me lol
 
Took out the engine by dropping it on a creeper, then jack up the car just high enough to move the engine out on the side (in this case on driver side).

attachment.php

attachment.php

attachment.php


Not a scratch in the engine bay!!
 

Attachments

  • $IMG_8905.JPG
    $IMG_8905.JPG
    173 KB · Views: 10,179
  • $IMG_8894.JPG
    $IMG_8894.JPG
    61.4 KB · Views: 9,639
  • $IMG_8918.JPG
    $IMG_8918.JPG
    125.9 KB · Views: 9,661
Last edited:
Started to disassemble the engine block last night,

Try not to drop any oil on the floor.........looks like i didn't do a very good maintenance
attachment.php

attachment.php


Remove the oil pump,
attachment.php


Pistons out,
attachment.php


Crankshaft ready to be remove, no scratch on the journals
attachment.php


Bare block, ready to get bore to 81.25mm
attachment.php
 

Attachments

  • $DSC02767.JPG
    $DSC02767.JPG
    168 KB · Views: 9,519
  • $DSC02773.JPG
    $DSC02773.JPG
    154.9 KB · Views: 9,578
  • $DSC02785.JPG
    $DSC02785.JPG
    156.9 KB · Views: 10,337
  • $DSC02791.JPG
    $DSC02791.JPG
    206.4 KB · Views: 9,444
  • $DSC02805.JPG
    $DSC02805.JPG
    167.1 KB · Views: 9,643
  • $DSC02804.JPG
    $DSC02804.JPG
    171.6 KB · Views: 9,639
Last edited:
Oh i forgot to mention, all the parts that removed from the block must be marked. Especial the rods and bearing.

Tonight i am trying to figure out what bearing size for connecting rods and crankshaft. The bearing colour is still viewable from the engine but some of it discoloured. So i am not quite sure.

From the service manual it mentioned about marking on the block and crankshaft to identify the size of the bearing for both connecting rods and crankshaft.

For crankshaft bearing,
attachment.php

attachment.php


For connecting rod bearing,
attachment.php

attachment.php


This my engine bearing size,
attachment.php


The colour that i see from the bearing that removed is almost same as what the numbering on the block and crankshaft except the crankshaft number 3. I think i will trust on marking on the block and crankshaft.......Now i can go order the bearing!!
 

Attachments

  • $DSC02819.JPG
    $DSC02819.JPG
    114.2 KB · Views: 9,642
  • $DSC02818.JPG
    $DSC02818.JPG
    108.7 KB · Views: 10,057
  • $DSC02820.JPG
    $DSC02820.JPG
    106.8 KB · Views: 9,404
  • $DSC02821.JPG
    $DSC02821.JPG
    108.1 KB · Views: 11,038
  • $DSC02814.JPG
    $DSC02814.JPG
    85.9 KB · Views: 9,308
Love the progress mate, keep at it.

Are you honing the block yourself? Or did i read your boring it out?
 
Love the progress mate, keep at it.

Are you honing the block yourself? Or did i read your boring it out?

Thanks!!

No, i am not. I will send the block to the machine shop and let them do the bore and hone. I am installing a set of oversize CTR pistons (81.25mm) in my B16A.
 
Thanks!!

No, i am not. I will send the block to the machine shop and let them do the bore and hone. I am installing a set of oversize CTR pistons (81.25mm) in my B16A.

Sounds good using standard crank/rods?

What compression ration does that give out?

Doing any head work like cams valves/springs?

And any torque/horsepower guesstimate?
 
Sounds good using standard crank/rods?

What compression ration does that give out?

Doing any head work like cams valves/springs?

And any torque/horsepower guesstimate?

I will use the stock rod since i don't plan to rev it high (max 8600-8800rpm).

From various compression calculator, the cr shall be about 11.1cr.

No head work, i am swapping in a complete ITR head. The valve seal will be replace before putting back on the car.

I am not sure about the horsepower, i would be happy with 170 whp. I will get the car dyno tune with Apex Power FC..........
 
hey i recently bought an ek9 and i want sum advise. what would be the best engine swap to make B16a , B18c5, or B16/20. but i want 3oowhp Naturally. What would i need to accomplish this project?
 
Got alot of new parts, Genuine Honda parts only!!

- Oil pump
- Water pump
- Timing belt tensioner
- New style LMA x 8 (it will be alot more quiet, no more tick tick sound)
- +0.25 piston rings x 4
- Crankshaft bearing x 8
- Connecting rod bearing x 2
- Upper gasket kit
- Lower gasket kit

attachment.php


I am still waiting for the other 6 connecting rod bearing (brown colour). It is out of stock here in HK, i am ordering it from the US and it has been a week already.

I have the block bored to 81.25mm and hone. Also the CTR pistons installed on the B16A connecting rod.

attachment.php


I am worry about the machine work, i told the shop to label the piston for each cylinder but they didn't and said it is pretty much the same size. Hopefully it will be ok.
 

Attachments

  • $DSC02845.JPG
    $DSC02845.JPG
    160 KB · Views: 9,229
  • $DSC02848.JPG
    $DSC02848.JPG
    125.9 KB · Views: 10,252
From various compression calculator, the cr shall be about 11.1cr.

Well over that, would be around 11.1:1 CR not taking into account the difference in compression height.

In the end, 12:1 will be the result, you will need a remap.
 
Last edited:
Well over that, would be around 11.1:1 CR not taking into account the difference in compression height.

In the end, 12:1 will be the result, you will need a remap.

Thanks for the advise. I notice that the CR shall be higher than my original quote but i will have my car dyno tune with Apex's Power FC. Hopefully it shall turn out ok.
 
Finally the six connecting rods bearing arrived after almost a month of waiting........

attachment.php


Just got my oil pan back, i have someone welded the Tegiwa oil SUMP BAFFLE baffled kit. It looks good!!

attachment.php


Started to put the engine back together, i have all new crank bearing installed, crank back into the block and torque those bolts to factory spec (76 Nm for B16A)

attachment.php


I am hoping to have the block finish this weekend. So i can start put it back to the car.
 

Attachments

  • $DSC02861.JPG
    $DSC02861.JPG
    123.4 KB · Views: 11,110
  • $DSC02870.JPG
    $DSC02870.JPG
    186.9 KB · Views: 13,318
  • $DSC02867.JPG
    $DSC02867.JPG
    128.7 KB · Views: 8,135
Here is the block,

attachment.php


Pistons installed,
attachment.php


CTR piston stick out little bit,
attachment.php


Bolts back the transmission, waiting to put it back into the car,
attachment.php


But i ran into problem with the lower timing belt cover not fit, i ordered the wrong oil pump from the US. So now i have to get a new lower timing belt cover.
 

Attachments

  • $DSC02877.JPG
    $DSC02877.JPG
    173.8 KB · Views: 8,558
  • $DSC02886.JPG
    $DSC02886.JPG
    172.3 KB · Views: 8,485
  • $DSC02883.JPG
    $DSC02883.JPG
    113.3 KB · Views: 9,012
  • $DSC02882.JPG
    $DSC02882.JPG
    171.8 KB · Views: 8,503
The compression height on the CTR pistons is 0.73mm more than b16a, which will put it around 0.2mm higher than the b16a block (You could measure this with a DTI to get accurate figure). Ideally you need 1mm piston to head clearance. 3 layer gasket is approx 0.7mm, so be carefull. :nerv: 
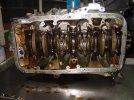
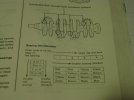
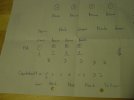
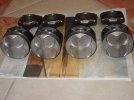
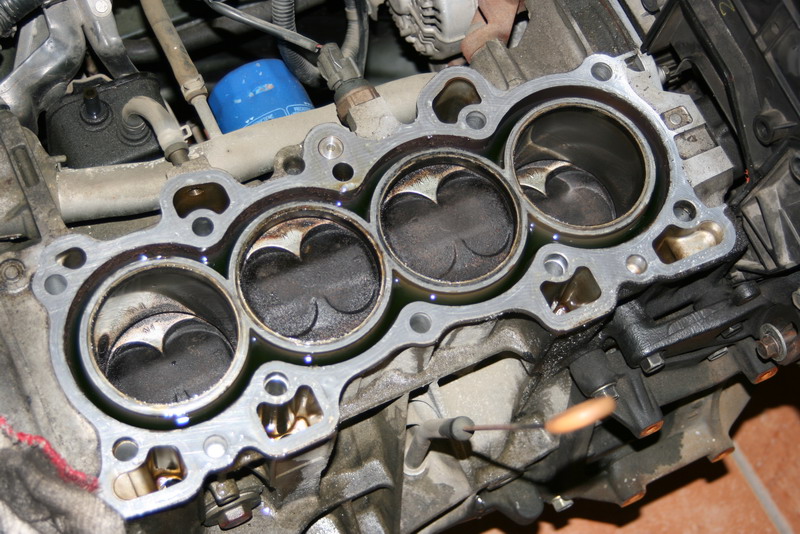
Ideally you need to clay the engine, as i think your geting tight on your tolerances! I think your CR with these pistons alone in the b16a will be around the 12:1 mark. I think a critical measurement will be the head face to chamber contact measurment.

Is this a common mod for the b16a?
 
Last edited:
Back
Top