
You are using an out of date browser. It may not display this or other websites correctly.
You should upgrade or use an alternative browser.
You should upgrade or use an alternative browser.
My slow but sure EK4 build up!
- Thread starter tedman
- Start date

Eh, thanks, i think lol!

Cheers man! To be honest i read books on this and really fromiliarised myself with the engine before touching anthing. Its best to know how it works, so you can see why something is designed a certain way to do its particular job.
I haver never built an engine before so its a learnig experience too, but my uncke builds bike engines every now and again, has about 25 years experience at it so its always handy to just ask him if there is anything i'm unsure of.
Here's alink to the book i bought for doing this build:
How to Rebuild Honda B-Series Engines: Civic, Integra, CRX, Prelude, del Sol - 9781932494785
Although tis book is really good for mechanical tips and hints, it dosen't have torque settings for bolts so i also have a HAYNES manual for this info.
Anyway, today's update:
Put the head gasket and dowels on, ready for the head to go on

Started to replace the main crank seal:

Main crank seal on, note nice wee bead of hondabond around it:


Put the head on, and torqued it into place:

Next i put on my Fidanza flywheel and exedy clutch:

As my engine sits now, forgot a wee box of bits and pieces at home so will install the cams and finish it all off tomorrow all going well:


Comments and criticism welcome...
how did ye clean ur pistons mate
how did ye clean ur pistons mate
Gunk, then a wipe with a grey scotch pad to finish it off....


darek
New Member
- Joined
- Jun 16, 2009
- Messages
- 129
Great rebuild! Lots of work out there! I like how it sits on that oem ek9 suspension. I hope i will soon buy one set for my ek4, I had the koni's and they were shitty, also the stock ek4 suspension is a bit to soft. I am pretty sure the ek9 susp. set will make a difference, dont really want the coilovers since I dont attend trackdays often.
obiek
New Member
- Joined
- Dec 19, 2009
- Messages
- 185
really really impressed with the information on this build up thread. Very very thorough. Thanks for taking the time out to share
x2...
Jokeshopbeard
VTEC Addict!
- Joined
- Feb 18, 2008
- Messages
- 2,321
Just read through your whole build mate, absolutely love the trick little bits you've done, your attention to detail, and the way you've documented everything!!
I take my hat off to you sir!
Have a few bits I've seen here planned for my '9, so the pics have been a massive help in identifying the methods I'll use. WRT the rocker cover, would you mind going into a touch more detail as to the sanding? Like grades used, machine/by hand, etc? Had in my head for ages that I wanna do my cover like that but haven't seen one done. Would be much appreciated.
Thanks a lot mate!!
Just read through your whole build mate, absolutely love the trick little bits you've done, your attention to detail, and the way you've documented everything!!
I take my hat off to you sir!
Have a few bits I've seen here planned for my '9, so the pics have been a massive help in identifying the methods I'll use. WRT the rocker cover, would you mind going into a touch more detail as to the sanding? Like grades used, machine/by hand, etc? Had in my head for ages that I wanna do my cover like that but haven't seen one done. Would be much appreciated.
Thanks a lot mate!!
Thanks man! Nice to a be inspiration to someone!
I'm doing the lot myself so its slow work but i can be assured its done RIGHT lol!
As for the rocker cover, i can't remember the grades of paper i used, but it was pretty fine, getting finer and finer.
Start off with the paint stripper,
Next sand and sand and sand! It took me about a full day to get it smooth enough (and blistered fingertips!)
Then with a wet Brillo pad, get it into all the nooks and crannies and once everything is as smooth as you can get it, take it to a workshop and they should buff it up for you.
My uncle has one for polishing the V-rod so i used that. An hour or 2 with that and it will be sparkling! But it will need re polished a few times a year to keep it in this condition, but this dosen't take long.
HTH man!
Clean!
Thanks man, its all in the prep!
farplay to ye man nice work Nice!
Cheers fella!
Great rebuild! Lots of work out there! I like how it sits on that oem ek9 suspension. I hope i will soon buy one set for my ek4, I had the koni's and they were shitty, also the stock ek4 suspension is a bit to soft. I am pretty sure the ek9 susp. set will make a difference, dont really want the coilovers since I dont attend trackdays often.
Thanks lad, yea definetly the best value mod for the EK4! It was only â¬100 and it TRANSFORMED the car!
really really impressed with the information on this build up thread. Very very thorough. Thanks for taking the time out to share
really really impressed with the information on this build up thread. Very very thorough. Thanks for taking the time out to share
Thanks man, i try to get pics of everything i do to it, i have LOADS more but i only post a few on here, the best ones! Cheers!
I love the pod your going to be using
will look amazin When it's done
love this thread mate !!
Thanks dude! Still not sure of the gauge pod but i'm sure i'll grow to love it in time!
fantastic build thread, piecing mine together now on EG6 and this is givin inspiration to keep going (3 years is a long time)!!
quick question, what did you use to spray the inlet mani? looks factory!
Lol! I thought i was taking too long! The months seem to just morph together!
Keep on it dude, send us a linky!
As for the spray, its just halford's own brand aerosol Hi-temp aluminium paint. In 300ml can. Handy size and has a good clog free nozzle, and covers really well.
Linky:
Halfords Very High Temperature Paint Aluminium 300ml from Halfords Price £5.99
HTH dude....

Last update was not right so here's the revised version!
Update again!
I was off work today and got a few bits and pieces done.
Firstly i done a bit of work on the inside. Currently looks like this now.

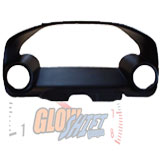
Started routing in the cables that will connect up my gauges. I'm going to put them in one of these pods:
So i have the cables routed as so:

Because i've got an EK9 heater surround, i'll not be using my clock wiring anymore, so this is perfect for connecting up my gauges to...

Here's what its hiding behind, my Apexi NEO, i'll be making another DIN surround for this because those little grinder nicks on the right are doing my head in!

Then onto the radiator supports. I measured it up, centre to centre measured out the hole centres for the supports. Looks like this now:
These will be all cleaned down, and welded up in place when i borrow a welder!
The front bar is currently covered in Waxoyl to prevent rust so that will be cleaned off, sanded down and then re-weld the rad brackets in place.
But here's how it looks just now...


Also started working on the wiring going to the battery. The battery will be mounted in the boot and i want it to look as 'original honda' as possible! Here's just a sneaky peek!

A few pics of my new Cusco brace for the rear:

And finally, finished stripping the bay of all the bits and pieces, getting it ready for paint!


More to come soon!
Update again!
I was off work today and got a few bits and pieces done.
Firstly i done a bit of work on the inside. Currently looks like this now.
Started routing in the cables that will connect up my gauges. I'm going to put them in one of these pods:
So i have the cables routed as so:
Because i've got an EK9 heater surround, i'll not be using my clock wiring anymore, so this is perfect for connecting up my gauges to...
Here's what its hiding behind, my Apexi NEO, i'll be making another DIN surround for this because those little grinder nicks on the right are doing my head in!
Then onto the radiator supports. I measured it up, centre to centre measured out the hole centres for the supports. Looks like this now:
These will be all cleaned down, and welded up in place when i borrow a welder!
The front bar is currently covered in Waxoyl to prevent rust so that will be cleaned off, sanded down and then re-weld the rad brackets in place.
But here's how it looks just now...
Also started working on the wiring going to the battery. The battery will be mounted in the boot and i want it to look as 'original honda' as possible! Here's just a sneaky peek!
A few pics of my new Cusco brace for the rear:
And finally, finished stripping the bay of all the bits and pieces, getting it ready for paint!
More to come soon!
Another small thing! As i'm relocating my battery to the boot, i had to make up some thing to mount the battery to and to keep it secure.
Looked on the net for ideas and whatever and ended up doing my own thing.
For this i had to mutilate my standard battery, tray but it will all be good! Drilled out the mounting support spot welds. Smoothed them off. Cut the half circle shape'd mount off, but i will probably just re-weld this section in made from flat plate section but not sure what i'll do yet.
Again, here's another teaser....
")


