
You are using an out of date browser. It may not display this or other websites correctly.
You should upgrade or use an alternative browser.
You should upgrade or use an alternative browser.
My Milano Red EK4 Project
- Thread starter VTEC-334
- Start date
VTEC-334
Member
- Joined
- Jul 19, 2011
- Messages
- 480
Ye sorry been busy lately and haven't got round to updating this but just about to up load some more pictures now.Any more update on this
Thanks mateBeast of a job from pops there! looking good mate, keep it up.

VTEC-334
Member
- Joined
- Jul 19, 2011
- Messages
- 480
OVER DUE UPDATE
Sorry people been abit tardy with keeping this updated but im here to make amends now.
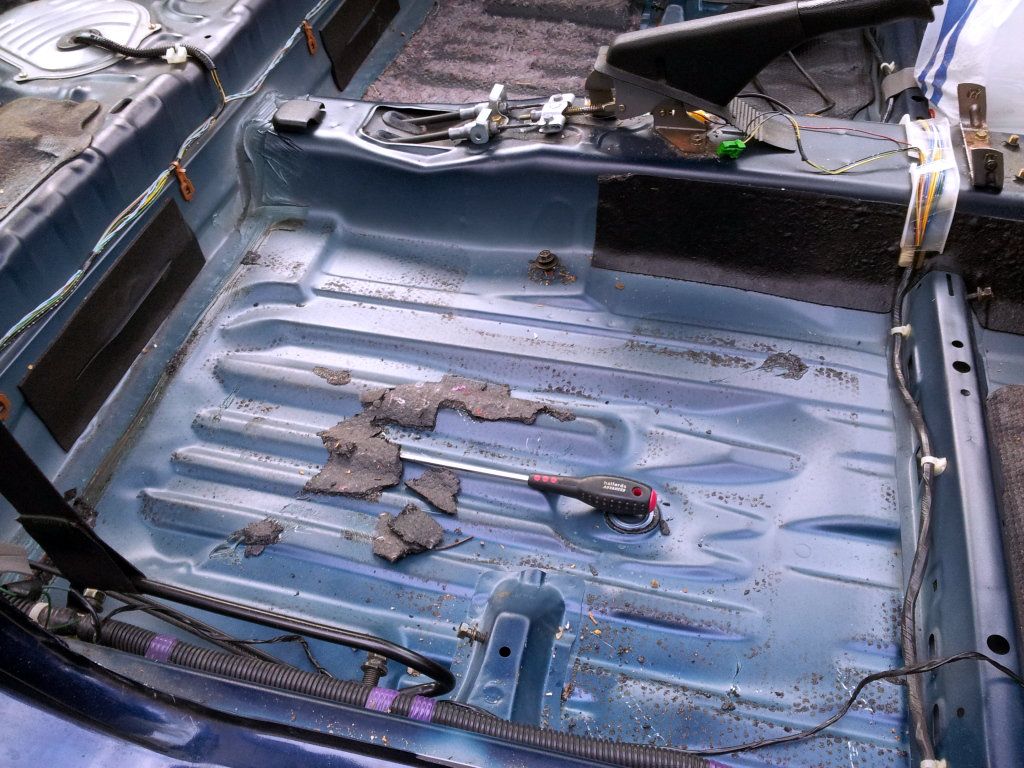
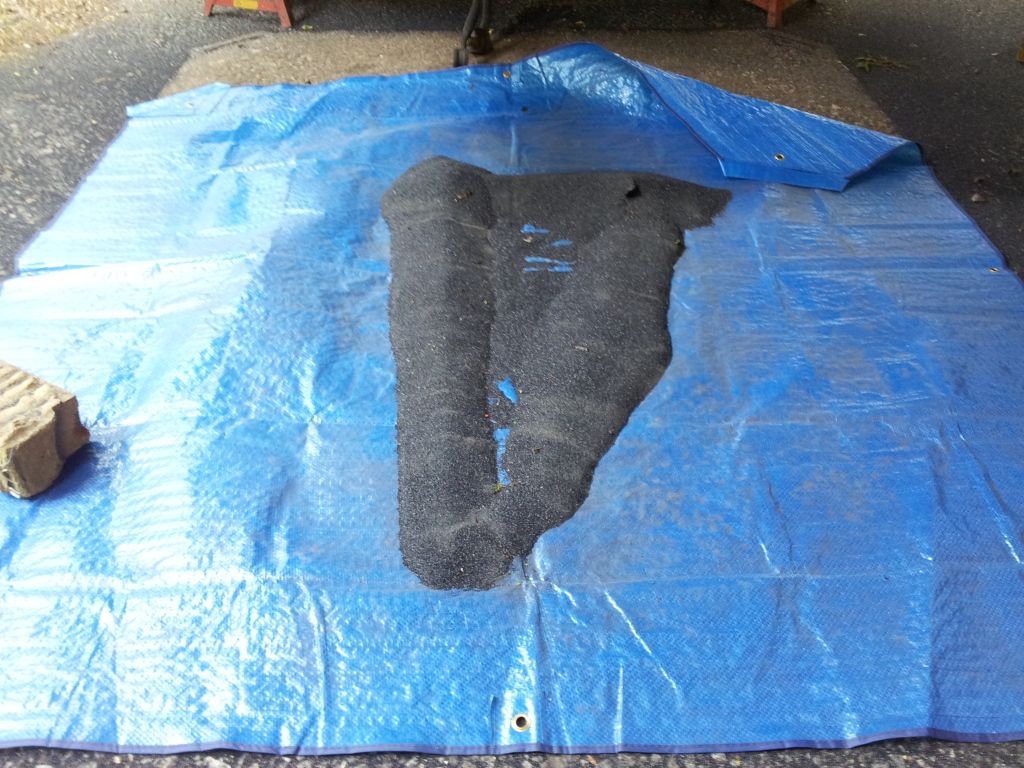
Few weeks back i started with the s**t job of removing the sounds deading, Have almost finished doing it now just one more panel and a bit of cleaning to do and i will be rid of that job.
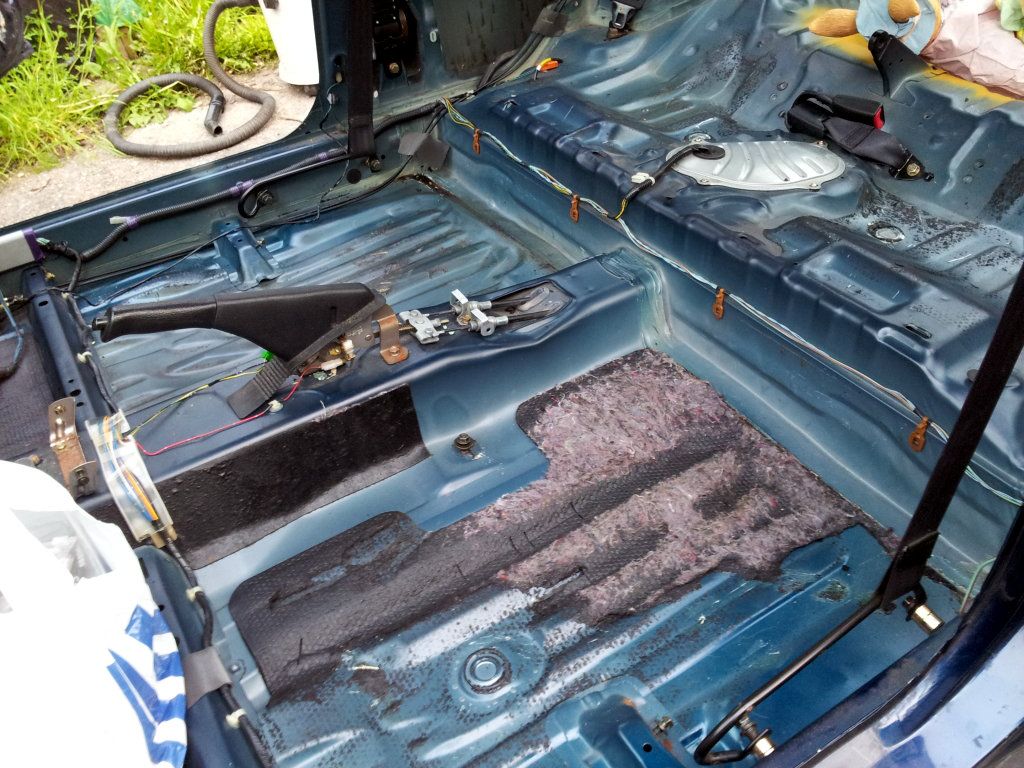
To be honest though it wasn't as bad as i thought and most of it pulled up in big sheets then the rest of came up with a bit of persuasion.
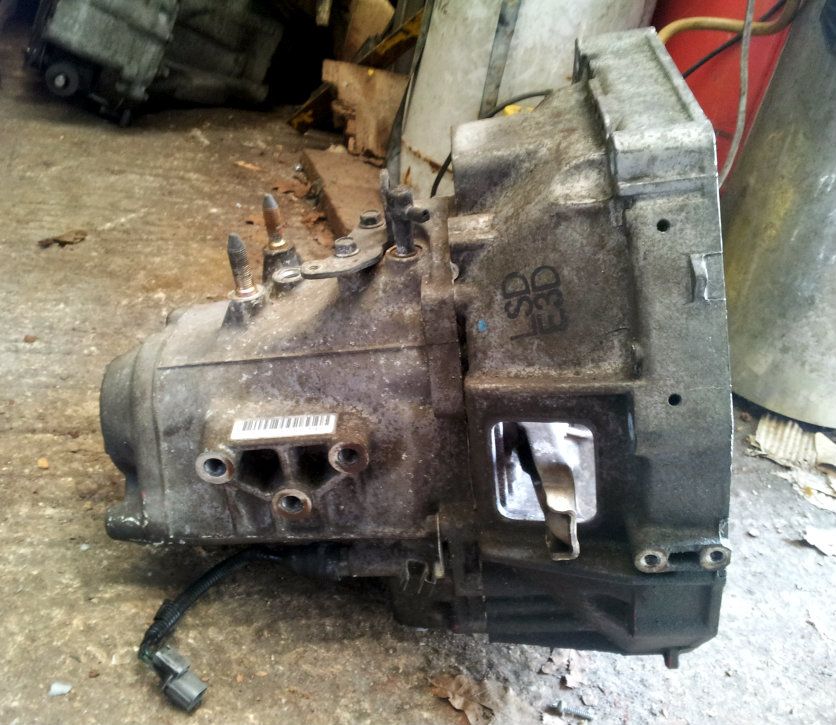
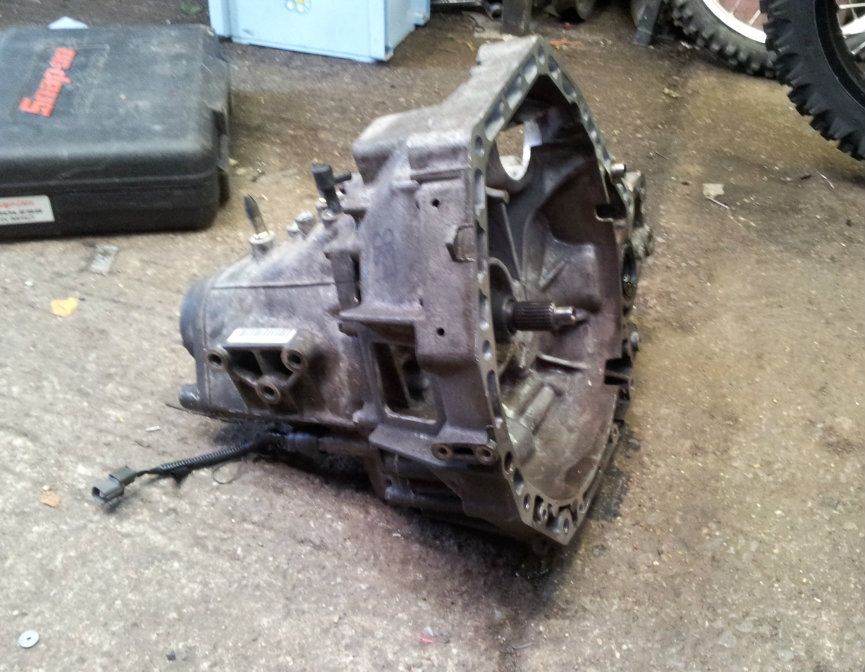
Also thanks to Rosey ej9 went down and picked up this UKDM ITR S80 box with 4.7FD and OEM LSD, Plan with this is to strip it and my s4c box down and swap the shorter 4th and 5th ratio out of my s4c box into the s80 box there for creating the shortest ratio box you can make out OEM parts.
Now jump forward to this weekend.
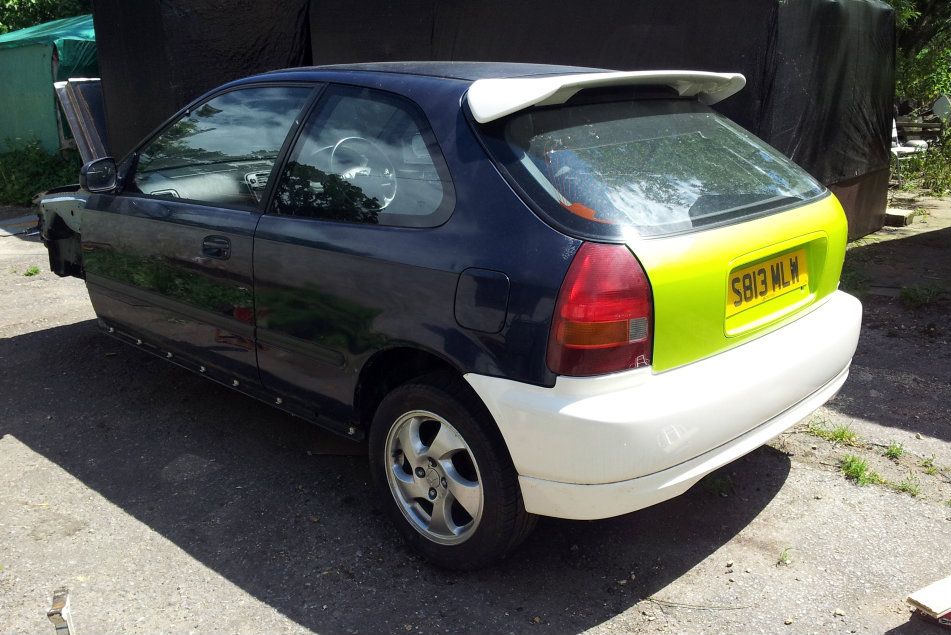
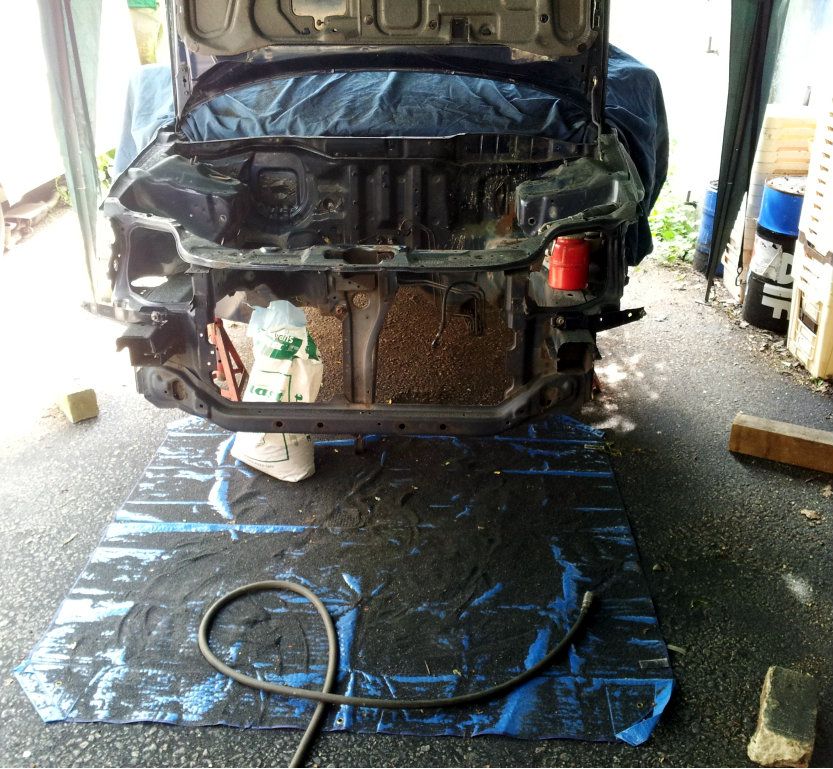
Started by lowering the car onto the wooden trolley so i can move it up the yard closer to the garages.
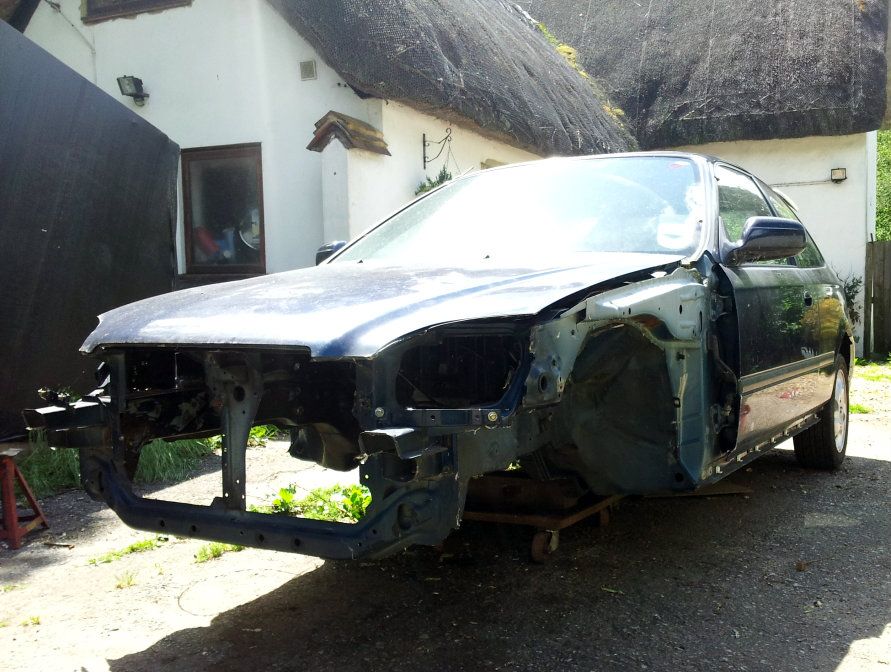
Looks normal from the back at least
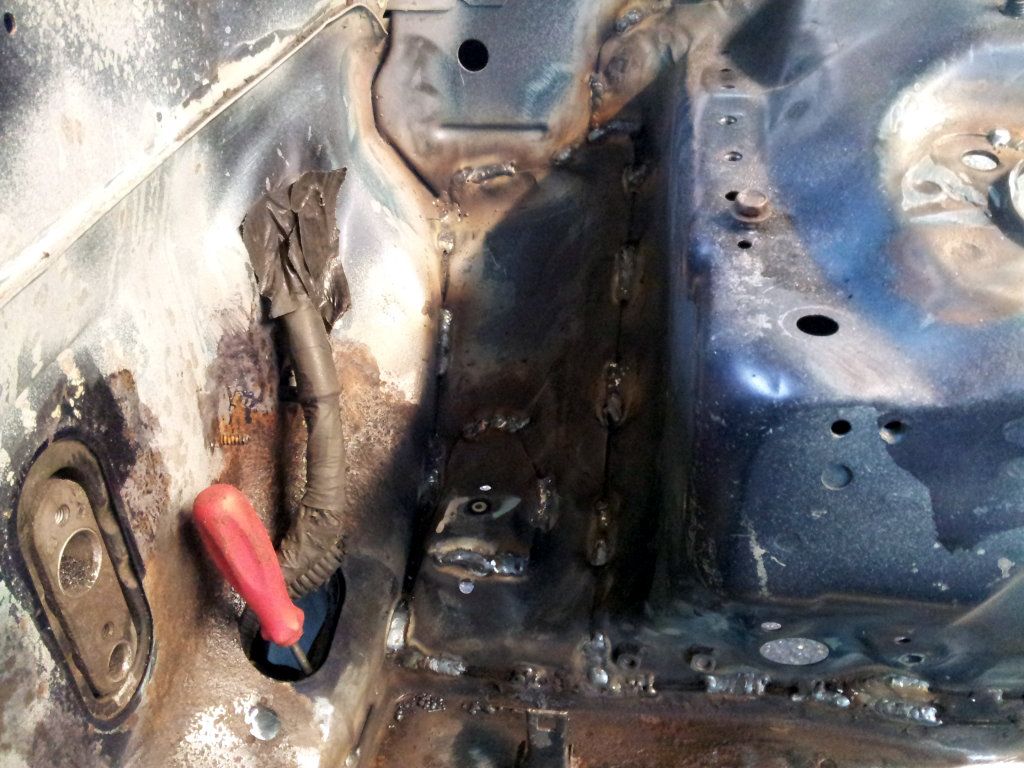
Now the big job start prepping the engine bay. Luckily i have use of a shot blaster which i can connect to the airline.
Started going over the joins where the seam sealer used to be.
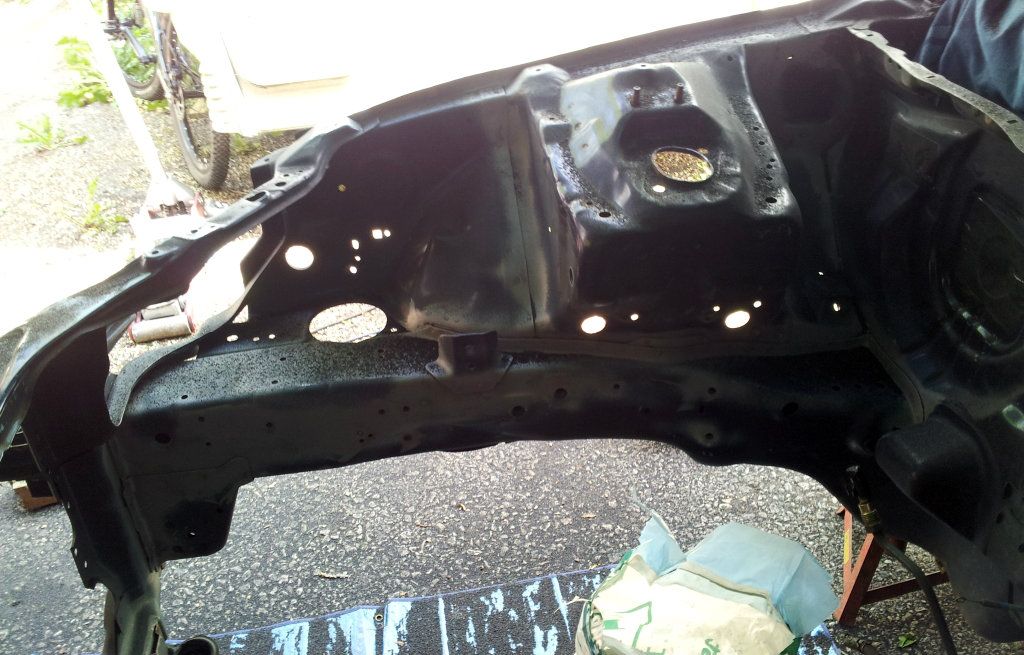
Then started doing the major bits of rust.

Is a messy tool but my god its good and saves a lot of time and effort.
The best bit is you can sweep all the shot into a pile and put it back in
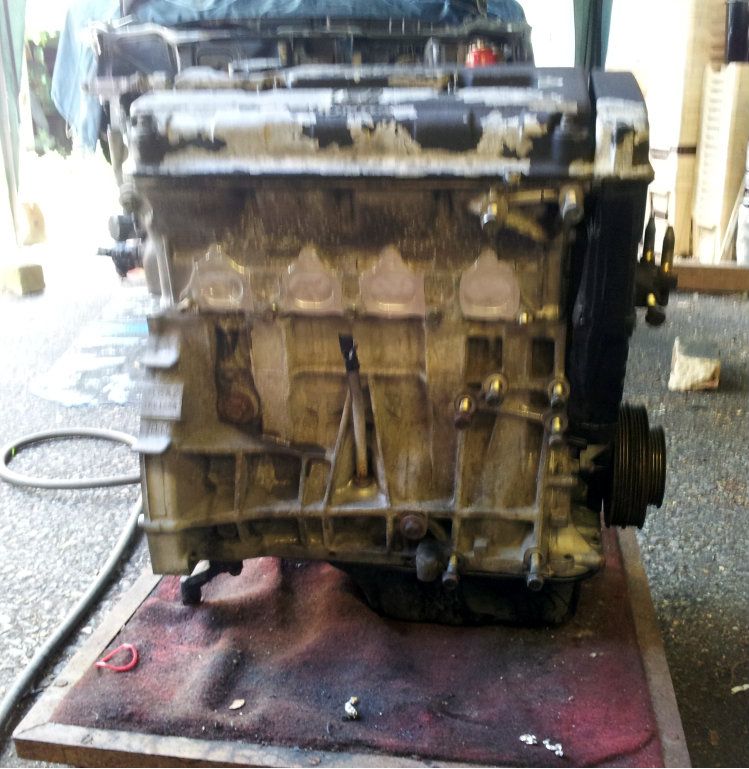
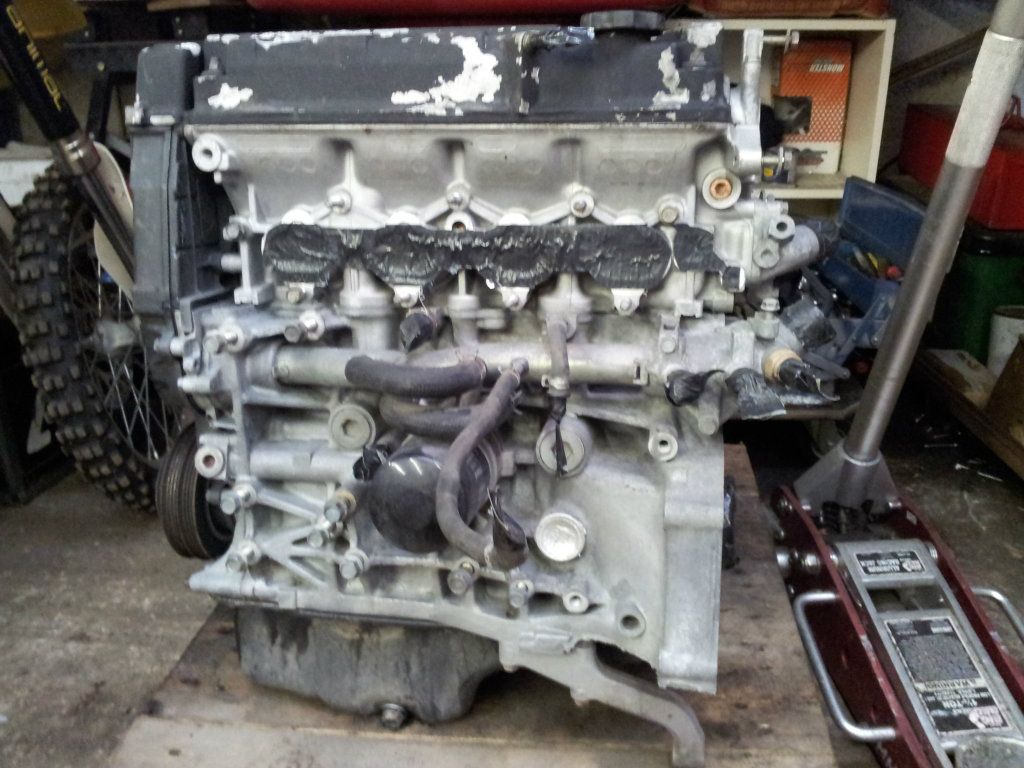
Then gave the engine block a blast over ready for me to paint it.
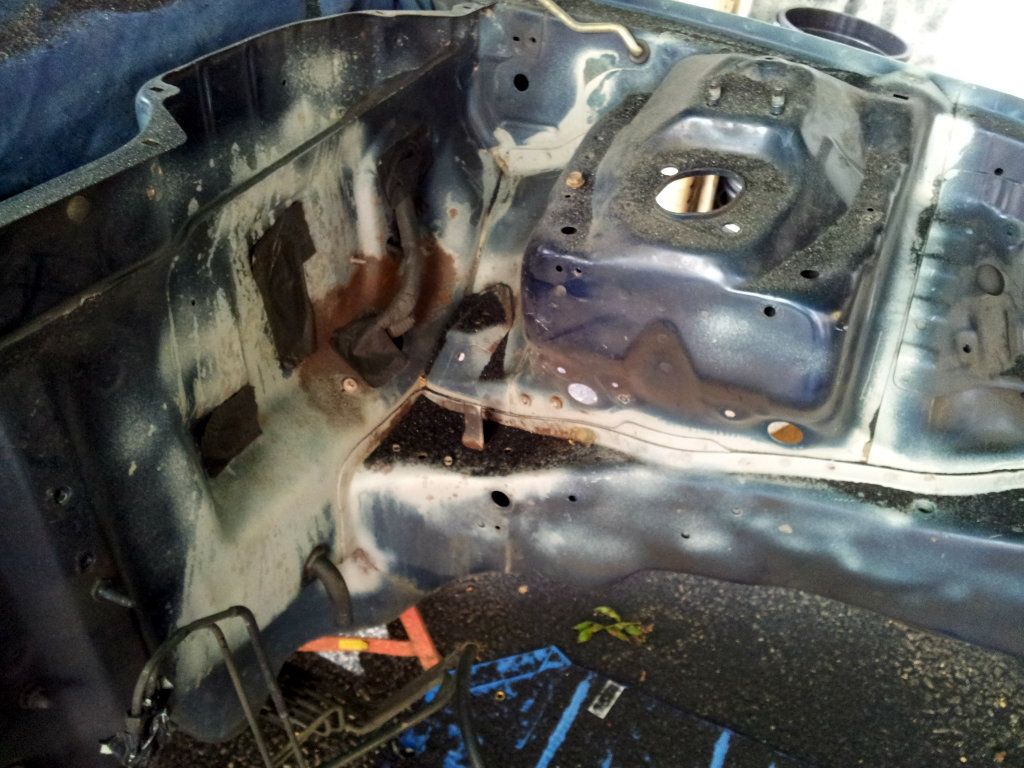
Before
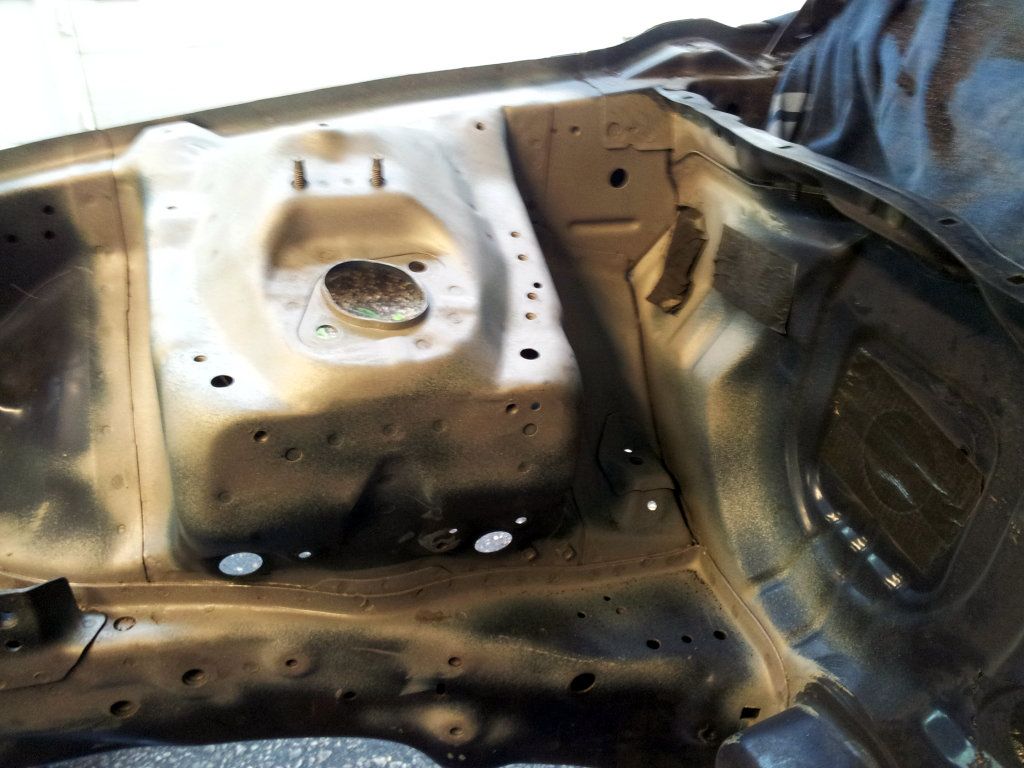
After (I know its the other side but you get the idea)
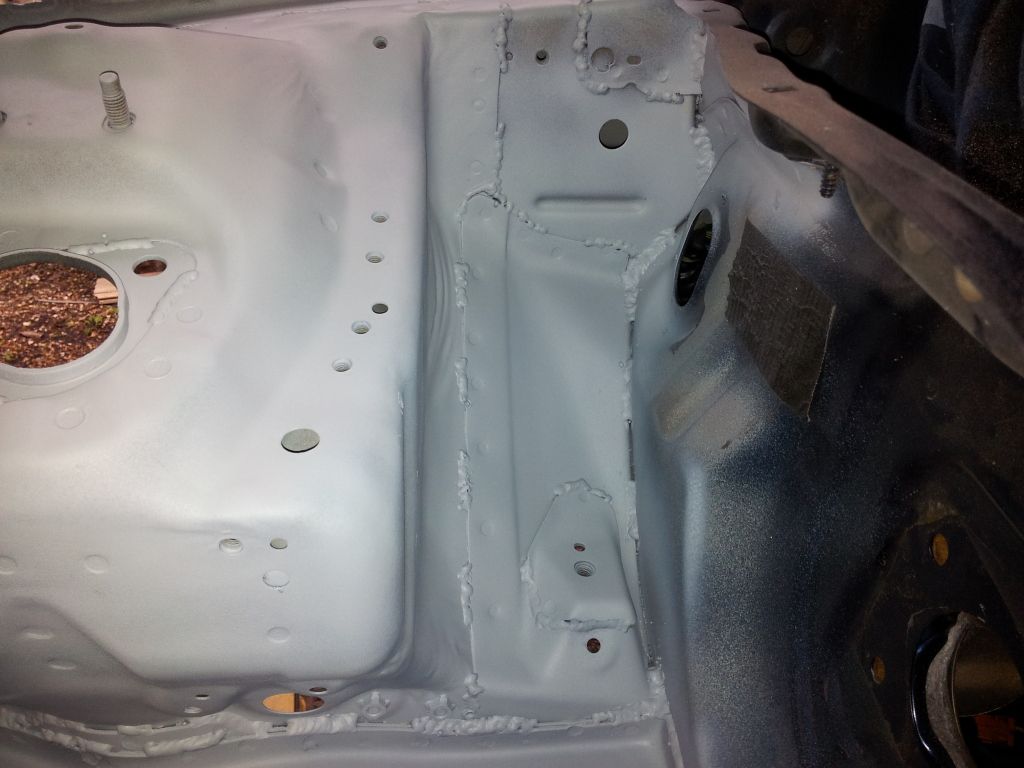
Finally the big bit doing the seam welding and once again big thanks to my dad for doing this why i was at work today.
Slight problem to begin with as the shot blaster left a film of carbon which the welder reacted with but my dad got past it and done all of this.
Chassis Legs
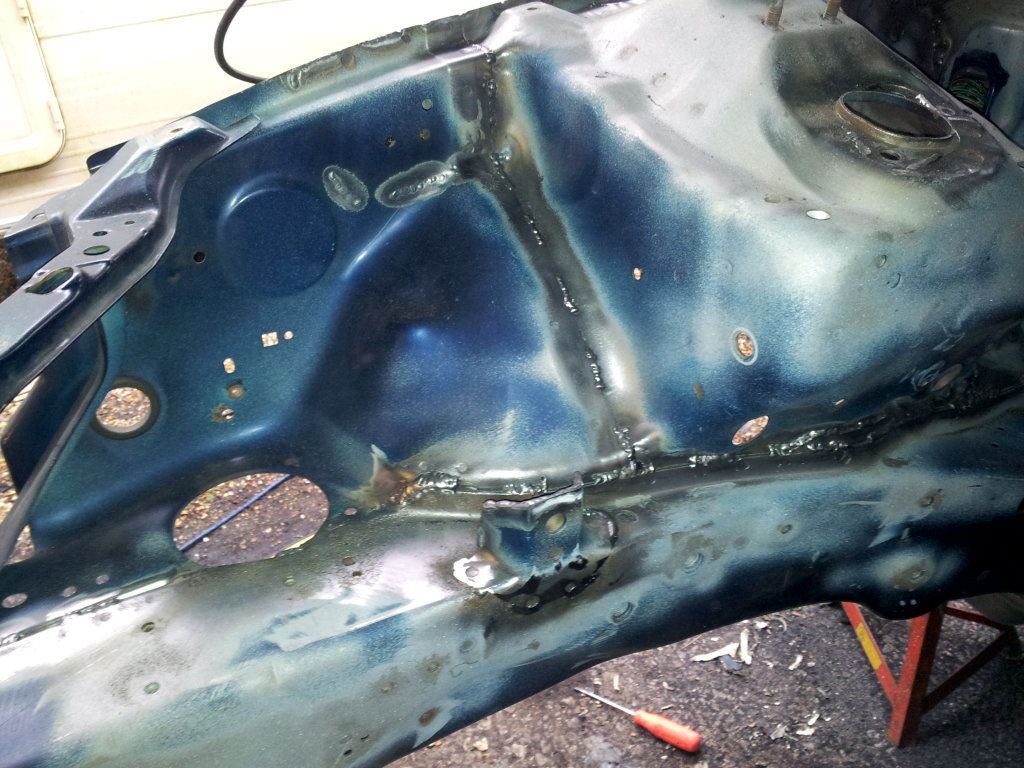
Strut Tower
The area round the bulkhead as this was only held by a couple of spot welds
Then once i got home i gave it a quick coat of etch primer just to keep the rust away.

So that one side done just got to finish the other side then i have to start doing some welding on the inside of the car. Overall im happy the chassis should be pretty good once its done and me and my dad have got a few more ideas to try and make it better.
Once again thanks for ready and i try keep this abit more up to date in future
Sorry people been abit tardy with keeping this updated but im here to make amends now.
Few weeks back i started with the s**t job of removing the sounds deading, Have almost finished doing it now just one more panel and a bit of cleaning to do and i will be rid of that job.
To be honest though it wasn't as bad as i thought and most of it pulled up in big sheets then the rest of came up with a bit of persuasion.
Also thanks to Rosey ej9 went down and picked up this UKDM ITR S80 box with 4.7FD and OEM LSD, Plan with this is to strip it and my s4c box down and swap the shorter 4th and 5th ratio out of my s4c box into the s80 box there for creating the shortest ratio box you can make out OEM parts.
Now jump forward to this weekend.
Started by lowering the car onto the wooden trolley so i can move it up the yard closer to the garages.
Looks normal from the back at least
Now the big job start prepping the engine bay. Luckily i have use of a shot blaster which i can connect to the airline.
Started going over the joins where the seam sealer used to be.
Then started doing the major bits of rust.
Is a messy tool but my god its good and saves a lot of time and effort.
The best bit is you can sweep all the shot into a pile and put it back in
Then gave the engine block a blast over ready for me to paint it.
Before
After (I know its the other side but you get the idea)
Finally the big bit doing the seam welding and once again big thanks to my dad for doing this why i was at work today.
Slight problem to begin with as the shot blaster left a film of carbon which the welder reacted with but my dad got past it and done all of this.
Chassis Legs
Strut Tower
The area round the bulkhead as this was only held by a couple of spot welds
Then once i got home i gave it a quick coat of etch primer just to keep the rust away.
So that one side done just got to finish the other side then i have to start doing some welding on the inside of the car. Overall im happy the chassis should be pretty good once its done and me and my dad have got a few more ideas to try and make it better.
Once again thanks for ready and i try keep this abit more up to date in future
Last edited:
VTEC-334
Member
- Joined
- Jul 19, 2011
- Messages
- 480
UPDATE
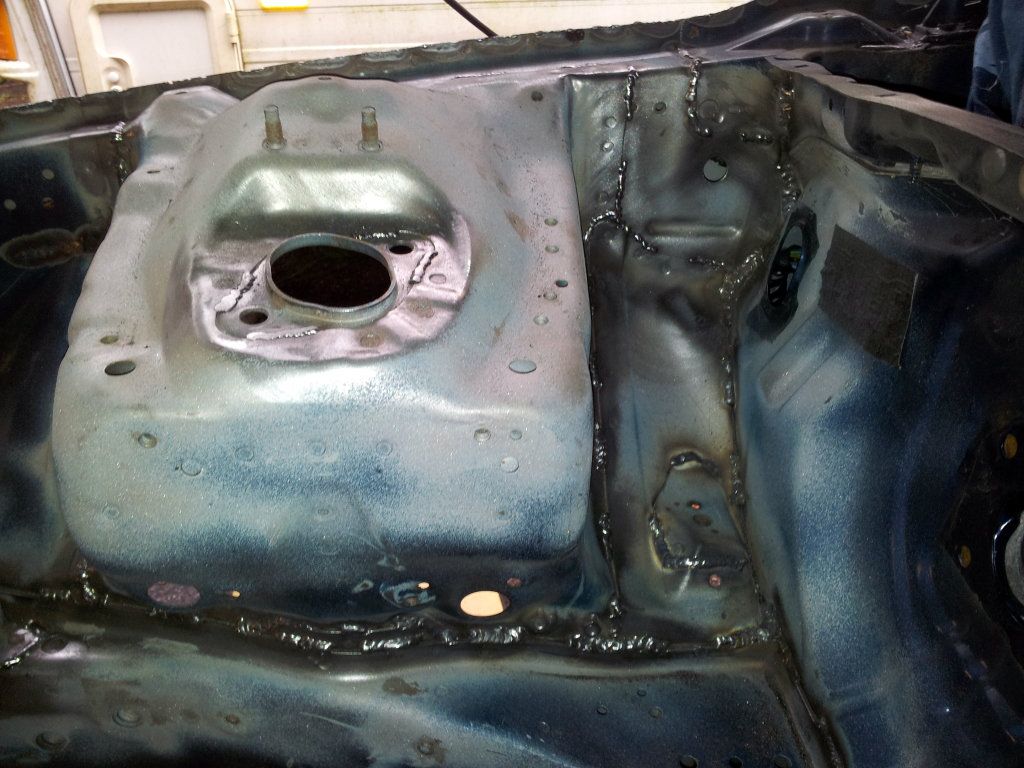
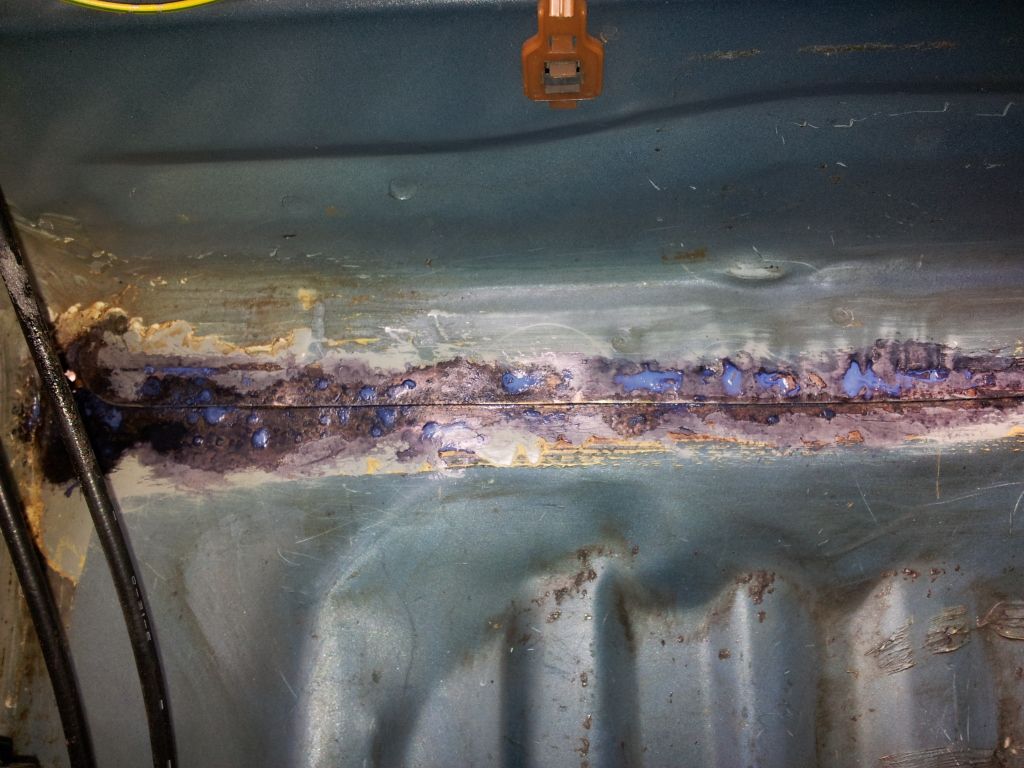
Finally finished removing the sound deading from the inside of the car thank god. The set about fixing the rust along the center join of the floor where the seam sealer had broken.
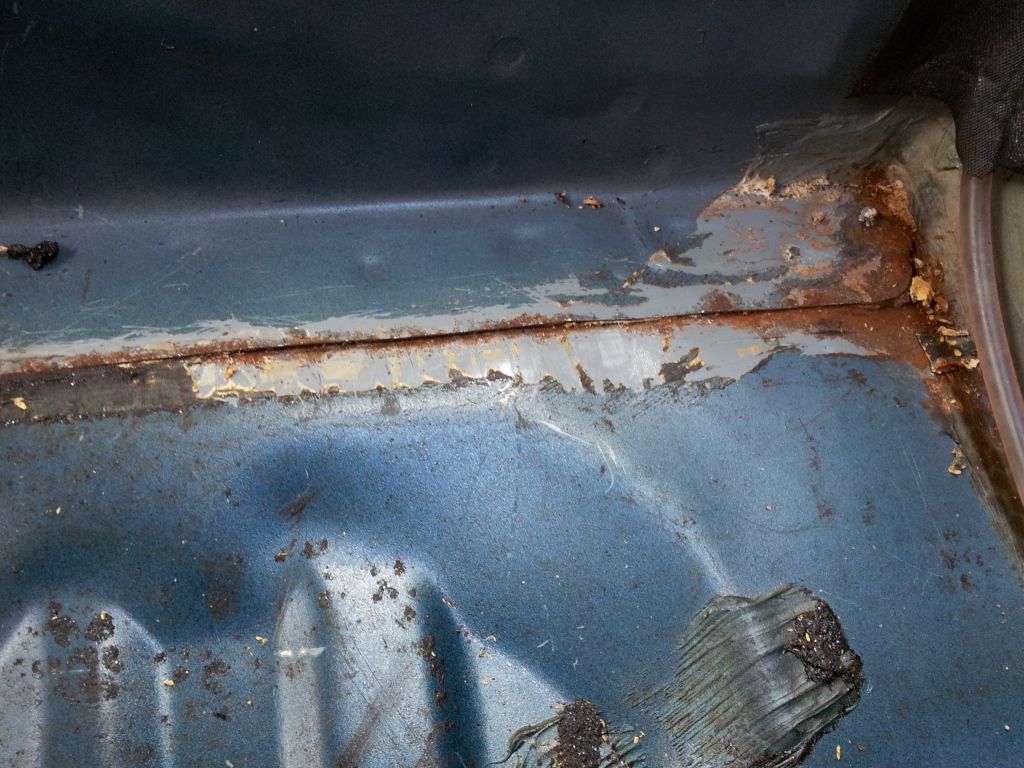
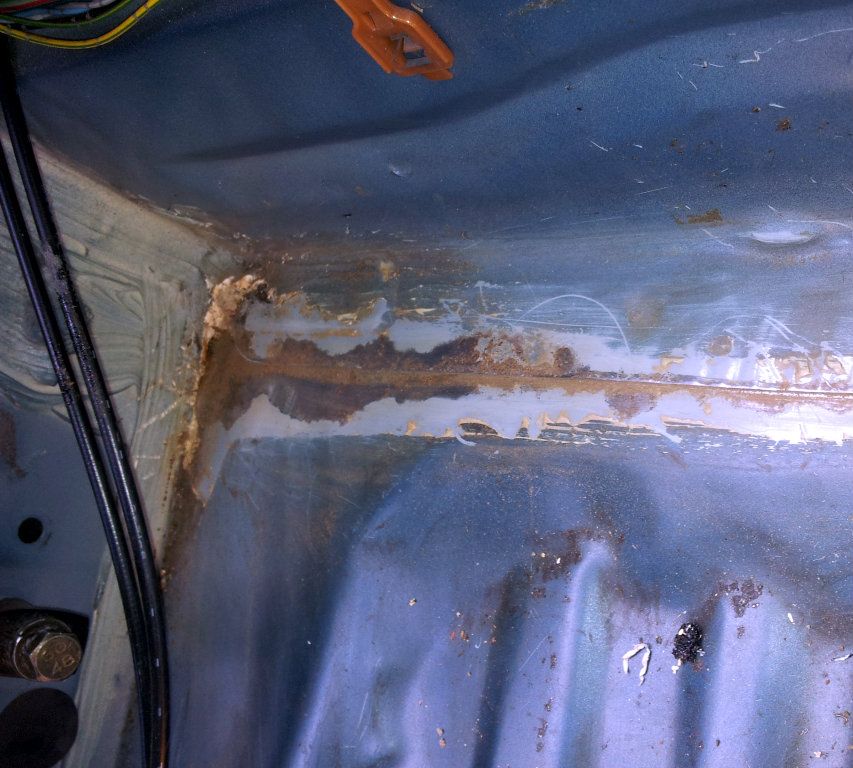
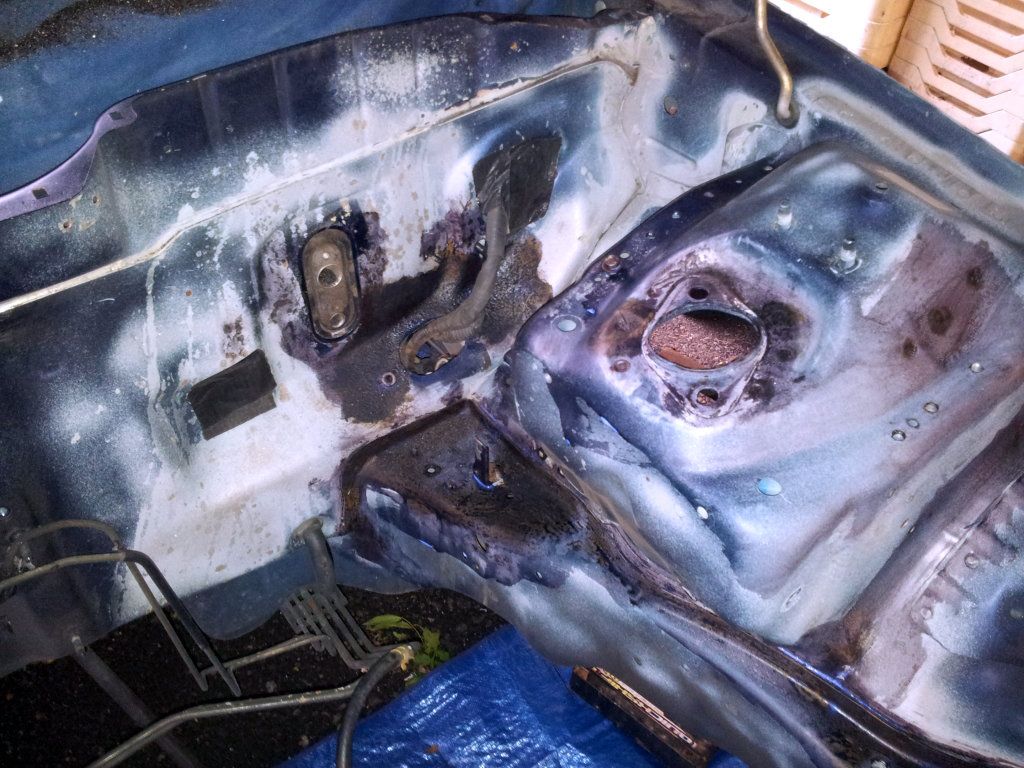
Then gave it a good helping of rust treater before i re-sealed the join. Also went over the bad patches in the engine bay.
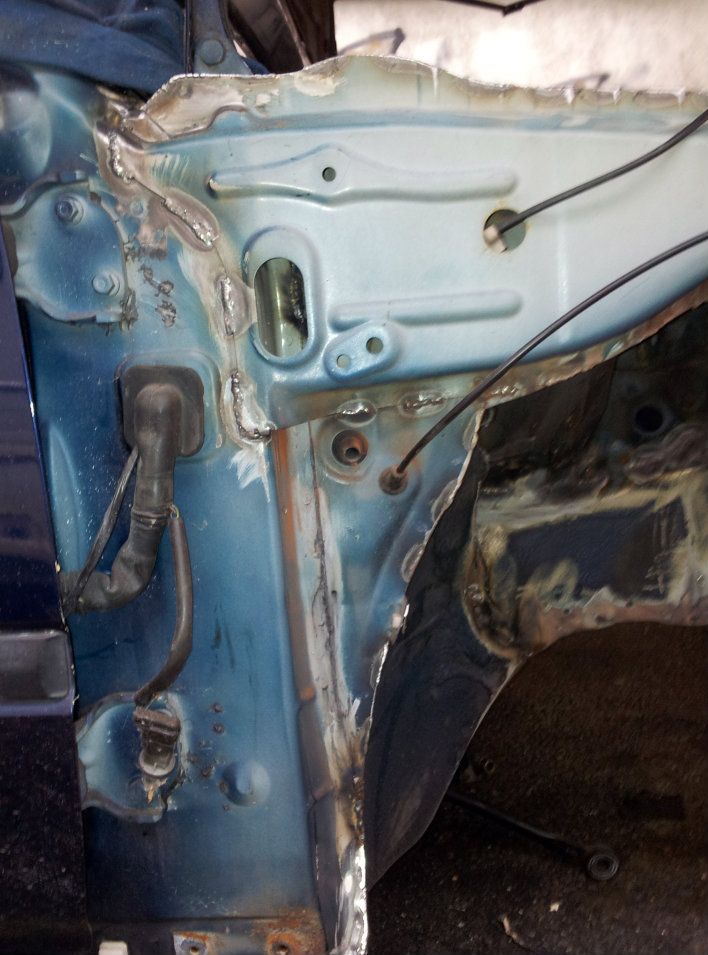
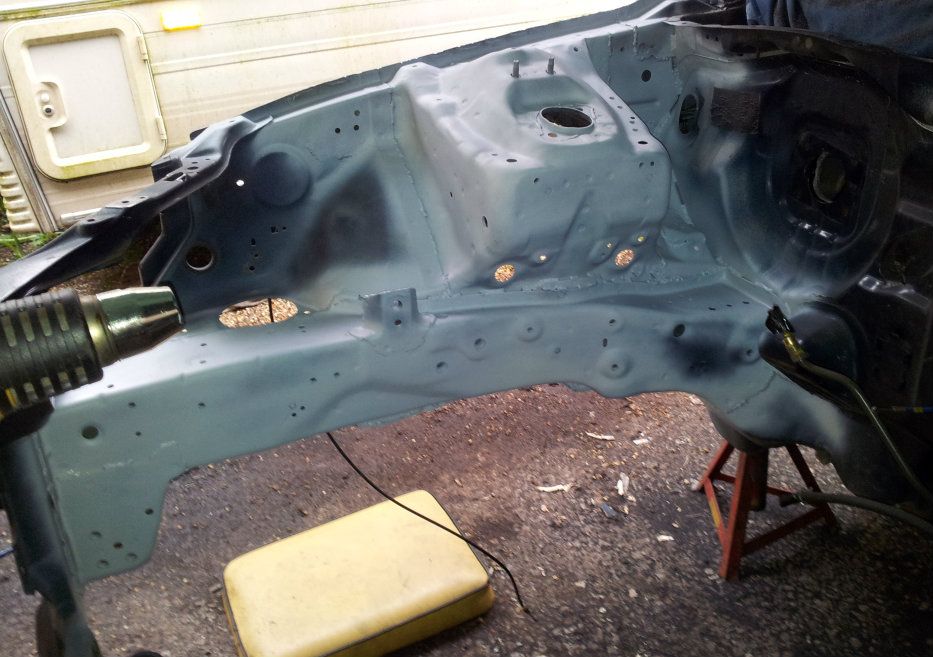
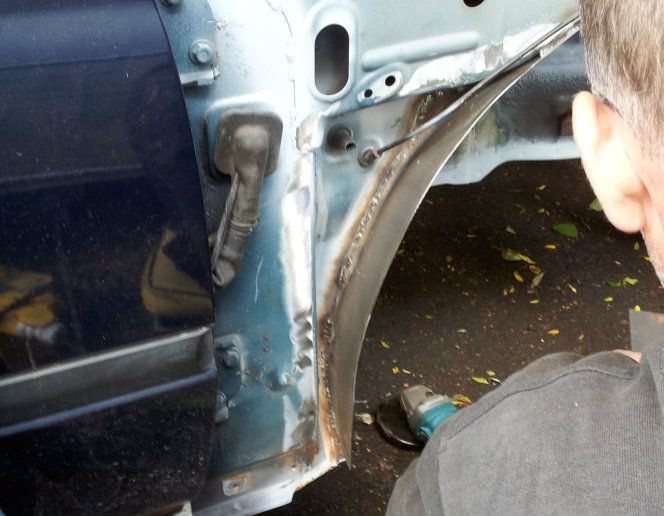
At the same time my dad set about bracing the fender area. The idea we came up with should work just as well as the brace kits you can buy but is a load cheaper, Looks neater and should weigh a far amount less.
Started by welding in the main curved section using abit of steel we had lying around
Then sealed the join and gave it a spray of paint.
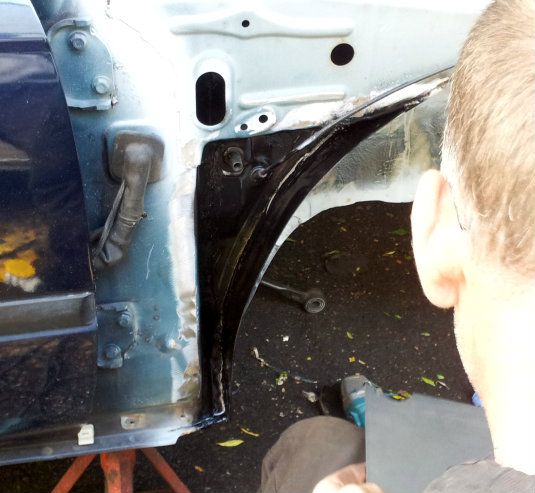
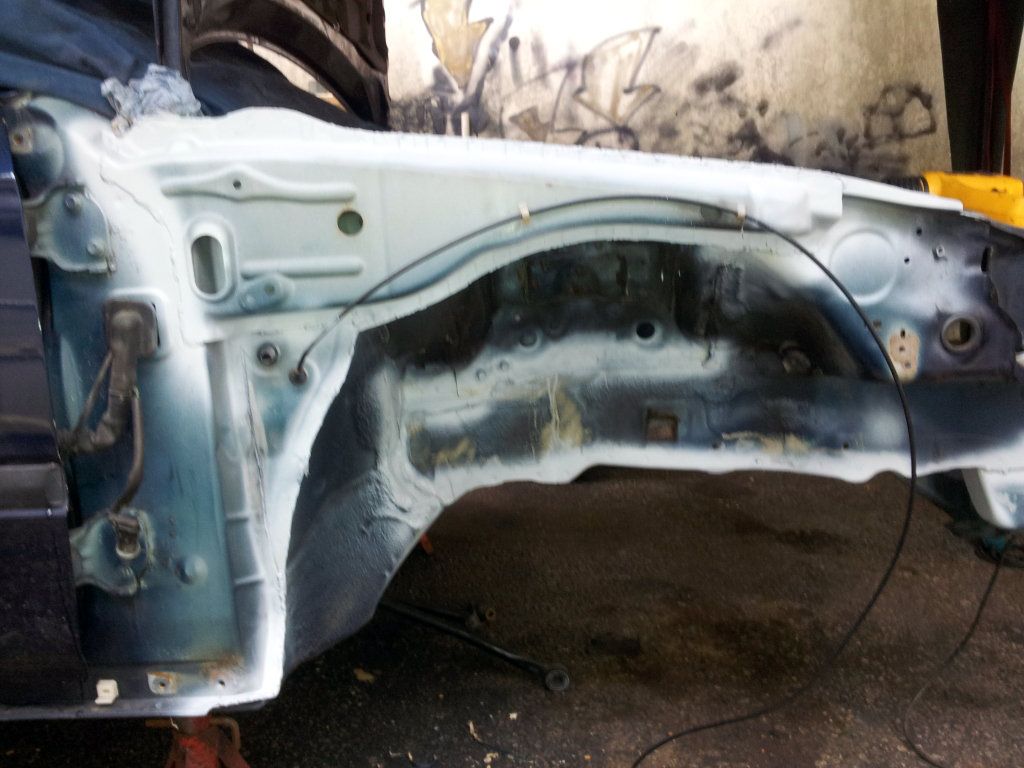
Then added the last sheet of steel over the top adding a drain hole at the bottom and a hole in the side for the bonnet release cable.
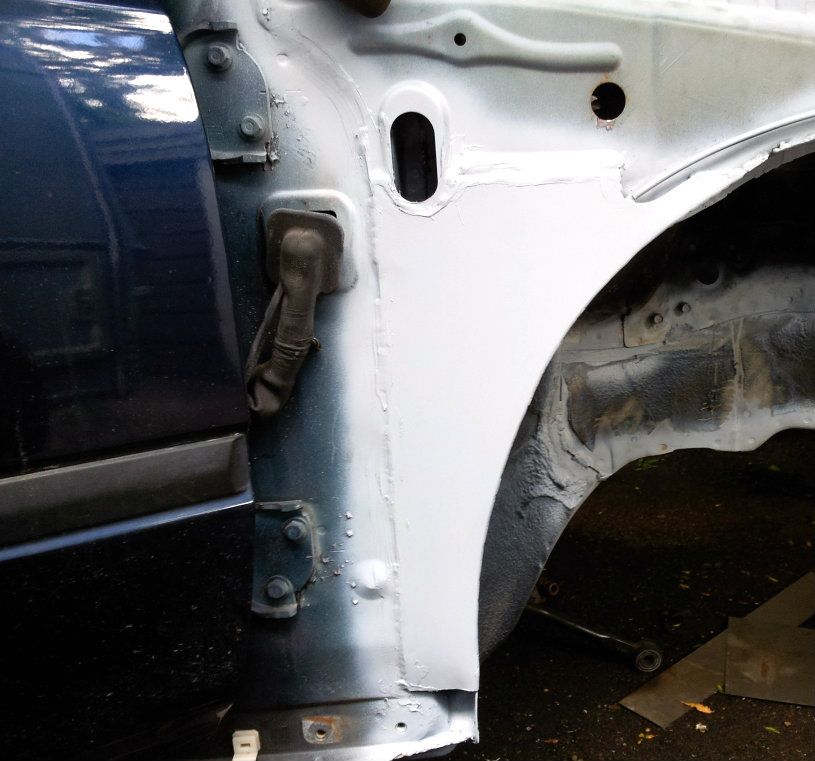
Another lick of paint and this what i've got.
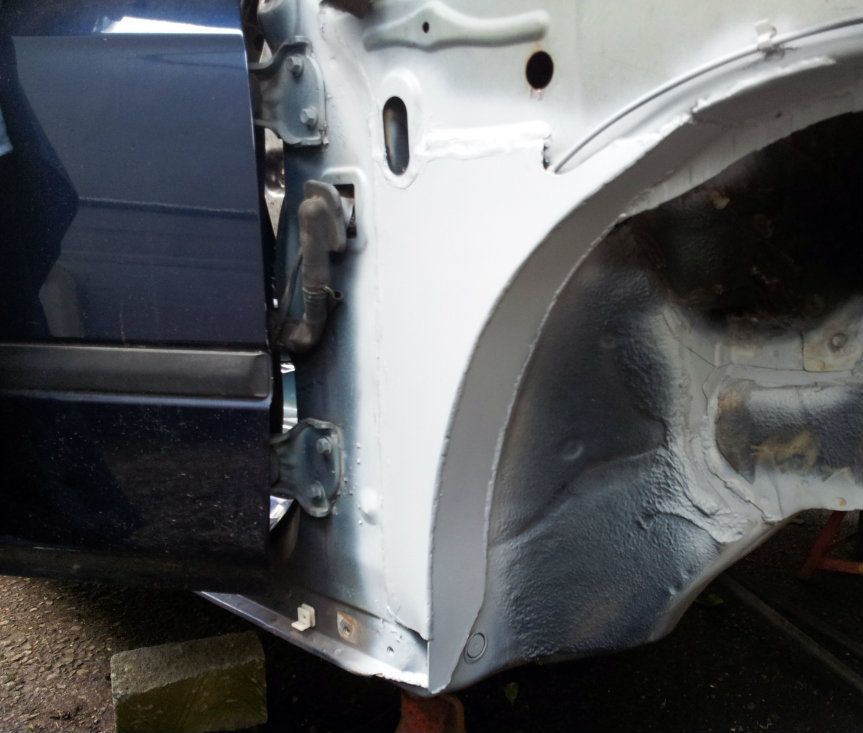
Im happy with it, Should do a good job at bracing a key area but it hasn't taken up a load of space or added much weight just got to finish the others side now.
Now the big job striping down my s4c box out of the EK4 and the S80 box i brought a few weeks ago. So i can swap the 4th and 5th out of the S80 box and add the shorter ratio ones out of the S4c box.
First striped down the S4c box only to find the 5th gear out of a Y1 gearbox and a 4.2 FD had fitted
Lucky 4th was a S4C one and the Y1 5th gear is actually shorter so i got away with it lucky but i never know why this combo of a shortest OEM 5th and longest OEM FD where ever put together.
My S4C box striped.
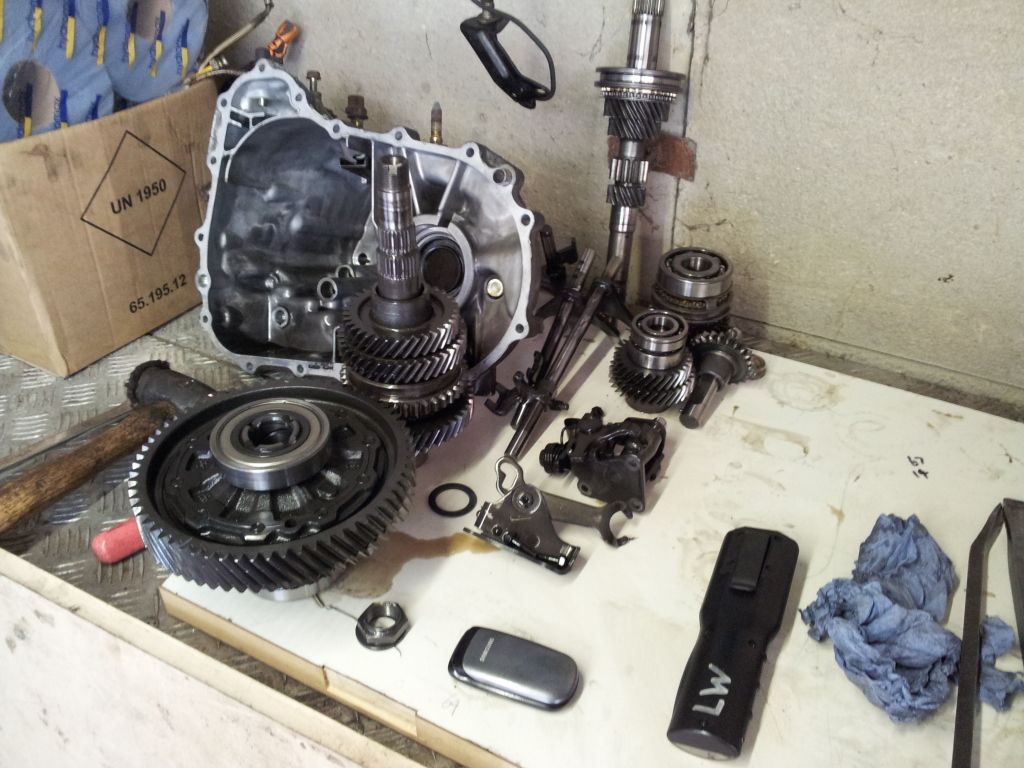
Then striped the s80 box down.

Finally put 4th and 5th out of the S4C box into the S80 box, Checking the synchro and hubs a i went along. Amazingly all seemed fine and where well with in tolerance but as a matter of caution i also swapped out the S80 3rd gear for the S4C one as the gears and synchros looked noticeable better.
S4C Main shaft, Synchro and Hub.
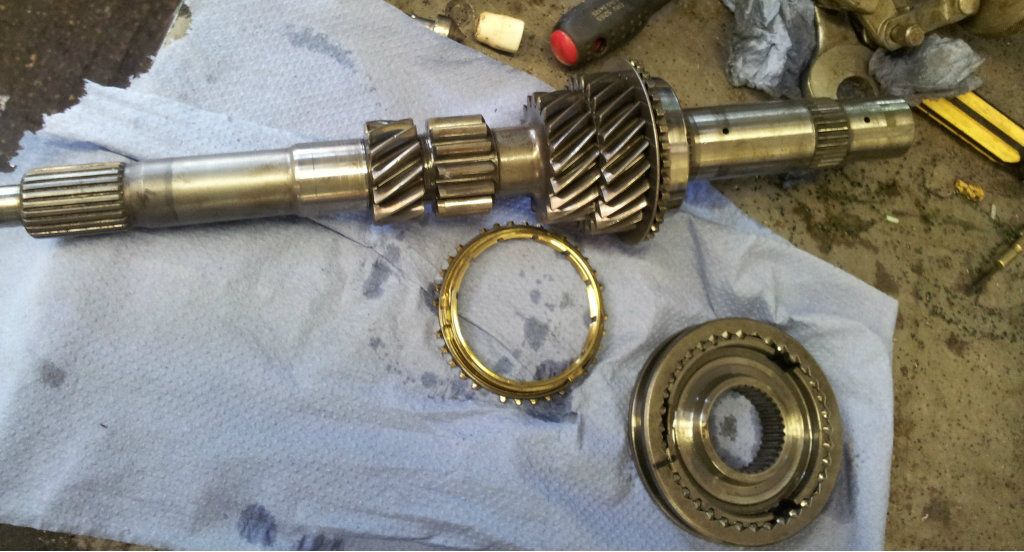
Cleaned some bits up and bolted it all back together and its done, One S80 box with 4.7FD, LSD and no horrible ratio gap between 3rd and 4th. Just hope it all works when it goes back into the car
Once again cheers for reading.
Finally finished removing the sound deading from the inside of the car thank god. The set about fixing the rust along the center join of the floor where the seam sealer had broken.
Then gave it a good helping of rust treater before i re-sealed the join. Also went over the bad patches in the engine bay.
At the same time my dad set about bracing the fender area. The idea we came up with should work just as well as the brace kits you can buy but is a load cheaper, Looks neater and should weigh a far amount less.
Started by welding in the main curved section using abit of steel we had lying around
Then sealed the join and gave it a spray of paint.
Then added the last sheet of steel over the top adding a drain hole at the bottom and a hole in the side for the bonnet release cable.
Another lick of paint and this what i've got.
Im happy with it, Should do a good job at bracing a key area but it hasn't taken up a load of space or added much weight just got to finish the others side now.
Now the big job striping down my s4c box out of the EK4 and the S80 box i brought a few weeks ago. So i can swap the 4th and 5th out of the S80 box and add the shorter ratio ones out of the S4c box.
First striped down the S4c box only to find the 5th gear out of a Y1 gearbox and a 4.2 FD had fitted
Lucky 4th was a S4C one and the Y1 5th gear is actually shorter so i got away with it lucky but i never know why this combo of a shortest OEM 5th and longest OEM FD where ever put together.
My S4C box striped.
Then striped the s80 box down.
Finally put 4th and 5th out of the S4C box into the S80 box, Checking the synchro and hubs a i went along. Amazingly all seemed fine and where well with in tolerance but as a matter of caution i also swapped out the S80 3rd gear for the S4C one as the gears and synchros looked noticeable better.
S4C Main shaft, Synchro and Hub.
Cleaned some bits up and bolted it all back together and its done, One S80 box with 4.7FD, LSD and no horrible ratio gap between 3rd and 4th. Just hope it all works when it goes back into the car
Once again cheers for reading.
VTEC-334
Member
- Joined
- Jul 19, 2011
- Messages
- 480
UPDATE
Bit overdue again but all i've done is paint engine bits for the last few weeks so thought i save it all for one update.
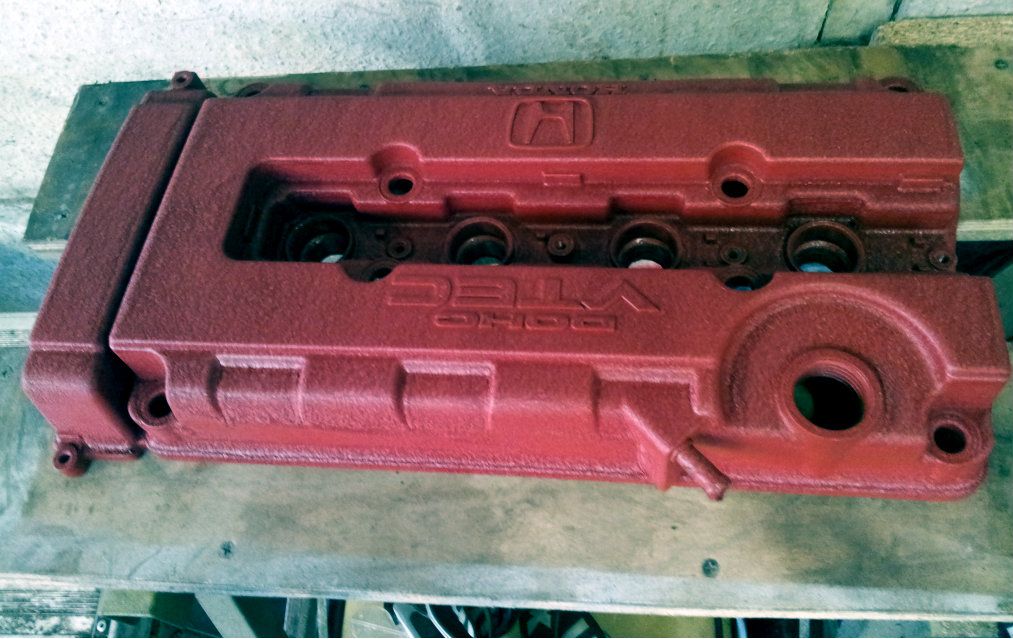
First off i started with the rocker cover.
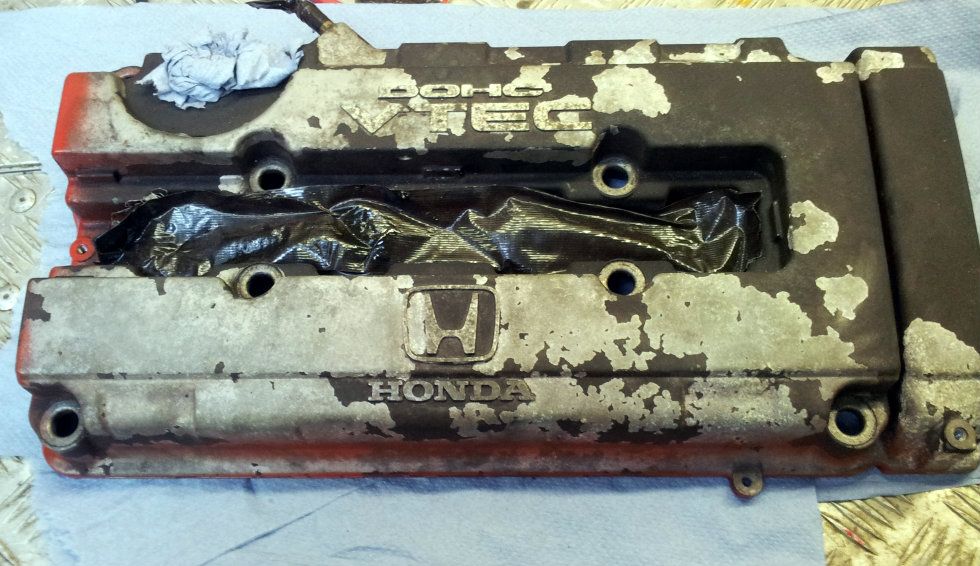
First thing was to gett eh old paint off and clean it up. The original paint was actually fairly well laid on and took about a third of a bottle of paint stripper.
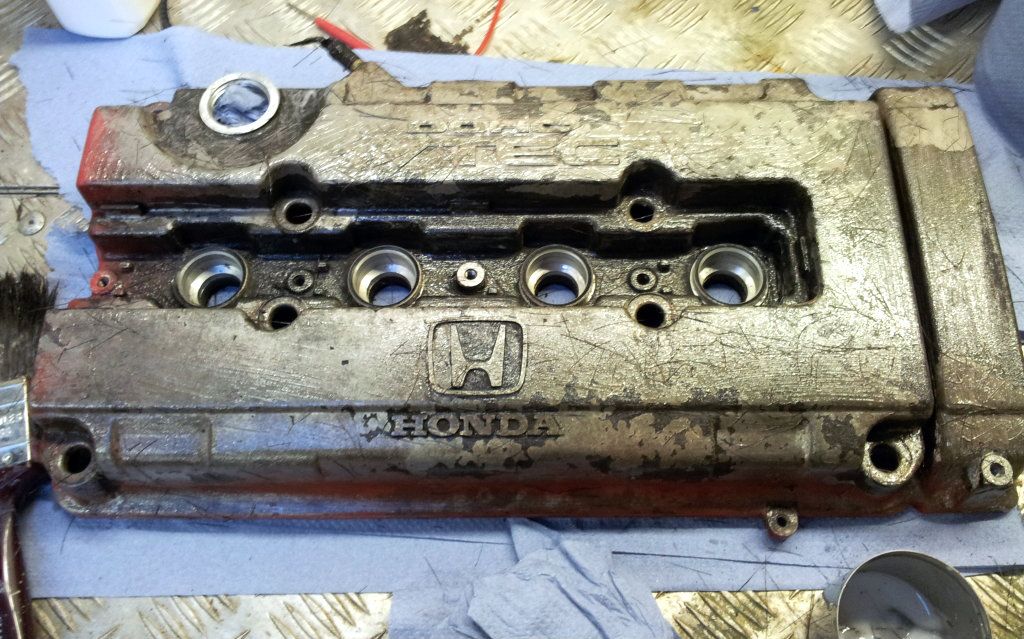
A quick jet wash off and ten minutes with a drill and wire brush bit and this is what i was left with.
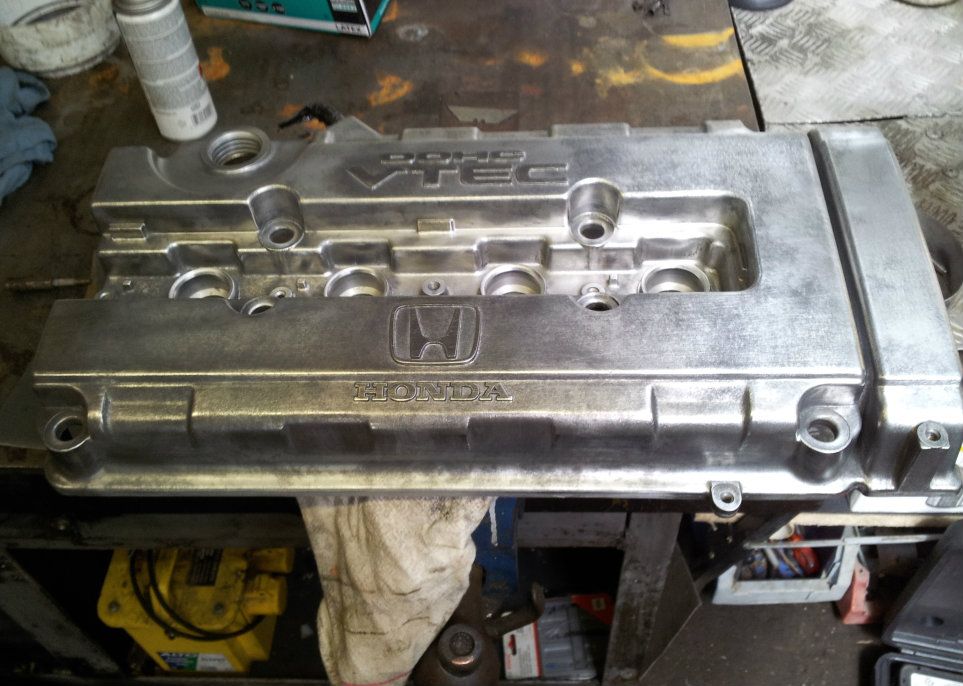
Quick go over with panel wipe then it was time to spray on the wrinkle paint. 3 coats, a hours bake in the oven and one stunk out house (Still getting the smell of paint when ever i cook) this is what i was left with.
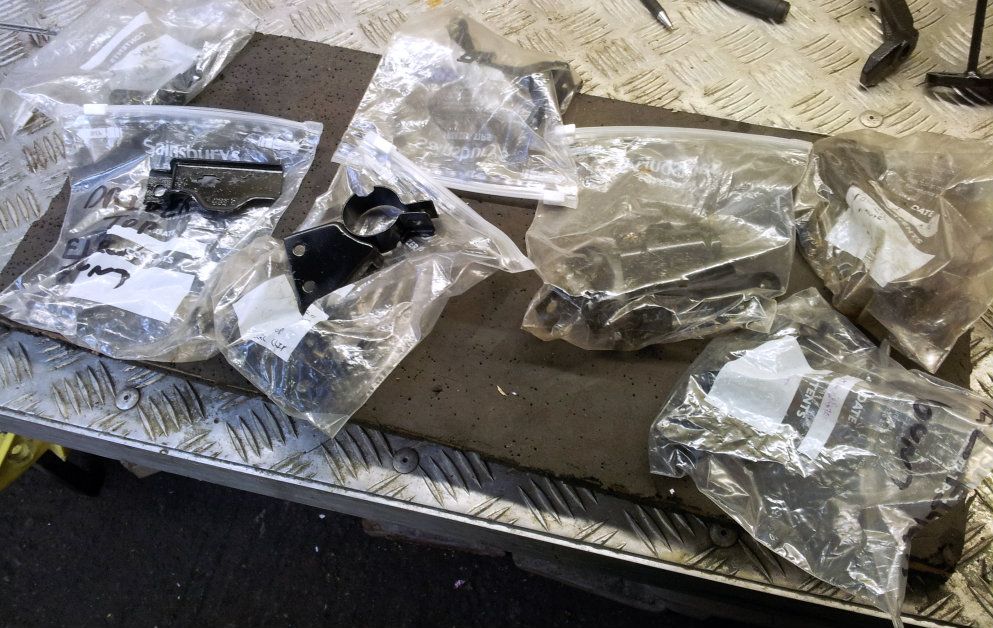
Then moved on to the various electric clips, bolts, Lower torque mounts and other things.
Painted the lower Shock fork arms and re painted the Innovative engine mounts i brought.
http://i1234.photobucket.com/albums/ff403/VTEC-334/20120628_113329.jpg?t=1341608084
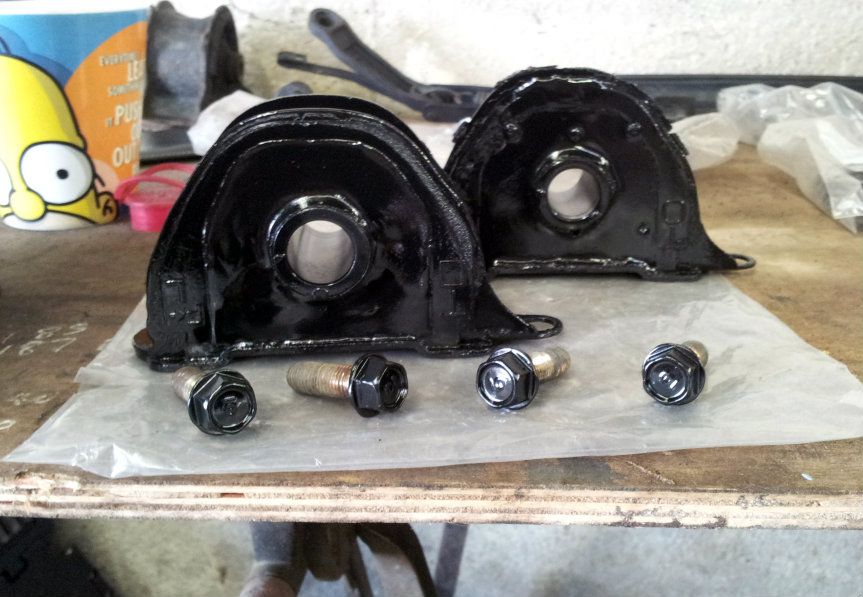
Then just to be on the safe side and add abit more stiffness i filled my old lower torque mounts up with resin and gave them a lick of paint.
These are the various electrical clips, brackets and bolts that i cleaned up and also gave a couple of coats of paint just to be super ****.
Why i was doing this my dad finished stitch welding the other side of the bay.

Bit more of his work (welder was playing up abit)
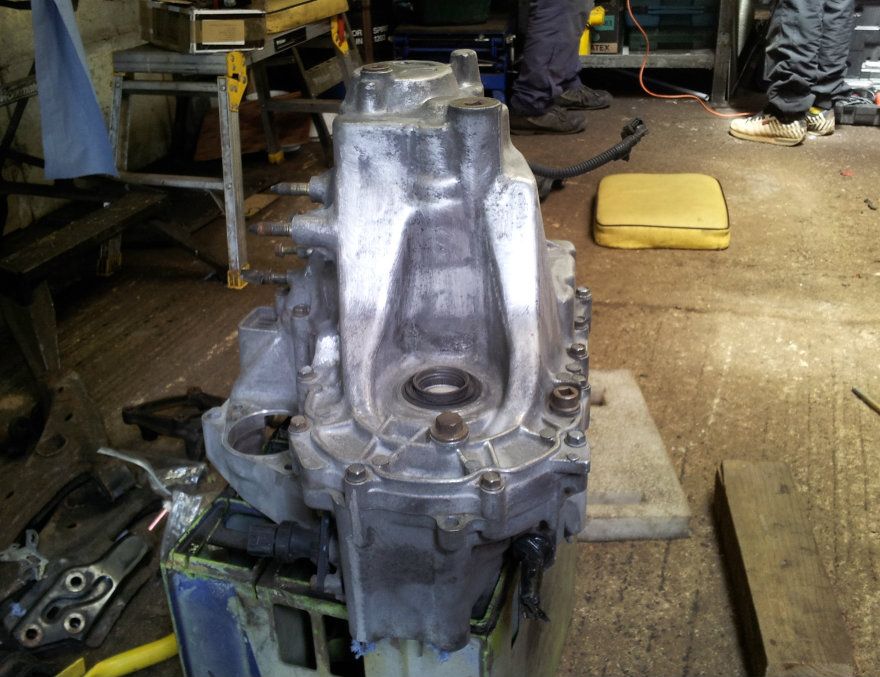
Now comes the big part painting the engine and gearbox. Again thanks to my dad this was a joint divide and conquer efforts to get ti all prepped and painted.
First off sanded all the old pitted alloy off the gearbox and gave it a wipe down.
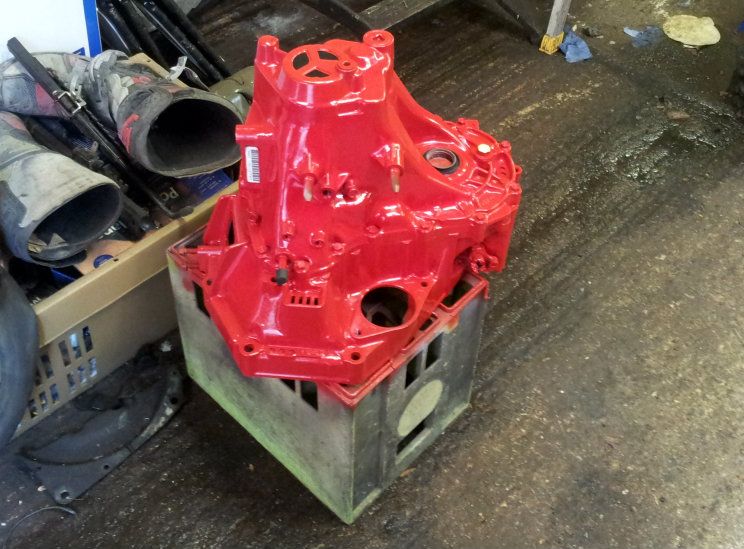
Then gave it a new look (red is darker, my phone just makes it look abit lighter)
Now the engine and once again i forgot to take pictures during the work so only have the finished photos but here they are.
Still not sure on the Cam gear cut outs but they will serve a purpose when i eventually get adjustable cam gears.
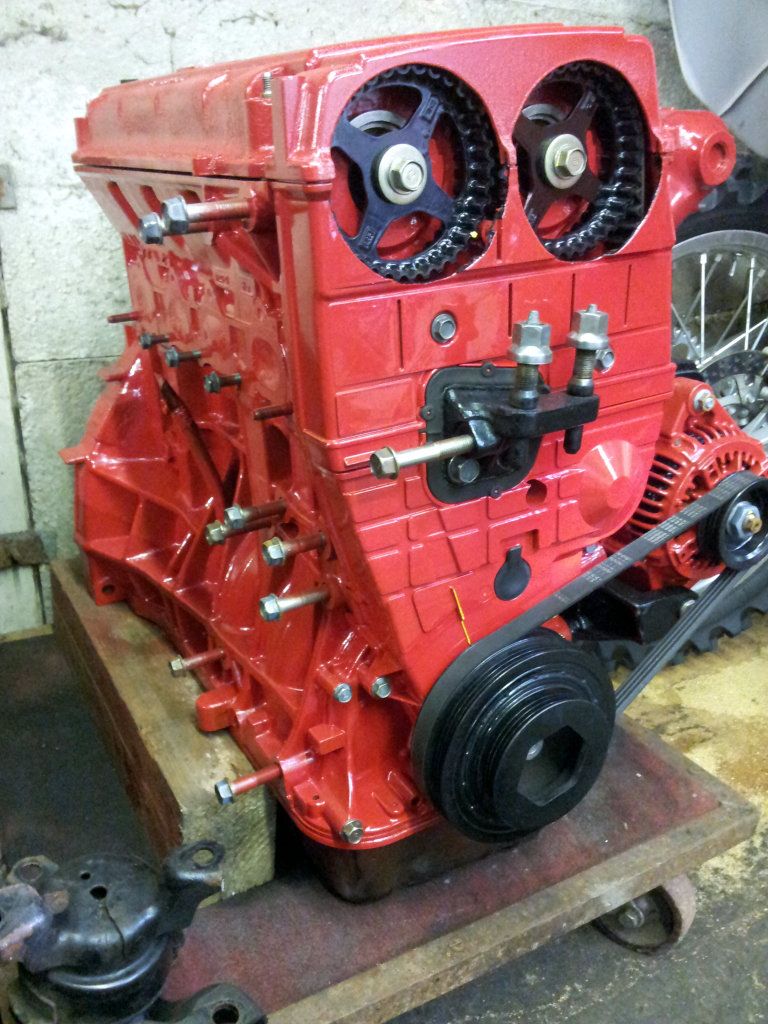
Striped all the pipes, manifold, fuel rail, FRP, pulleys, dizzy and Alternator and cleaned them up before paint and reassembly . (Once again the red is darker, Also still have the power steering pump a couple of other bits to clean and paint.)
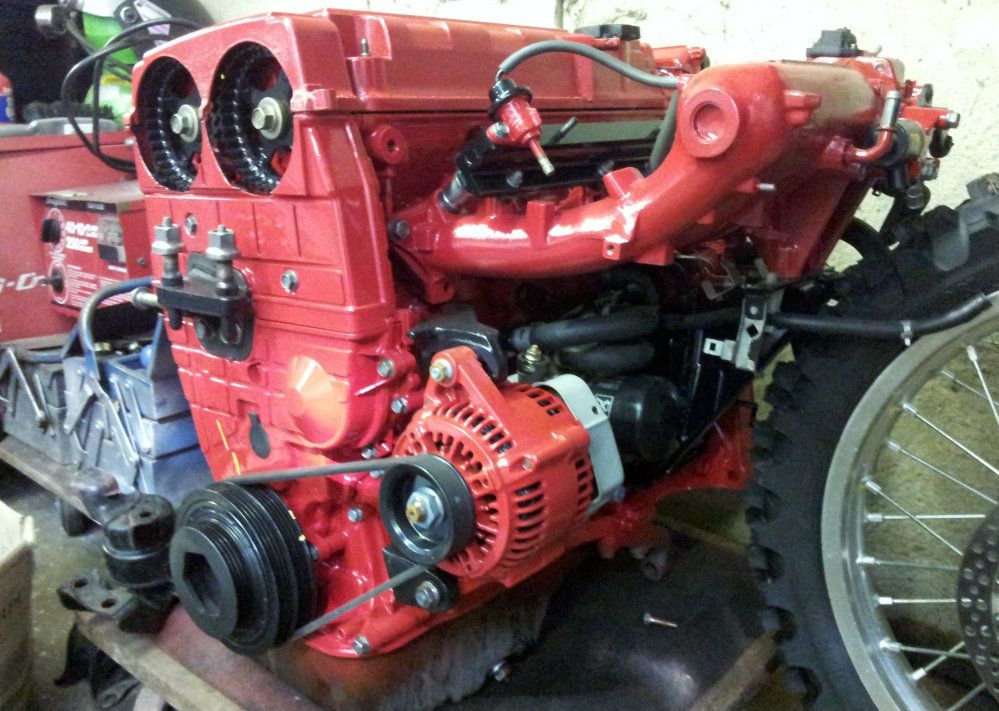
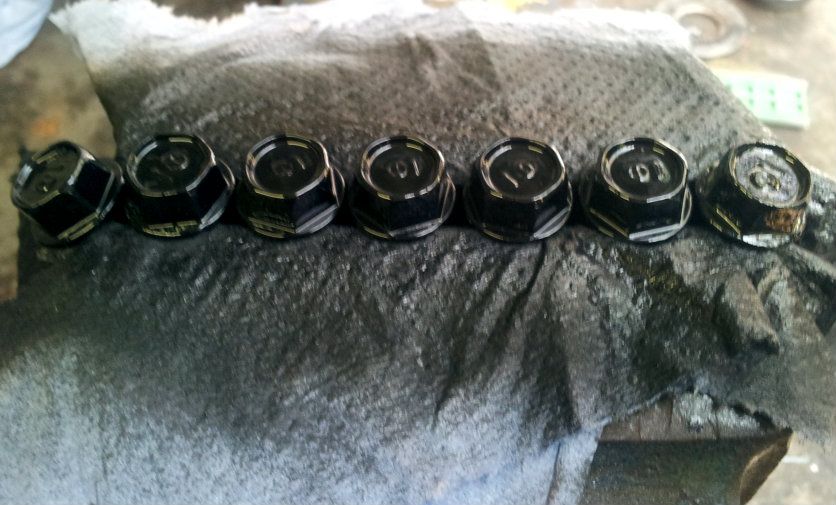
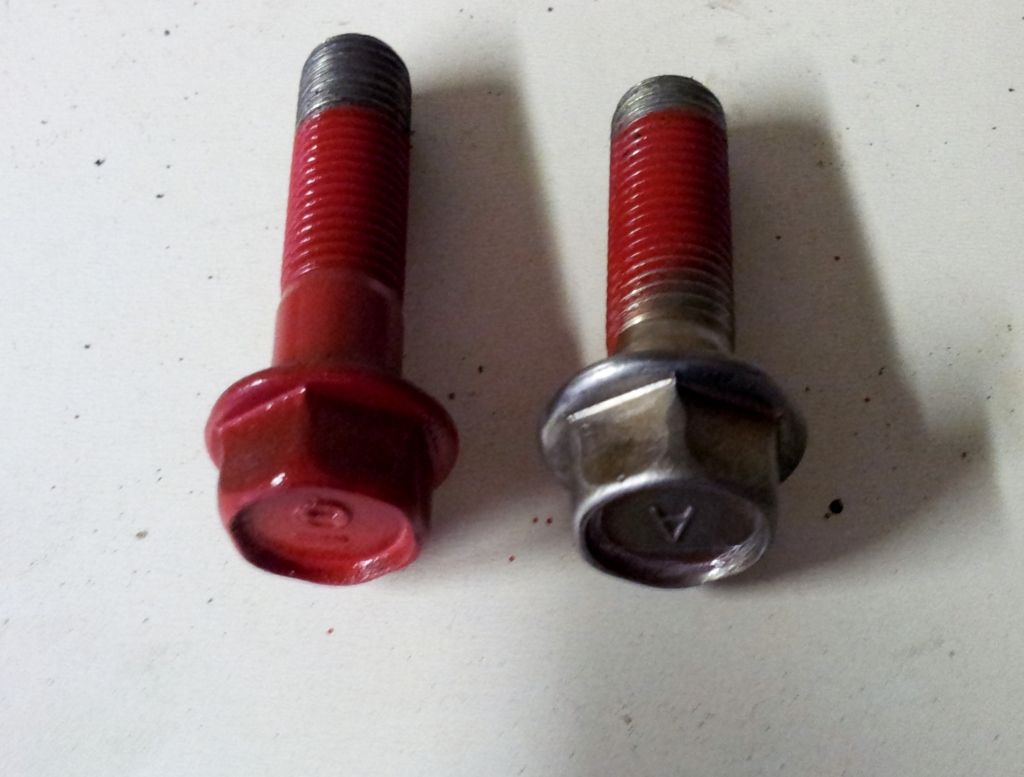
Even removed all the engine bolts and solenoid cover and gave them a polish.
The final look from the top. Had to the give the rocker cover a couple of coats of red paint so it would match the rest of the engine as the wrinkle paint came out a bit dark. (still a few touch up bits like polishing the lettering)

So hope you guys like the color choice for the engine? Thought it would be abit different from the norm. Just got to wait for my clutch, Sump baffle and flywheel then i can bolt the gearbox and engine together ready to go back in the car.
Also as you can probably tell from the title change i have had a change of heart about the colour.
As much as i love the Verde Green i think it is going to be to leary for a daily driver so i have decided to go Milano Red instead.
Thanks again for reading C and C's welcome and check back soon.
Bit overdue again but all i've done is paint engine bits for the last few weeks so thought i save it all for one update.
First off i started with the rocker cover.
First thing was to gett eh old paint off and clean it up. The original paint was actually fairly well laid on and took about a third of a bottle of paint stripper.
A quick jet wash off and ten minutes with a drill and wire brush bit and this is what i was left with.
Quick go over with panel wipe then it was time to spray on the wrinkle paint. 3 coats, a hours bake in the oven and one stunk out house (Still getting the smell of paint when ever i cook) this is what i was left with.
Then moved on to the various electric clips, bolts, Lower torque mounts and other things.
Painted the lower Shock fork arms and re painted the Innovative engine mounts i brought.
http://i1234.photobucket.com/albums/ff403/VTEC-334/20120628_113329.jpg?t=1341608084
Then just to be on the safe side and add abit more stiffness i filled my old lower torque mounts up with resin and gave them a lick of paint.
These are the various electrical clips, brackets and bolts that i cleaned up and also gave a couple of coats of paint just to be super ****.
Why i was doing this my dad finished stitch welding the other side of the bay.
Bit more of his work (welder was playing up abit)
Now comes the big part painting the engine and gearbox. Again thanks to my dad this was a joint divide and conquer efforts to get ti all prepped and painted.
First off sanded all the old pitted alloy off the gearbox and gave it a wipe down.
Then gave it a new look (red is darker, my phone just makes it look abit lighter)
Now the engine and once again i forgot to take pictures during the work so only have the finished photos but here they are.
Still not sure on the Cam gear cut outs but they will serve a purpose when i eventually get adjustable cam gears.
Striped all the pipes, manifold, fuel rail, FRP, pulleys, dizzy and Alternator and cleaned them up before paint and reassembly . (Once again the red is darker, Also still have the power steering pump a couple of other bits to clean and paint.)
Even removed all the engine bolts and solenoid cover and gave them a polish.
The final look from the top. Had to the give the rocker cover a couple of coats of red paint so it would match the rest of the engine as the wrinkle paint came out a bit dark. (still a few touch up bits like polishing the lettering)
So hope you guys like the color choice for the engine? Thought it would be abit different from the norm. Just got to wait for my clutch, Sump baffle and flywheel then i can bolt the gearbox and engine together ready to go back in the car.
Also as you can probably tell from the title change i have had a change of heart about the colour.
As much as i love the Verde Green i think it is going to be to leary for a daily driver so i have decided to go Milano Red instead.
Thanks again for reading C and C's welcome and check back soon.
spikeyhairdude
Vishal
- Joined
- Nov 20, 2011
- Messages
- 1,408
- Car(s)
- EK9/E82
any updates
021-bennettt
Member
- Joined
- May 5, 2009
- Messages
- 544
Looking god man, im not sure on the red engine i think it will work when its in the car tho
VTEC-334
Member
- Joined
- Jul 19, 2011
- Messages
- 480
Very Long Overdue Update
Sorry to the people I haven't replied to, Went away for a month doing abit of traveling and kinda dropped the ball with this thread
Well big news is the car's in paint as we speak and should be ready in 3 weeks or so (Mate is doing it as a fill in job so he will work on it when he can) so thought i give you guys a little update of the final bodywork bits and a few parts i've brought!
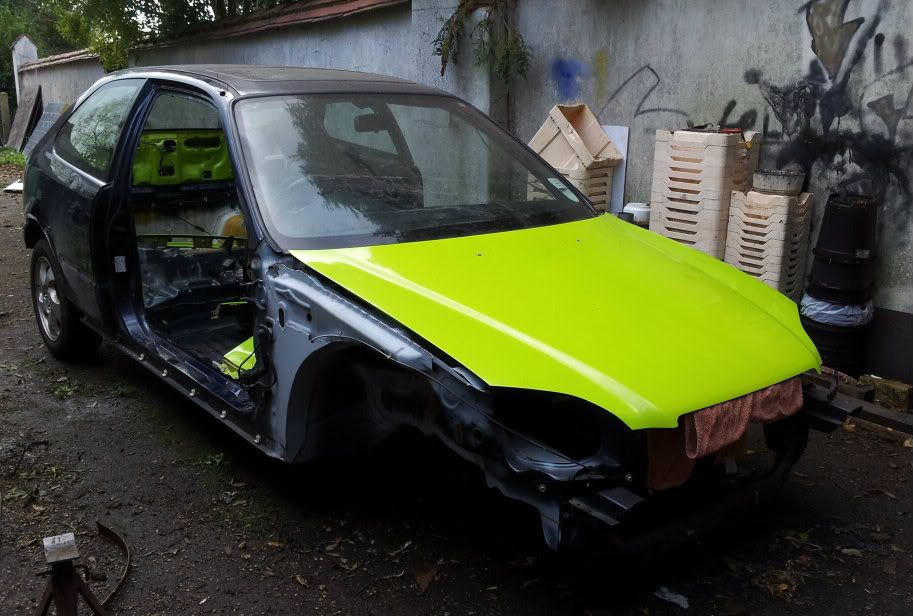
Finished stripping the car down, Removed the doors and all the wiring. So you can now say good bye to the green and blue as the next time your see this car it will be a nice shade of Milano red!
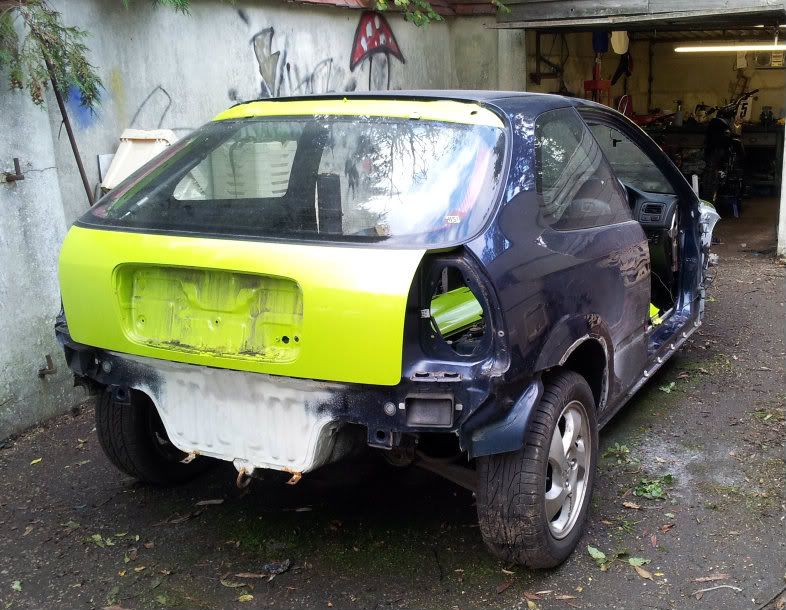
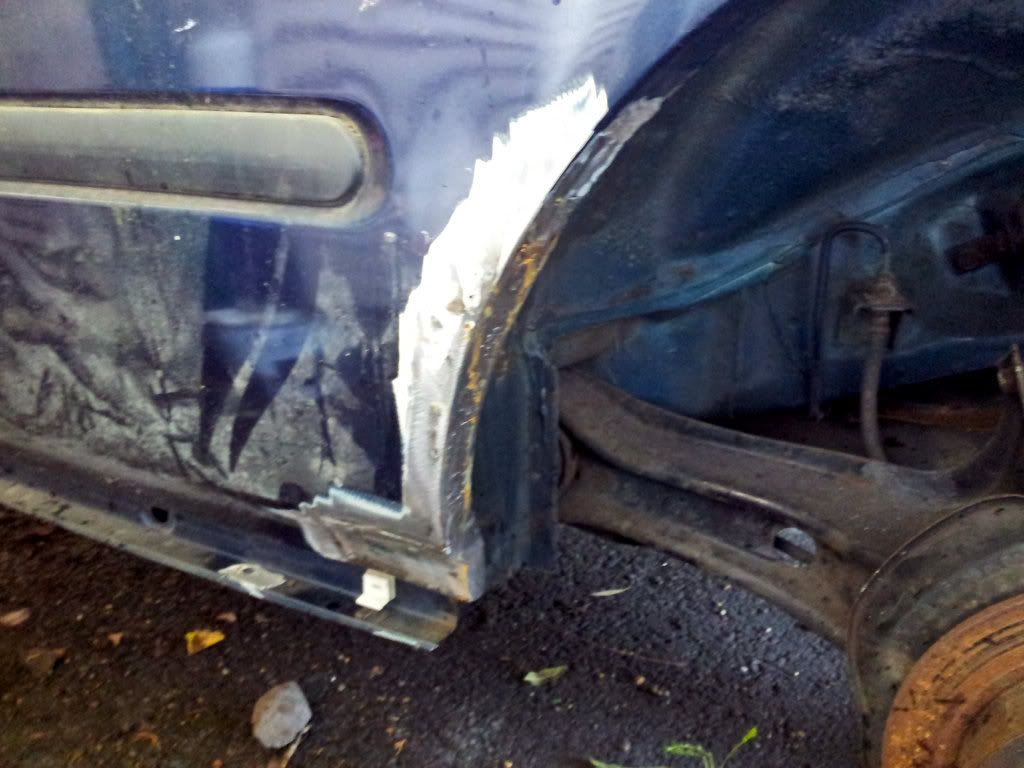
Also had to repair the rear arches and weld new metal in to get rid of the rust, At the same time i decided to roll the rear arches a bit.
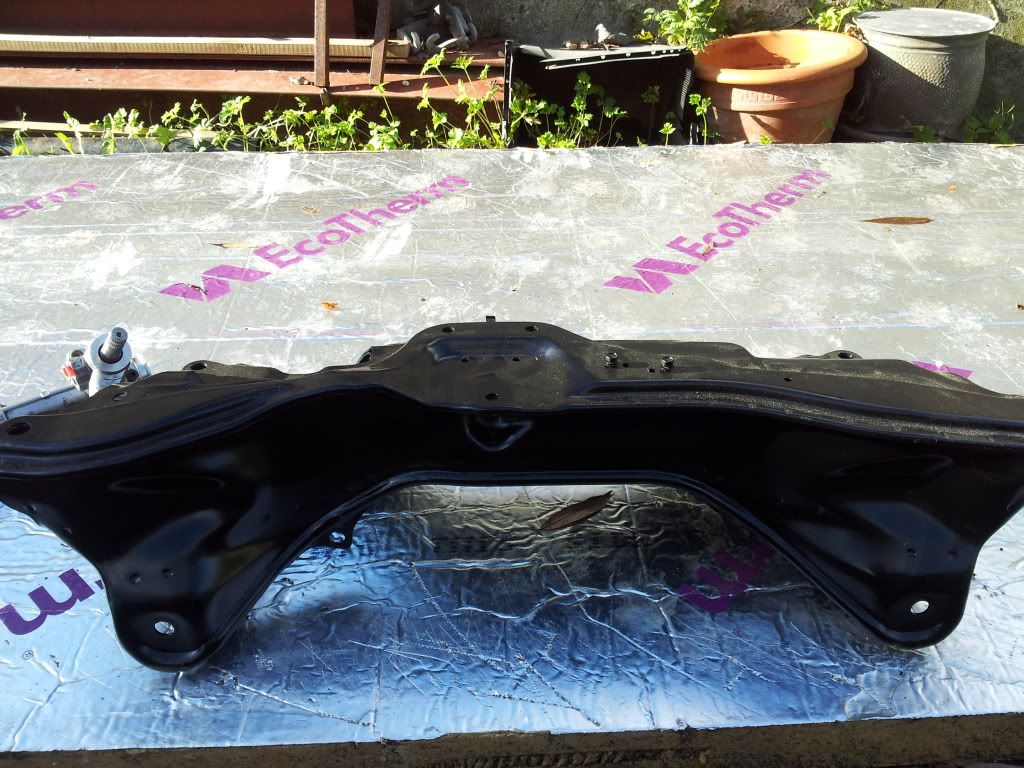
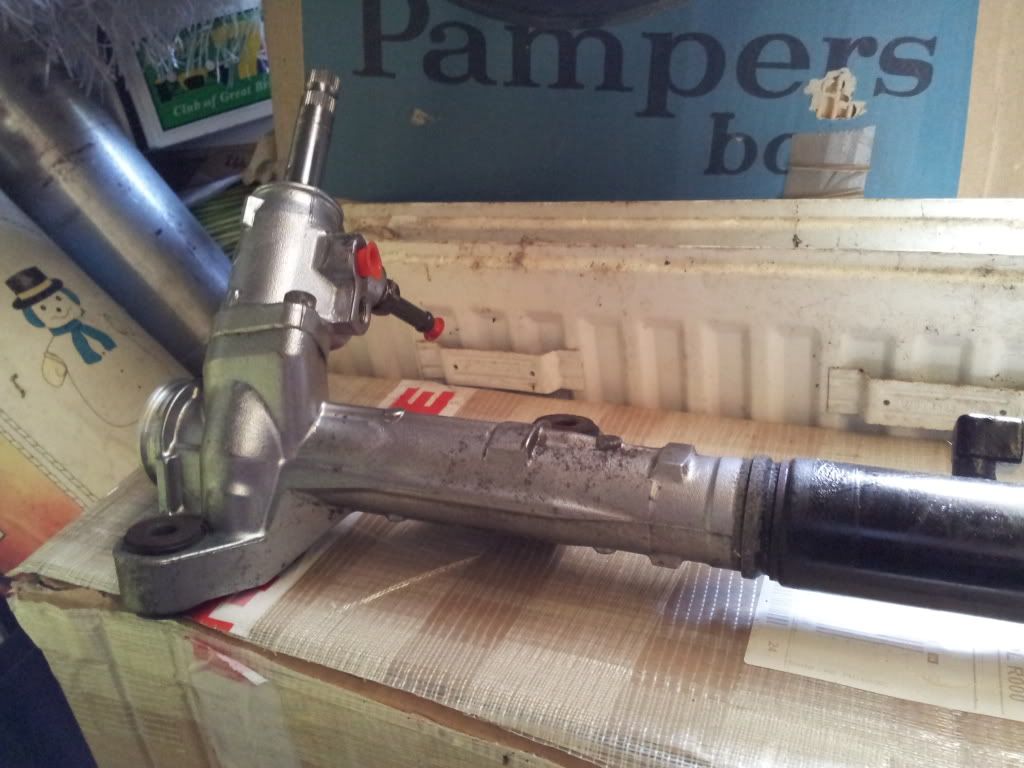
Sand blasted the LCA and Subframe, the gave them a nice new coat of paint. Also stripped down and cleaned the steering rack, and gave it once over to make sure that none of the seals are leaking.
Got hold of some nice goodies: Sump and Rocker gasket, Thermal inlet and exhaust gasket, Sump baffle, Full Hardrace Bushes Kit and a Hamp oil filter.

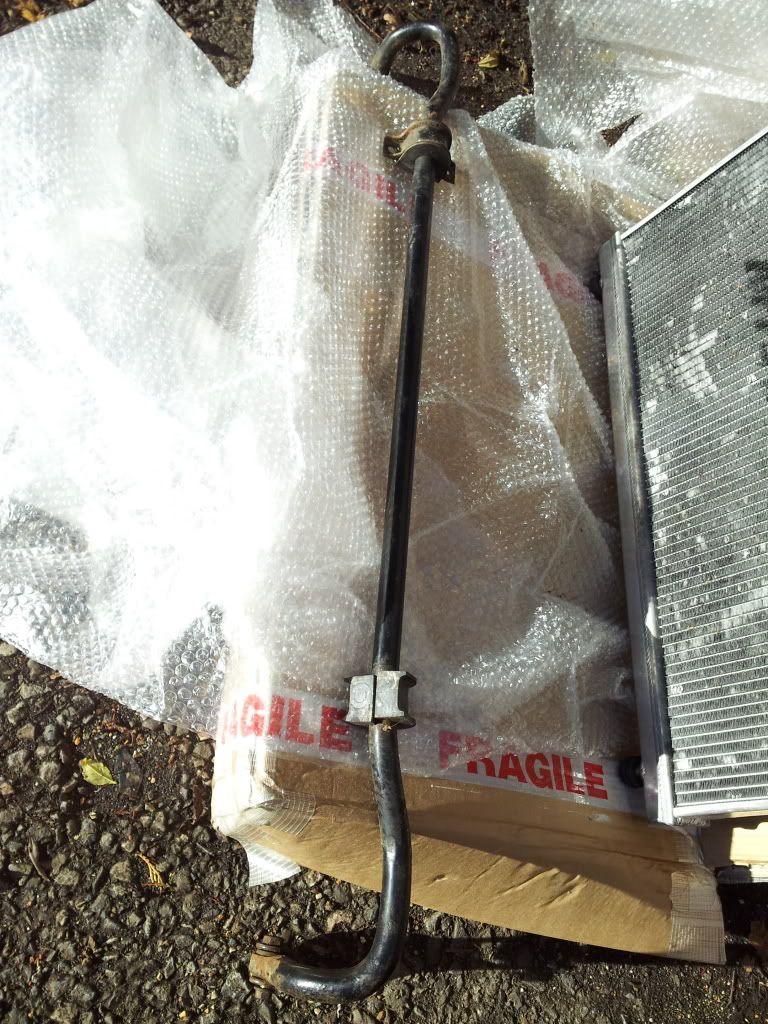
24mm DC2 rear ARB, will put polybushes on this and new drop links. Also dad said he will make me a subframe brace and a 3 point strunt bar as he likes that kind of fabrication work.
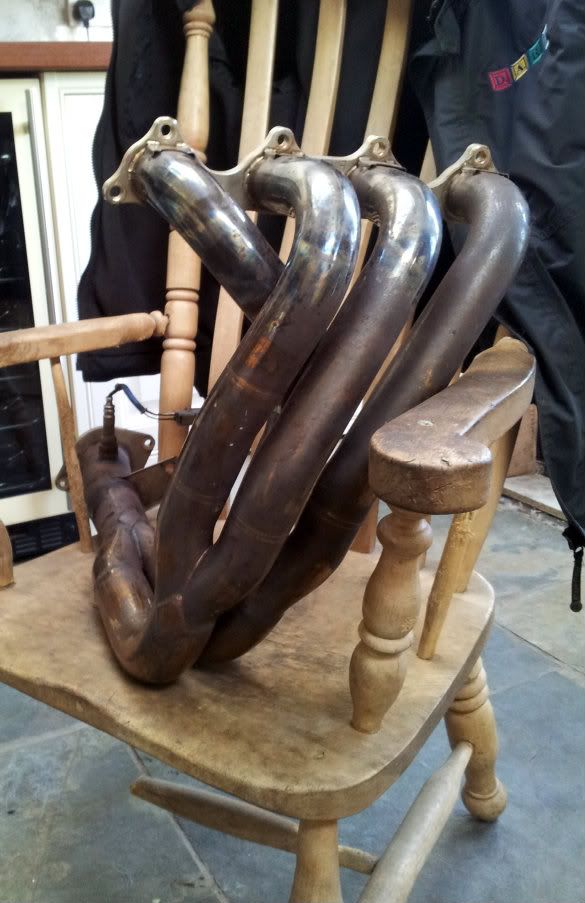
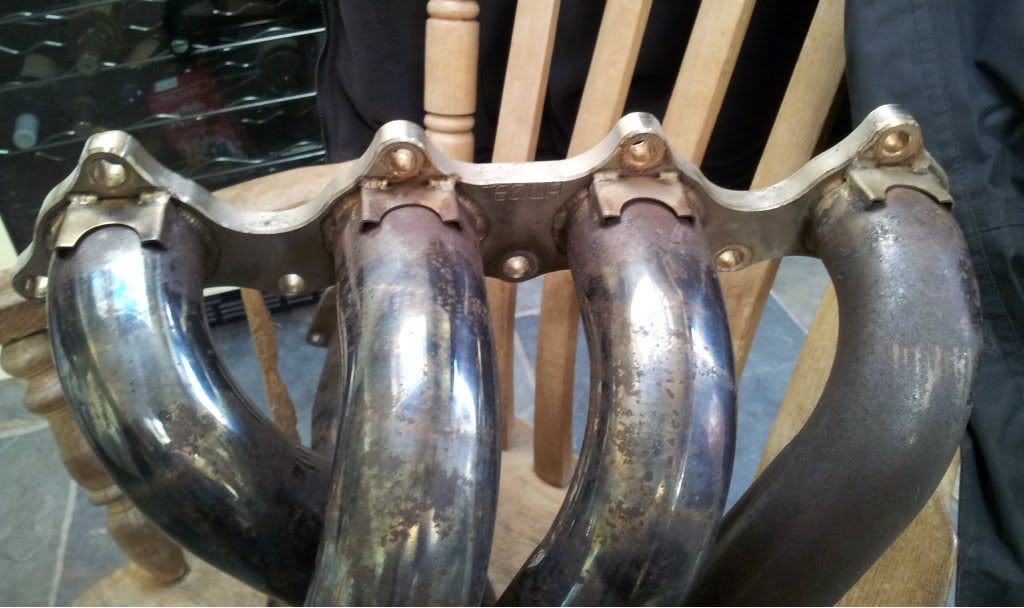
Tegiwa 2.5in manifold! Should go nicely with a baffled de-cat, 2.5 custom B-pipe (Once again a dad job) and most probably a Soild Fabrication N1 replica.
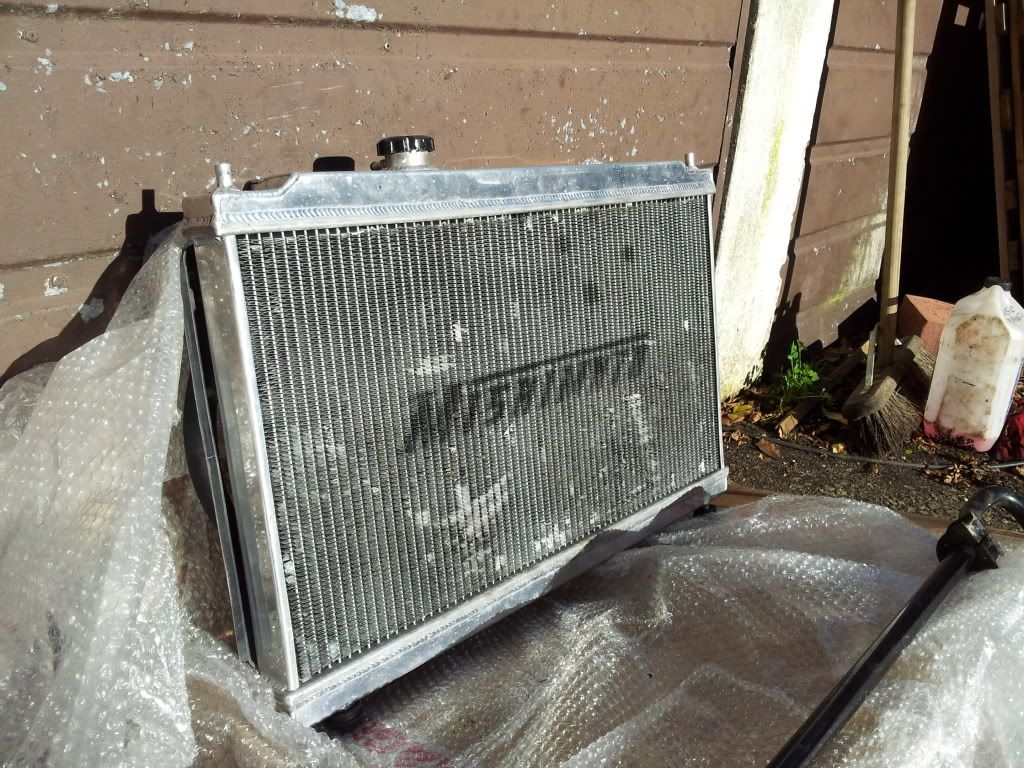
Mishimoto Radiator.
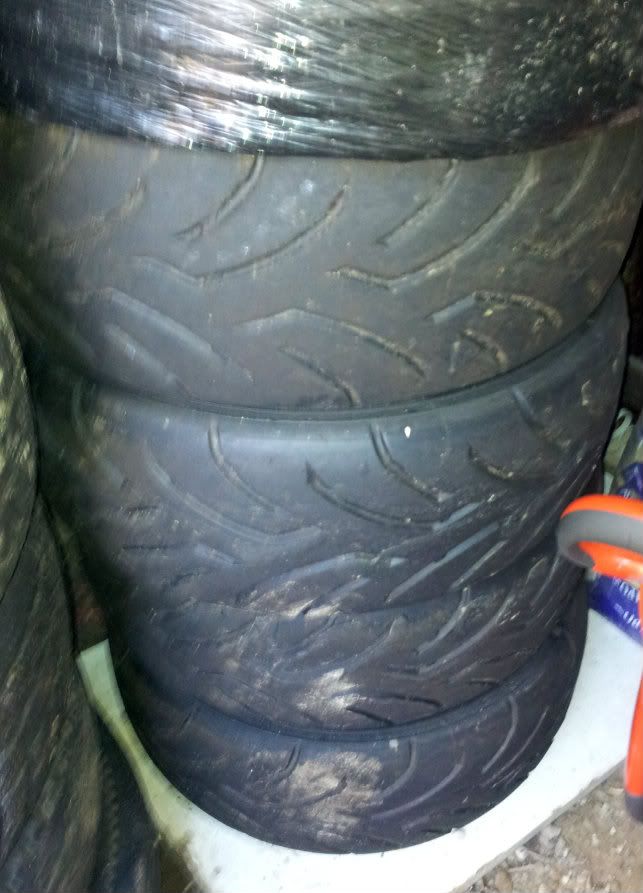
Thanks to a client smashing his race car off in practices and deciding enough is enough, I got these nice Dunlop 195/55/15 tyre's for nothing which will wrap round my new Team Dynamics pro 1.2 nicely.
So that's it really the next update will be when the car is back home wearing it's fresh coat of paint.
Once again thanks for reading and i will try my best to keep this up to date
Sorry to the people I haven't replied to, Went away for a month doing abit of traveling and kinda dropped the ball with this thread
Well big news is the car's in paint as we speak and should be ready in 3 weeks or so (Mate is doing it as a fill in job so he will work on it when he can) so thought i give you guys a little update of the final bodywork bits and a few parts i've brought!
Finished stripping the car down, Removed the doors and all the wiring. So you can now say good bye to the green and blue as the next time your see this car it will be a nice shade of Milano red!
Also had to repair the rear arches and weld new metal in to get rid of the rust, At the same time i decided to roll the rear arches a bit.
Sand blasted the LCA and Subframe, the gave them a nice new coat of paint. Also stripped down and cleaned the steering rack, and gave it once over to make sure that none of the seals are leaking.
Got hold of some nice goodies: Sump and Rocker gasket, Thermal inlet and exhaust gasket, Sump baffle, Full Hardrace Bushes Kit and a Hamp oil filter.
24mm DC2 rear ARB, will put polybushes on this and new drop links. Also dad said he will make me a subframe brace and a 3 point strunt bar as he likes that kind of fabrication work.
Tegiwa 2.5in manifold! Should go nicely with a baffled de-cat, 2.5 custom B-pipe (Once again a dad job) and most probably a Soild Fabrication N1 replica.
Mishimoto Radiator.
Thanks to a client smashing his race car off in practices and deciding enough is enough, I got these nice Dunlop 195/55/15 tyre's for nothing which will wrap round my new Team Dynamics pro 1.2 nicely.
So that's it really the next update will be when the car is back home wearing it's fresh coat of paint.
Once again thanks for reading and i will try my best to keep this up to date
spikeyhairdude
Vishal
- Joined
- Nov 20, 2011
- Messages
- 1,408
- Car(s)
- EK9/E82
Finally updates.
VTEC-334
Member
- Joined
- Jul 19, 2011
- Messages
- 480
Thanks Matt, hopefully be done for the first meet next year.looking good bud!
Finally updates.
Haha sorry Spikey cheers for staying interested, As i said went away for abit and dropped the ball on this and since I've been back only had a trickle of parts come in why i saved for paint.
But back to normal service now, Next update will be in a few weeks when the cars back.
ARSLAN_786
VTEC TURBO :D
- Joined
- Nov 5, 2012
- Messages
- 9
nice work pal
VTEC-334
Member
- Joined
- Jul 19, 2011
- Messages
- 480
Looking forward to seeing pics after spray with engine in!
Wow! Really impressed of your work. Keep it up!
nice work pal
Cheers guy's. Hopefully some updates soon.